How do I create and manage support tickets from client area? [EXPLAINED]
To open a New Support Ticket you have to perform these few steps: [STEP BY STEP]
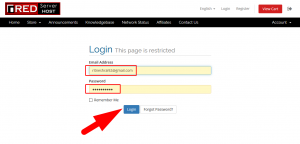
- Log in to your Client Area
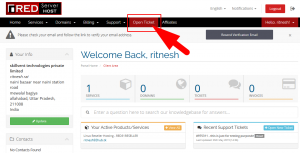
2. Now Click on the Open Ticket section
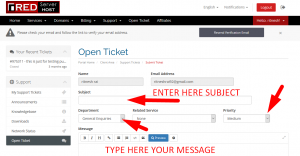
3. Enter the requested details on this page in order to submit a support ticket
- Your Name and Email Address are filled in automatically
- Enter appropriate subject related to your query
- In the previous screen, if you have not chosen appropriate department for your query, you can also choose appropriate department from here
- From the Related Service Drop-down box, choose a service for which you are raising a support ticket. This is optional, you can also select None
- From the Priority, you can choose priority of your support ticket
- In Message, write your actual query in detail
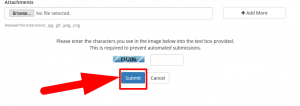
- If you want to send us files or images related to your issue, you can attach here (Allowed File Extensions: .jpg, .gif, .bmp, .jpeg, .png, .tiff, .zip, .doc, .docx, .txt, etc). Maximum file size limit of your attachment should be 5 MB.
- When you are ready, click on Submit button. You have now successfully submitted a support ticket, and a confirmation e-mail with the ticket number and details has been sent to you
4. Click on Submit
To view already submitted ticket, go to the Support menu and click on the Tickets
You will see a list of tickets that you have submitted/received to date. On this page, you can see the date & time when you raised the support tickets, department, subject, status, and last update time of the support tickets.
If you have any questions or queries, feel free to leave them in the comments section below.

Thanks for Reading!!!
Tags: cheap linux hosting, buy linux hosting, cheap reseller hosting, buy reseller hosting, best reseller hosting, cheap web hosting, cheapest web hosting, cheapest reseller hosting, cheap reseller host, cheap linux host, cheapest linux hosting, best linux hosting, best web hosting