HOW TO FORCEFULLY POINT ANY DOMAIN TO A SPECIFIC IP ADDRESS? [EASY GUIDE]☑️
In this guide, you will learn how to forcefully point any domain to a specific IP address using a local host file on your PC. But before getting started let us quick watch this video to learn how to point any domain to a specific IP Address using the local host’s file on your Windows PC.
Follow the steps given below to point any domain to a specific IP address using the host’s file:
Step::1 Open “My Computer” on your Windows PC
Step::2 Go to C:Drive
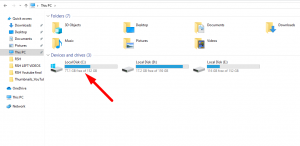
Step::3 Navigate to the “Windows” folder
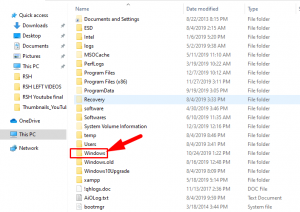
Step::4 Find the “System 32” folder and open it

Step::5 Now go to the Drivers folder
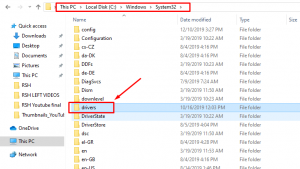
Also Read: Block/Unblock IP Addresses from SSHStep::6 Then go to etc folder

Step::7 Now find the file naming “hosts” and edit this file using Notepad++ (Or any Text Editor)
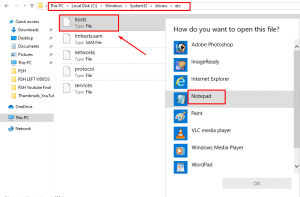
Step::8 Enter the Domain name and IP Address and save the host file.
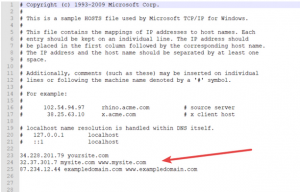
To verify open the Command application by clicking the “Start” button, typing “cmd” in the search field, and pressing “Enter.”
Now Type “ping” press the spacebar and type in the URL of the website and know the result.
That’s it!!!
If you enjoyed this tutorial, please consider following us on Facebook and Twitter.
Facebook Page- https://facebook.com/redserverhost
Twitter Page– https://twitter.com/redserverhost.com
If you have any queries, feel free to let us know via the comments section below.
Thanks for Reading!!!
Tags: cheap linux hosting, buy linux hosting, cheap reseller hosting, buy reseller hosting, best reseller hosting, cheap web hosting, cheapest web hosting, cheapest reseller hosting, cheap reseller host, cheap linux host, cheapest linux hosting, best linux hosting, best web hosting


