Skip to content
Home
About
Useful Tools
Blog
Contact us
Call Now:
+91-8080808743, +917007411273
Home
Web Hosting / Server
Menu Toggle
Linux Hosting
cPanel
VPS
Dedicated Server
Client Area
Linux Reseller Hosting
Website Development
Menu Toggle
WordPress
PHP
Tutorials
Menu Toggle
Digital Marketing
Search for:
Search
Search
RedServerHost >
RedServerHost >
Main Menu
Home
Web Hosting / Server
Menu Toggle
Linux Hosting
cPanel
VPS
Dedicated Server
Client Area
Linux Reseller Hosting
Website Development
Menu Toggle
WordPress
PHP
Tutorials
Menu Toggle
Digital Marketing
SSH
,
Tutorials
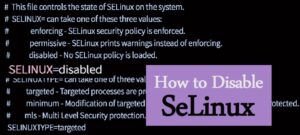
How to Disable SELinux Permanently in Linux server?
Softaculous
,
Tutorials
How to Install osCommerce via Softaculous?
SSH
,
Tutorials
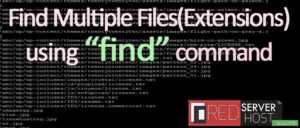
How to Find Multiple Files(Extensions) using “find” command?
PHP
,
Tutorials
,
WHM
How to Enable PHP-FPM from WHM?
Database
,
MySQL
,
PHPMyAdmin
,
Tutorials
How to Kill MySQL Process in phpMyAdmin?
Softaculous
,
Tutorials
How to Install Zen Cart using Softaculous in cPanel?
PHP
,
Tutorials
,
WHM
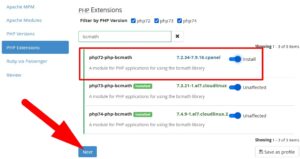
How to enable bcmath PHP extension for all PHP versions in cPanel/WHM?
PHP
,
Tutorials
,
WHM
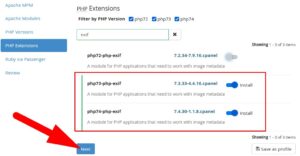
How to enable exif PHP extension for all PHP versions in cPanel/WHM?
PHP
,
Tutorials
,
WHM
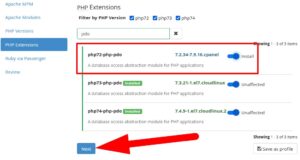
How to enable PDO PHP extension for all PHP versions in cPanel/WHM?
Post pagination
←
Previous
1
…
5
6
7
…
120
Next
→
Scroll to Top