PrestaShop is free and an open- source E-Commerce platform that allows user to create an E-commerce website. We have shred multiple articles related to PrestaShop and its features.
Today, in this tutorial we will illustrate the procedure to manually install PrestaShop in cPanel. You may check the video tutorial on the same.
- Download the zip file of PrestaShop from the official website www.prestashop.com/en/download.
- Enter the credentials as required and Continue to save the file in your local PC.
- Now, login to your cPanel account where you wish to install Prestashop.
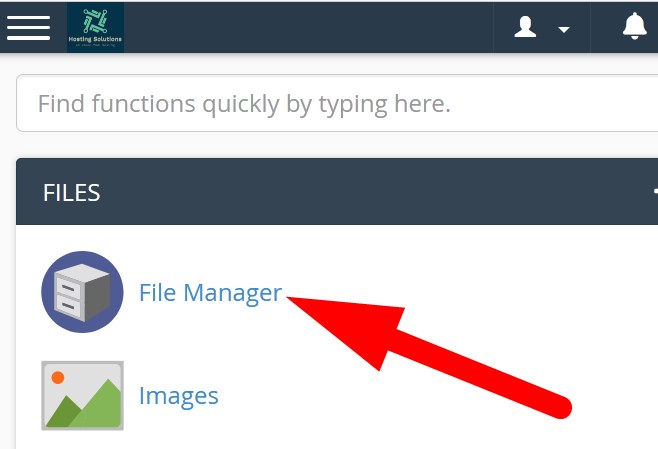
- Go inside File Manager section and then get into directory where you want to install it.

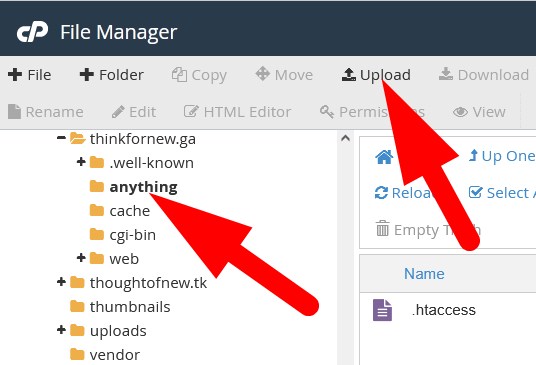
Select File Manger - On the File Manager page, Upload downloaded zip file in the directory of your choice. (You can create a new directory if you want)

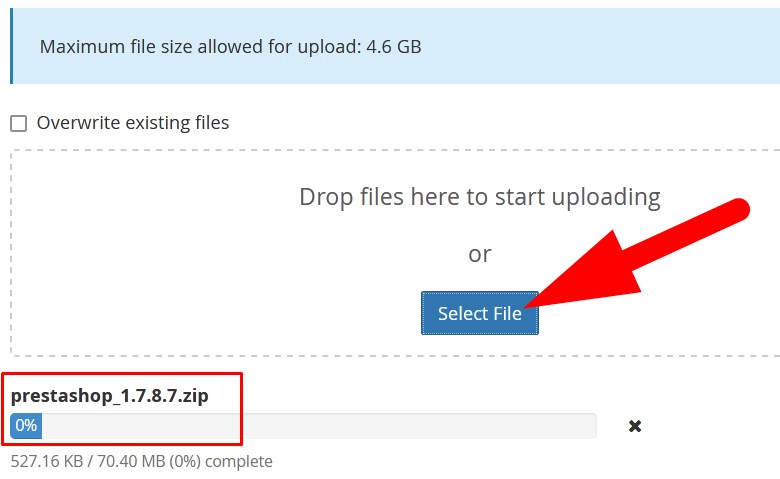
Upload PrestaShop zip file in cPanel - As you click over Upload, you will be directed to the next page. Click over Select File and select the downloaded file from your local PC and proceed.

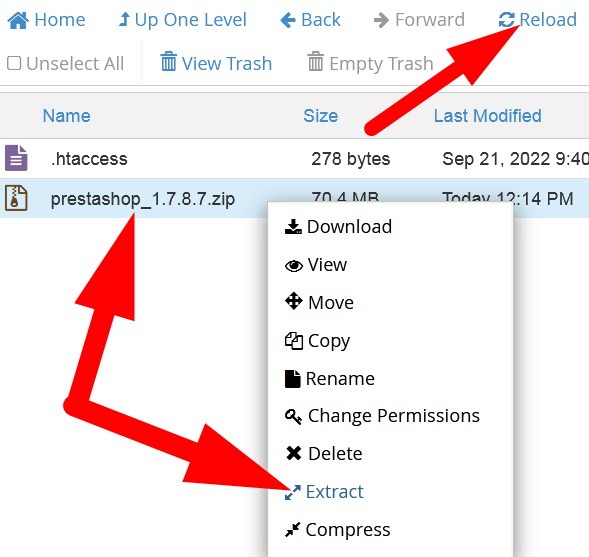
Upload PrestaShop zip File - Go back to File manager page & Reload the page. PrestaShop zip file would be present.
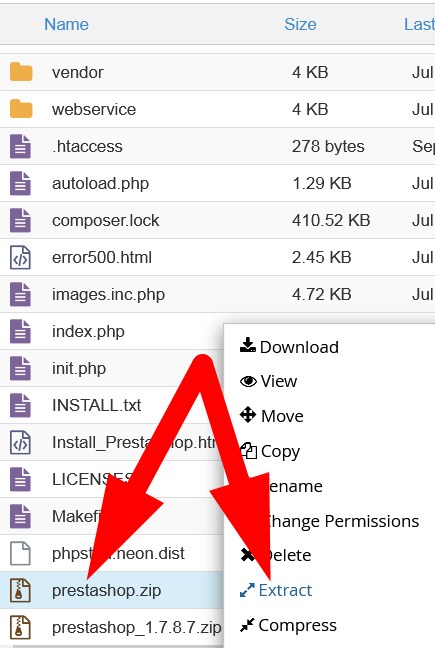
- Right click over the file & then Extract.

Extract File - After extracting, you will again get prestashop.zip file. Extract the file and list of all files and directories will appear.

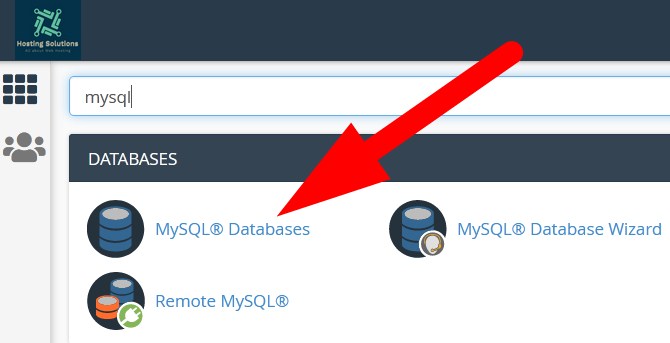
Extract prestashop.zip file - Now, go back to cPanel feature list page and select MySQL Databases from DATABASE section.

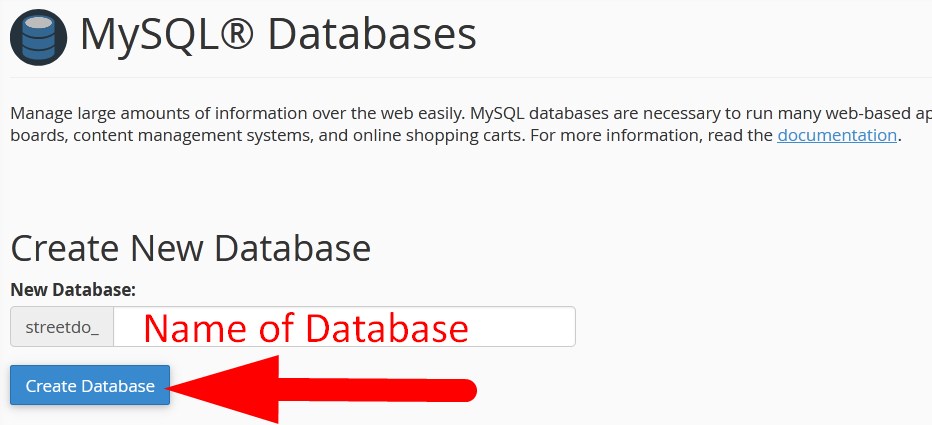
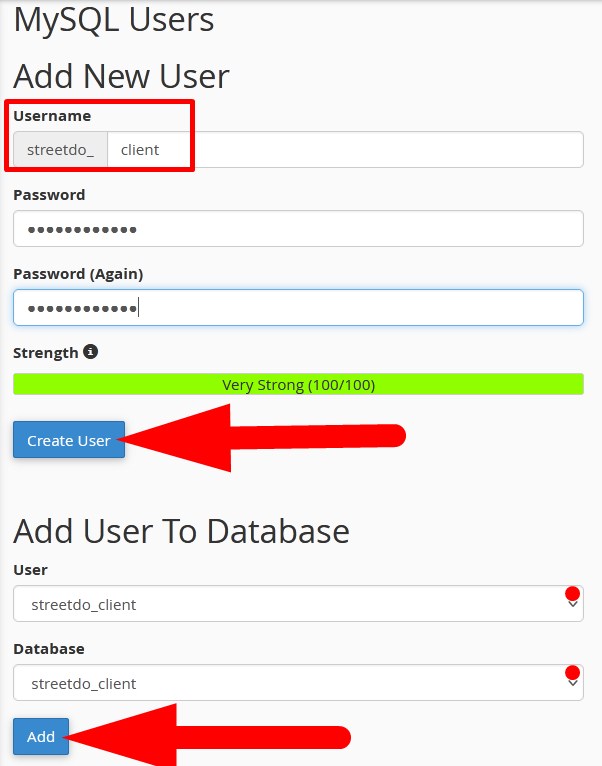
MySQL Feature in cPanel - Create a New Database and Database User. Then Add User to Database. You may check out the article to get detailed procedure. (Refer to the below given images)

Create Database 
Create User and Add User to Database - Now, hit the PrestaShop installation directory from outside and Prestashop Installer will open. Enter the credentials as directed.
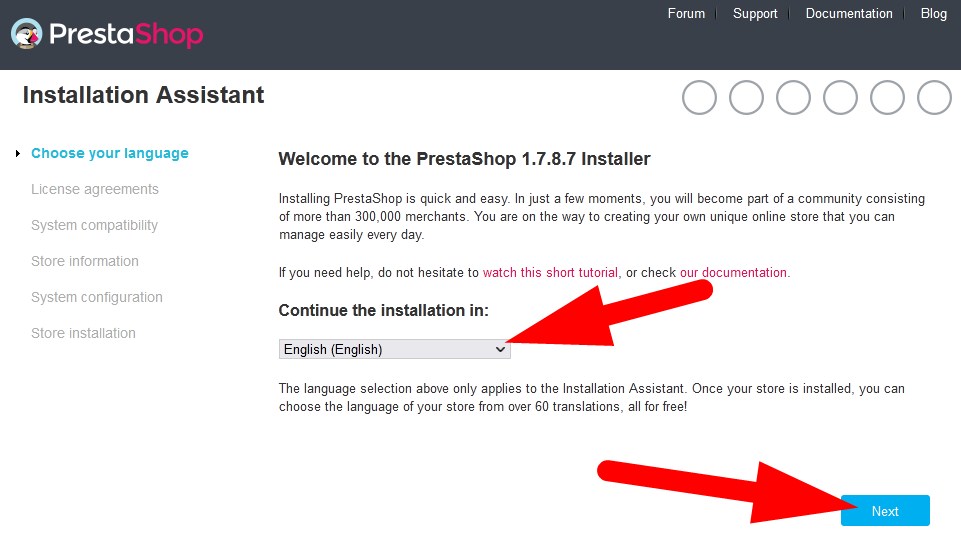
- Choose Language: Select Language from the drop down list. Click over Next and proceed.

Setup PrestaShop Installation - License agreements: In this section, check the box to accept terms and conditions. Then click Next and proceed.
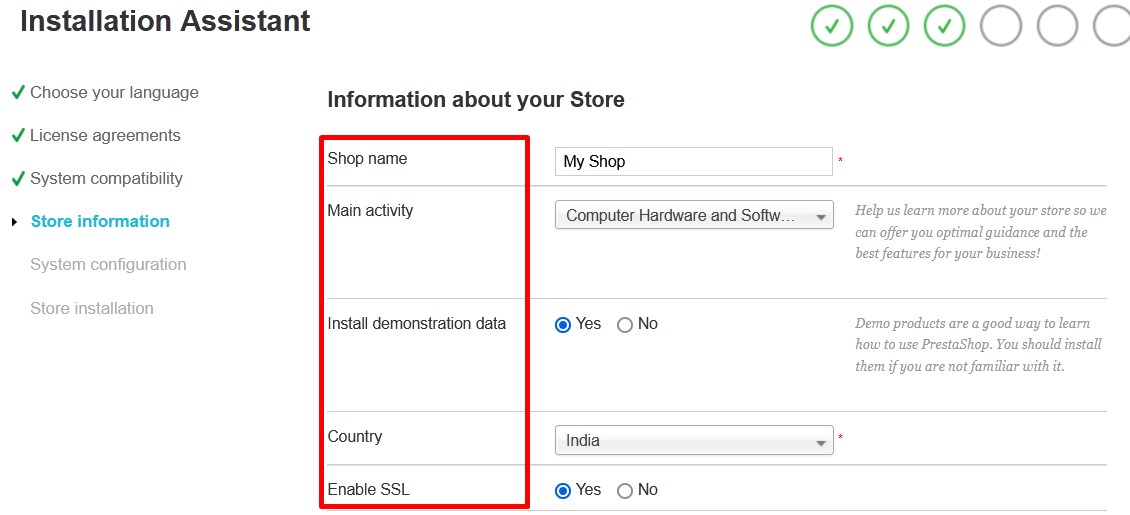
- Store Information: In this section, enter the required credentials. Refer to the below given images. Click over Next and proceed.

Setup Store Information 
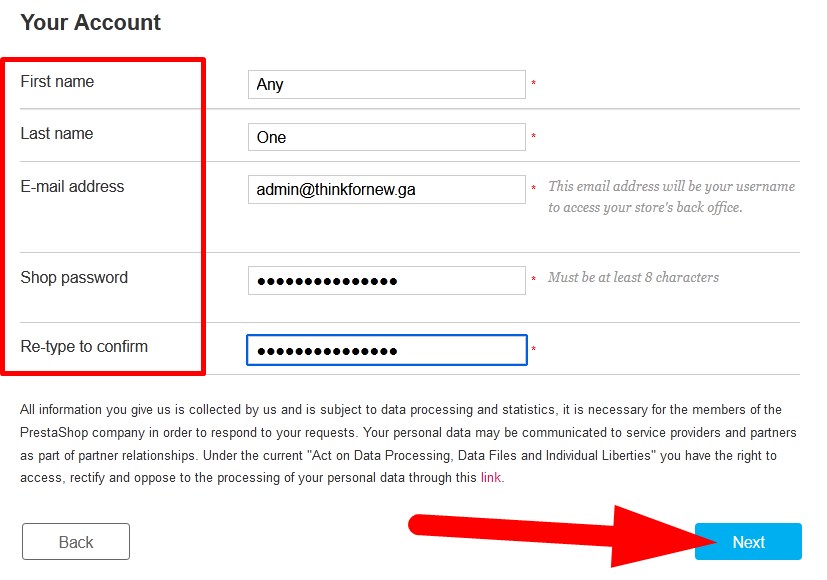
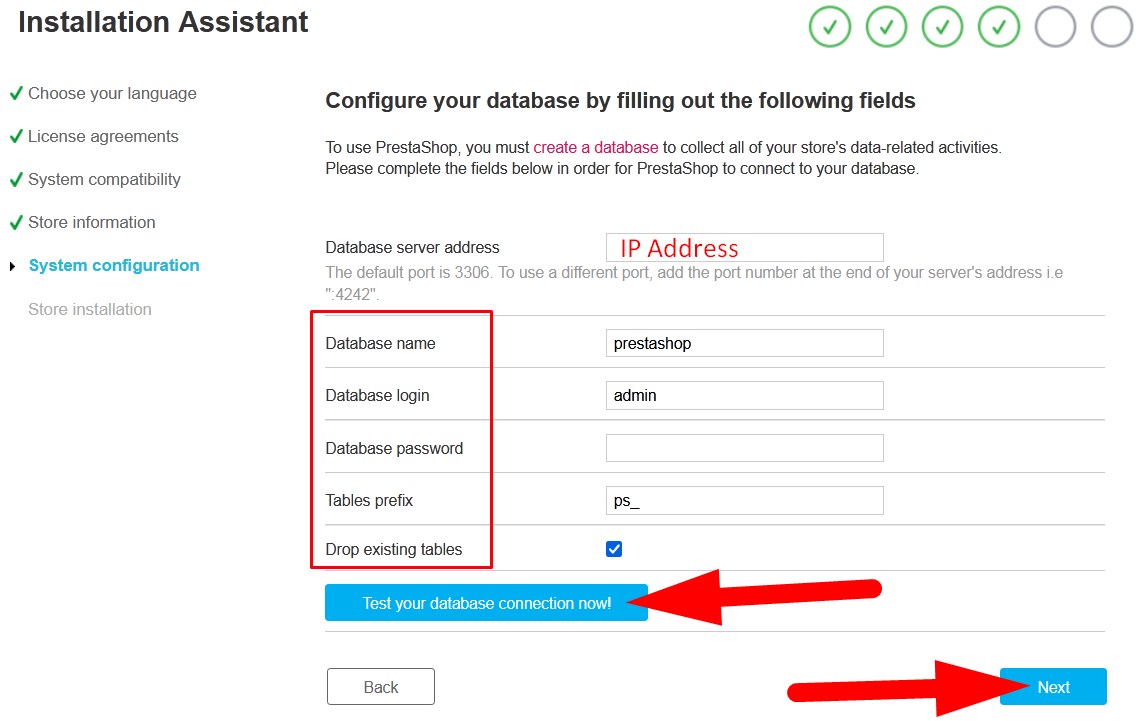
Setup Account Details - System Configuration: In this section, enter the credentials related to database. (Refer to below given image) Click over Next and proceed.

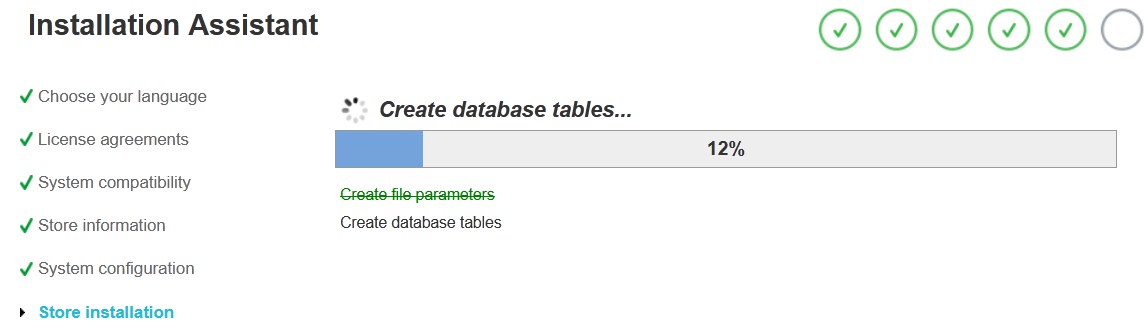
Setup Database - Store Installation: In this section, all the modules related to PrestaShop installation would be installed.

PrestaShop Module Installation
- Manage After installation of all the modules, you will see the confirmation page that Your installation is finished. You will find your login credentials here.

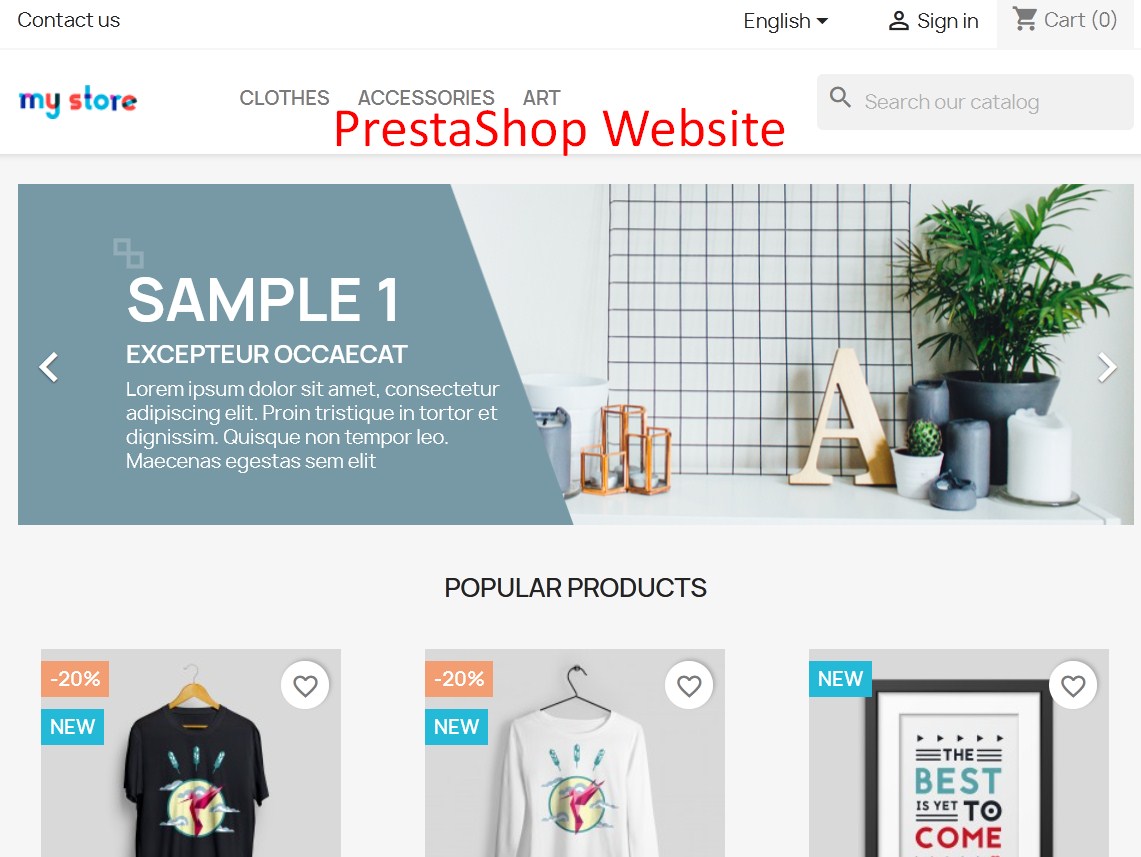
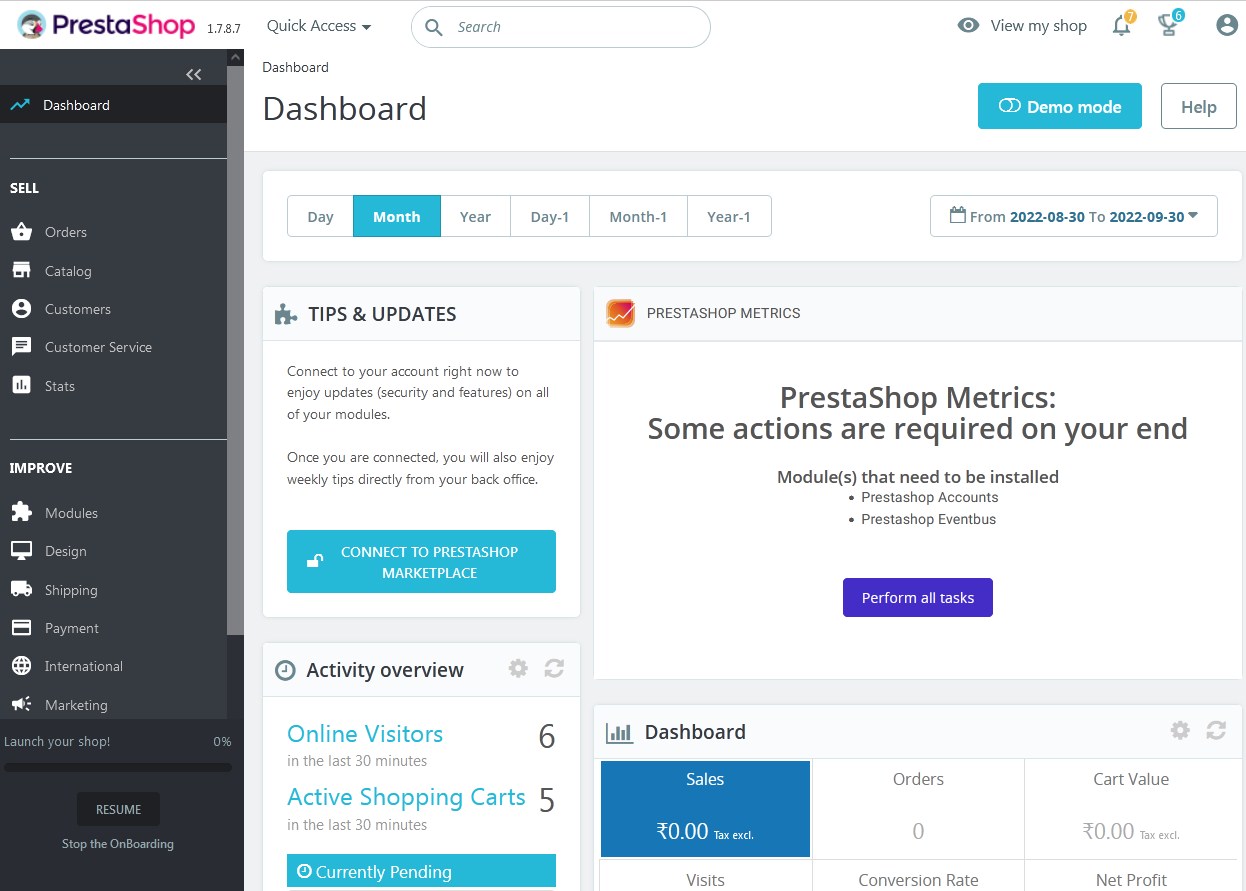
From Manage your store section, you can login to your PrestaShop dashboard and from Discover your store, you can login to your PrestaShop website.
To access the dashboard, you need to delete install directory for security reasons, then access the dashboard with the directed URL. Then enter the login mail and password which you get at the the time of complete installation and Log in. You will be directed to PrestaShop Admin Area.
That’s It !
Hope the article better describes the procedure to manually install PrestaShop in cPanel. Do share it with your colleagues if you find it working. Also share your suggestions and drop your queries to start the discussion on the related topic. Lets connect on social media with the below links.
Facebook Page: https://facebook.com/redserverhost Twitter Page: https://twitter.com/redserverhost.com


