What is Greylisting?
Greylisting is an additional option in Web Host Manager (WHM) that comes only with the root users. Greylisting prevents email users from spam emails and other phishing attacks. Once Greylisting enables, the mail server will reject all the emails coming from an unknown sender. If the seder is genuine and not spam, then it’ll try after a certain time (in minutes). If the acceptance period exceeds, then the email will be accepted.

How to Enable Greylisting?
You can easily enable Greylisting from your WHM root.
- Log into WHM as a root.
- Either navigate to the Email > Greylisting or simply search “grey” in the search bar and hit the Greylisting option from the result.
- Hit the switch button to enable the Greylisting.
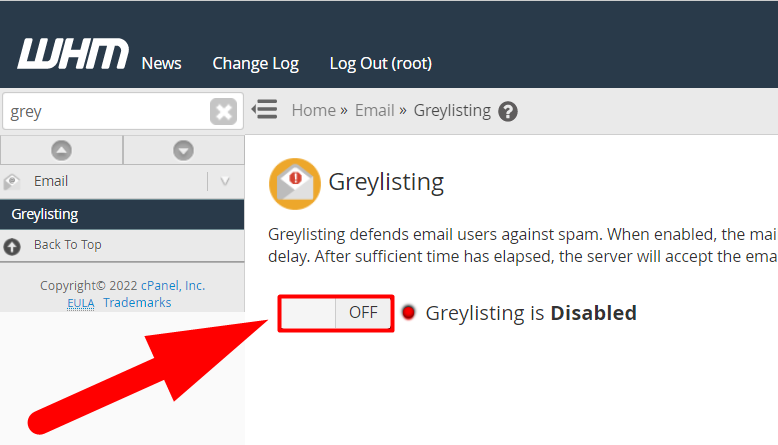
- That’s how you can easily enable the Greylisting option in WHM. Let’s configure it now.
How to Configure Greylisting?
Once you’ll Enable the Greylisting option, you’ll see several options in the Configuration tab.
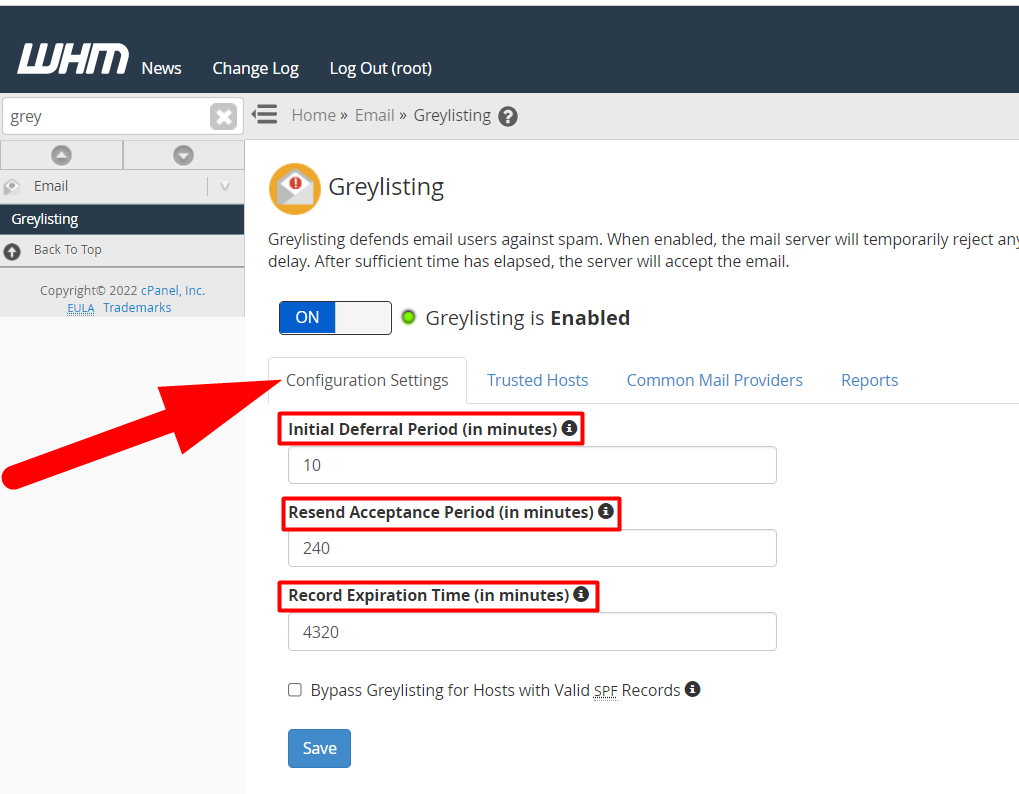
Initial Deferral Period: This is the number of minutes that your Greylist will postpone the emails coming from an unknown sender.
Resend Acceptance Period: This is the maximum number of minutes to accept a resend email from an unknown sender.
Record Expiration Time: Once the Record Expiration Time exceeds, server will delete all the existing information of a sender, and treat all the further emails from that sender as a new emails.
Bypass Greylisting With Valid SPF Records: This means, if a sender has valid SPF Recods then the Greylisting option will be bypassed and email user will receive the email as a valid SPF Record is considered as a proof of that the incoming user genuine not spam.
Once you finished all the Configuration parts, jump to the next tab which is Trusted Hosts.
Trusted Hosts
The Trusted hosts section is used to completely bypass the Greylisting option. Here, you can add, delete, or edit the IP addresses that the Greylist will never block/defer. You can also add multiple IPs at a time.
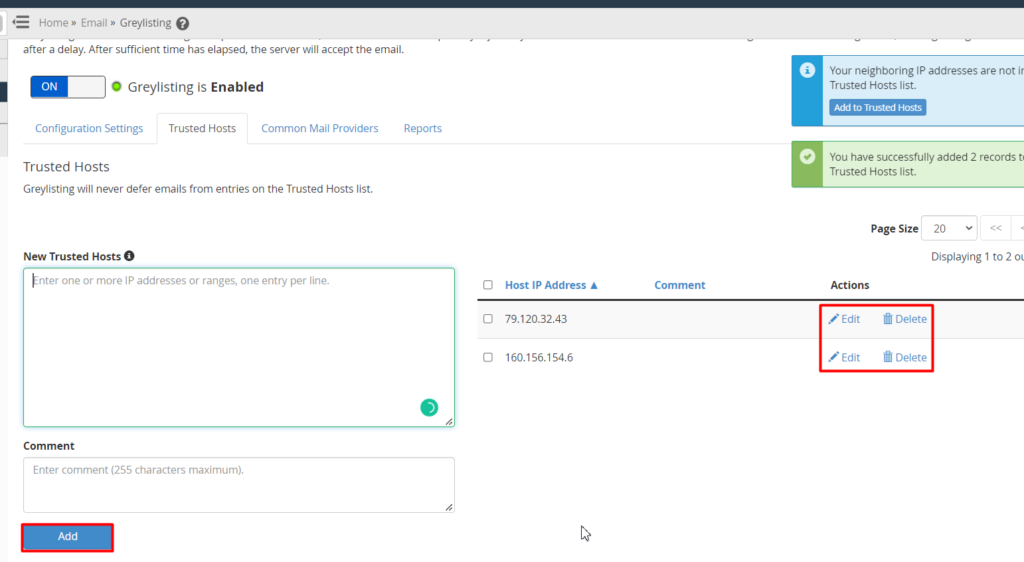
To add multiple IPs at a time, enter a single IP address in every line. You can also Edit and Delete the IP address post adding it to the Trusted Hosts.
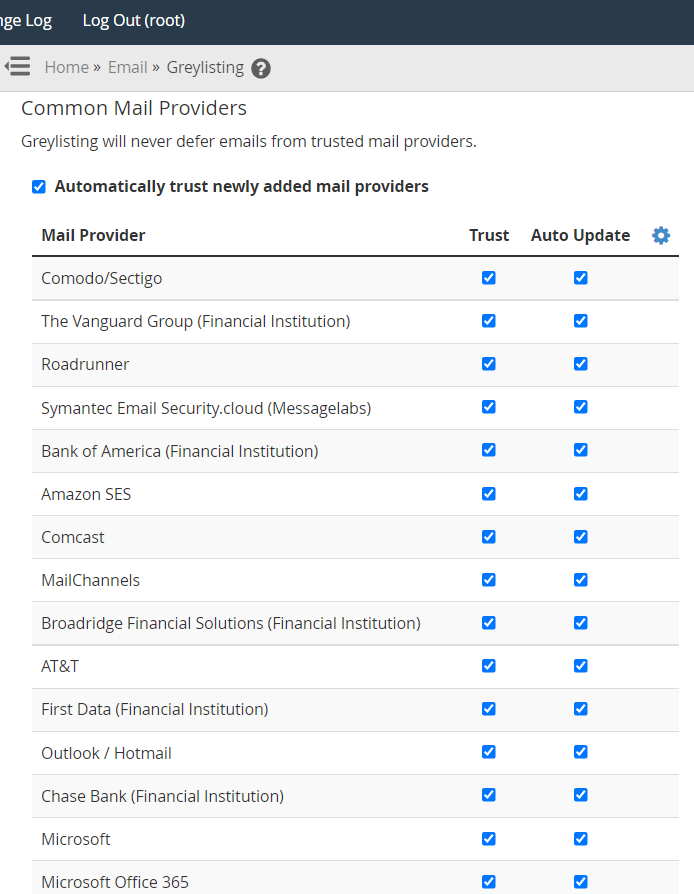
Common Mail Providers
All the Checked mail providers in this list will automatically bypass the Greylisting process. Greylisting will never deffer any emails from these checked mail providers. If you don’t trust someone, you can uncheck to remove them from the trusted provider’s list.
Reports
From this section, you can view the list of senders that have tried to send emails to you and their status.
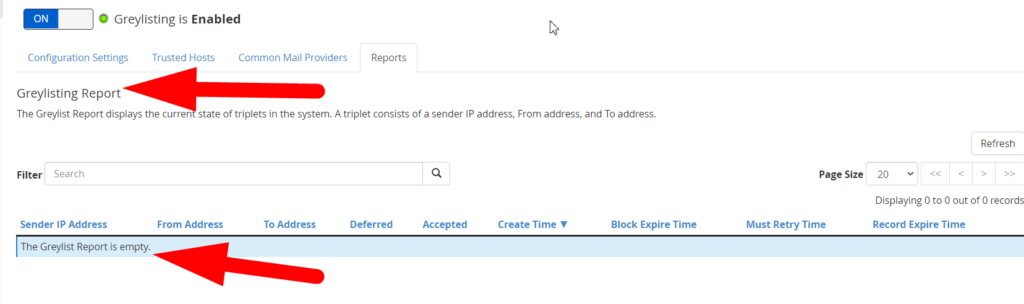
I haven’t activated any Greylist yet that’s why my Report list is empty. However, things will be different in your case if you have configured the Greylisting.
That’s It.
You’ve successfully configured the Greylisting section of the WHM root from starting to end. I hope now you can configure Greylisting on your own. Moreover, feel free to hit the comment section if you still have any confusion or query. You can also visit Redserverhost.com and open a free support ticket. Our highly talented Technical team will be happy to assist you.
For any further assistance, you can contact us on Facebook & Twitter.