WHMCS Complete Tutorial
In this modern-day where everyone wants to be online, work online, and do most of their daily stuff online. Not only this, thousand of thousands of users are increasing daily and making their online presence. The demand for domains & Hosting Services also increased rapidly in the last couple of years. Where some big hosting providers had already captured the market, Resellers are also capturing the market with their end-to-end support and customizable plans.

WHMCS refers to Web Host Manager Complete Solution. It’s a client management system (CMS) offering a tremendous variety of automated solutions that can directly help you and your business grow faster with a complete WHMCS solution. After reading this article, you’ll get to know almost every unique quality of WHMCS as this article is gonna be one of the most comprehensive tutorials on WHMCS ever.
Here, In this tutorial, We’ll walk you through a complete guide to WHMCS (Web Host Manager Complete Solution) in reseller hosting. No need to go anywhere else after going through this article.
What Is Reseller Hosting?
The word Reseller itself says that you can resell web hosting products with your own name & branding from the parent provider. In another way, Reseller hosting is a Web hosting business model where a parent Web hosting provider allows other users to resell products (taken from the parent provider) with their custom branding.
Related Article =〉 How to setup & use WHM ResellerWhat Is WHMCS?
Web Host Manager Complete Solution (WHMCS) is a fully automated client management software suite used to automate the task of WHM and reduce countless manpower so that the owners can more focus on growing their businesses.
WHMCS is intentionally made for Web Hosting Managers to provide the complete solution such as; client management, domain management, billing management, support management, and many more. WHMCS allows Web Hosting businesses or resellers with a cart system that can be easily integrated into any front-end website of Reseller hosting, and then visitors can easily purchase a hosting & domain.
It can reduce hours of manual work and make the onboarding process easy & effortless. Here are some major tasks that WHMCS can automate & make your work easier.
- Customer Support
- Domain Registration
- Order Management
- Billing Management
- Fraud Management
- Reports & Invoices
- Email Accounts
- VPS Hosting
Not only this, WHMCS has a lot more to do apart from the above points and a wide variety of fully-featured services related to products, management & support. Moreover, the installation of WHCMS is as easy as the installation of WordPress. Let me walk you through the next point of How to install WHMCS.
How To Install WHMCS?
The installation of WHMCS is simple. One can easily install it from cPanel by using Softaculous 1-Click-Installer, or it can be installed manually via uploading a zip file also. However, I’ll walk you through the easiest method to install WHMCS which is from cPanel.
Install WHMCS From cPanel
- Log in to your cPanel associated with the WHMCS account.

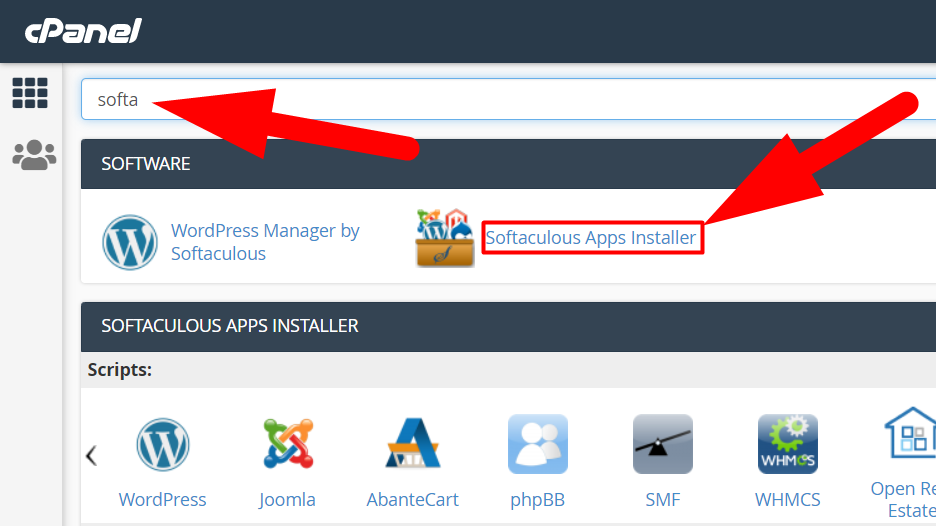
Install whmcs from cPanel - Search for Softaculous & click over the Softaculous Apps Installer option.

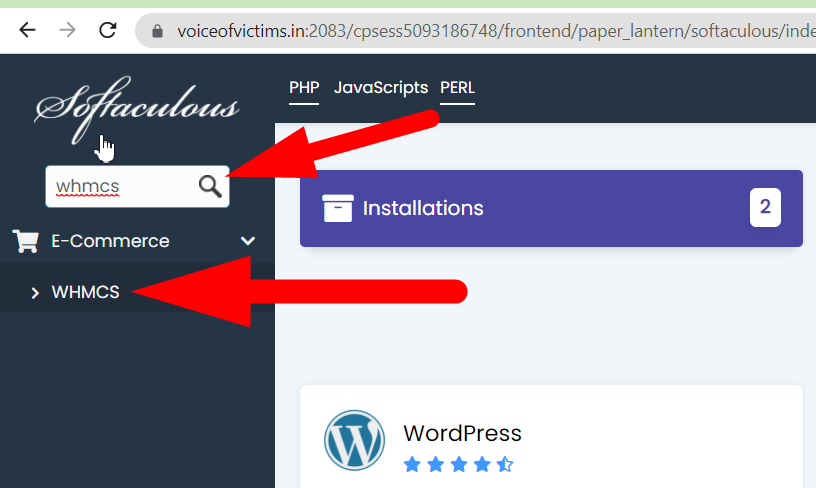
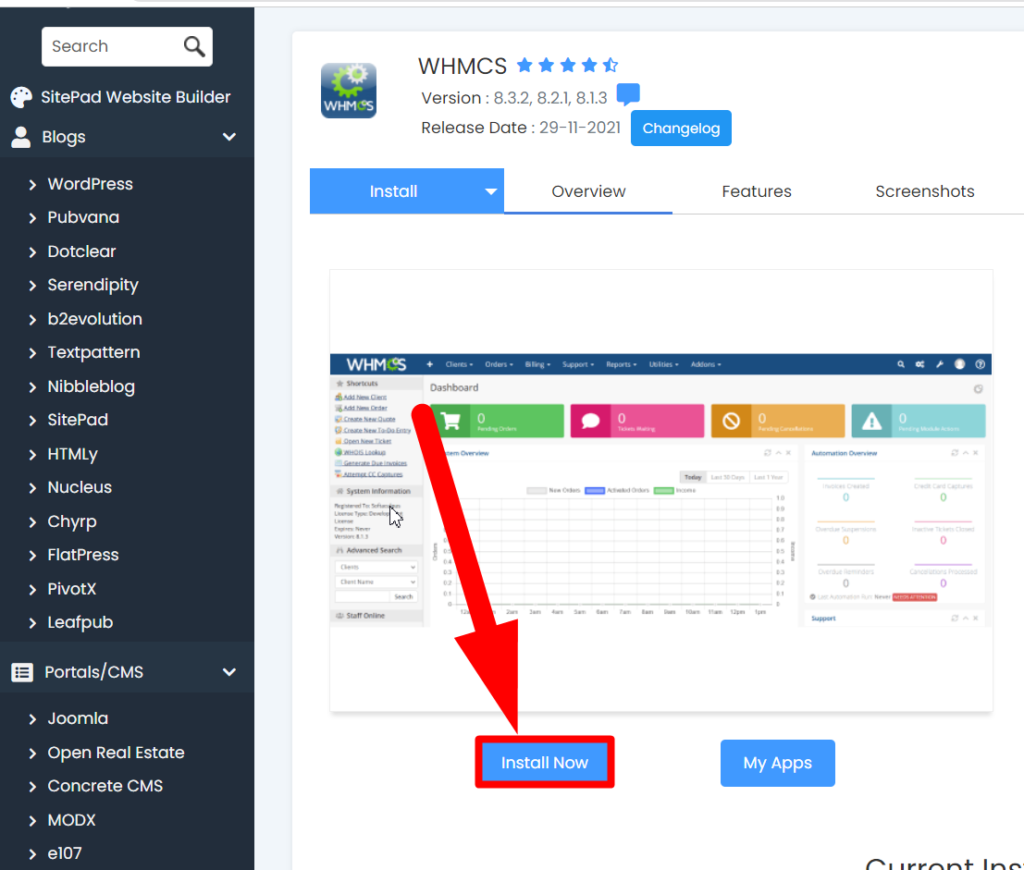
- From the top-left-corner search box, search for WHMCS and click over it.

- Click over the Install Now button to begin the installation process.

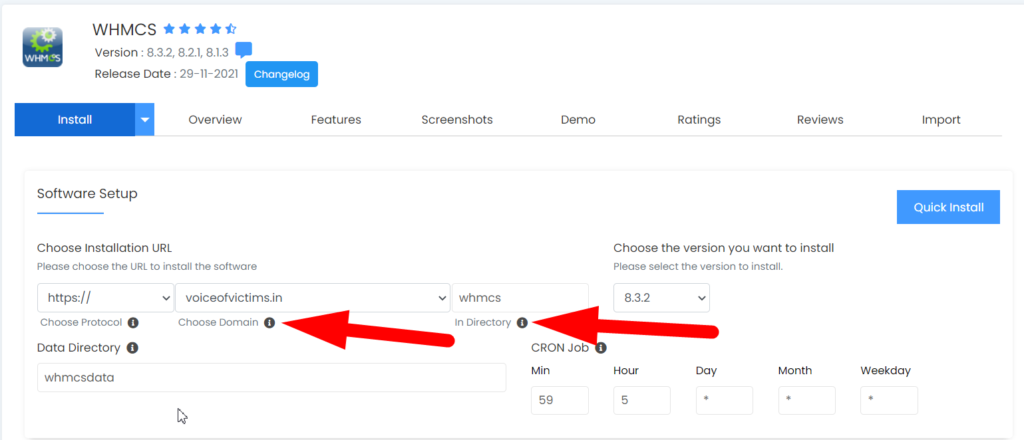
- Fill in the basic details such as the domain name in which you want to install WHMCS, specify the directory if you want, and other details. After filling in the details, scroll down a bit for the next step.

- Now fill in the basic details such as; username, password, organization name, and most importantly, the License Key. WHMCS cannot be installed without a License Key.


- Scroll down a bit & hit the Install button.


- That’s it. The WHMCS will be installed shortly and you can browse it from www.DomainName.xyz/whmcs path.
Related Article =〉 How To Uninstall WHMCS using cPanelHow To Configure WHMCS?
Now, when you have installed WHMCS on your domain, let’s Configure the WHMCS.
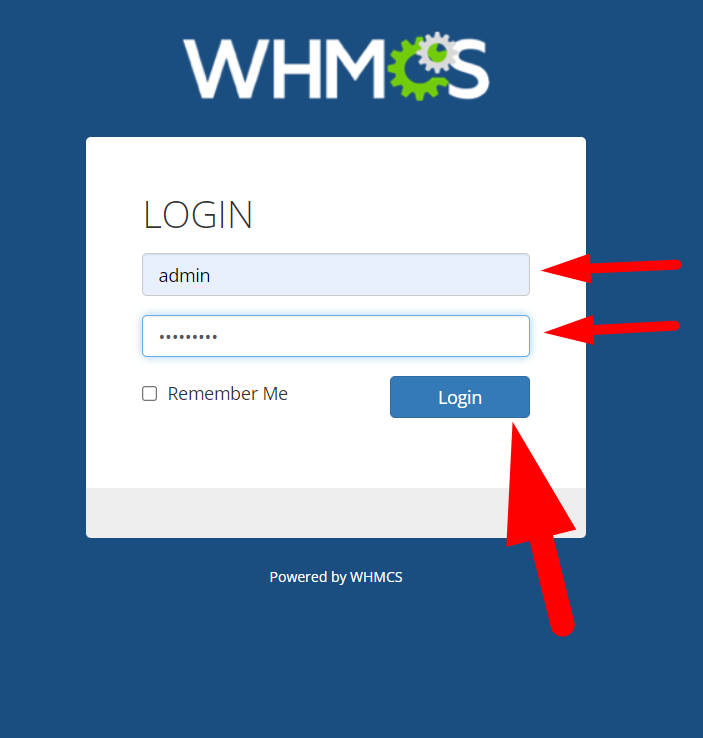
- To do it, open your WHMCS admin login page from www.DomainName.xyz/whmcs/admin or www.DomainName.xyz/whmcs/login.php URL.
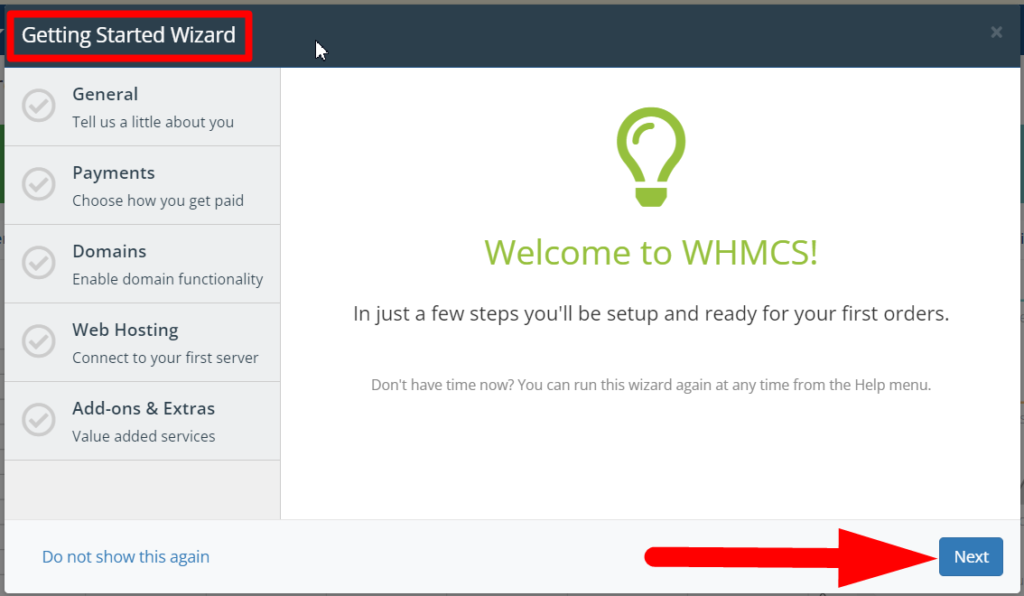
- A pop-up window called Getting Started Wizard will be opened, click over the Next button to start the configuration of WHMCS.

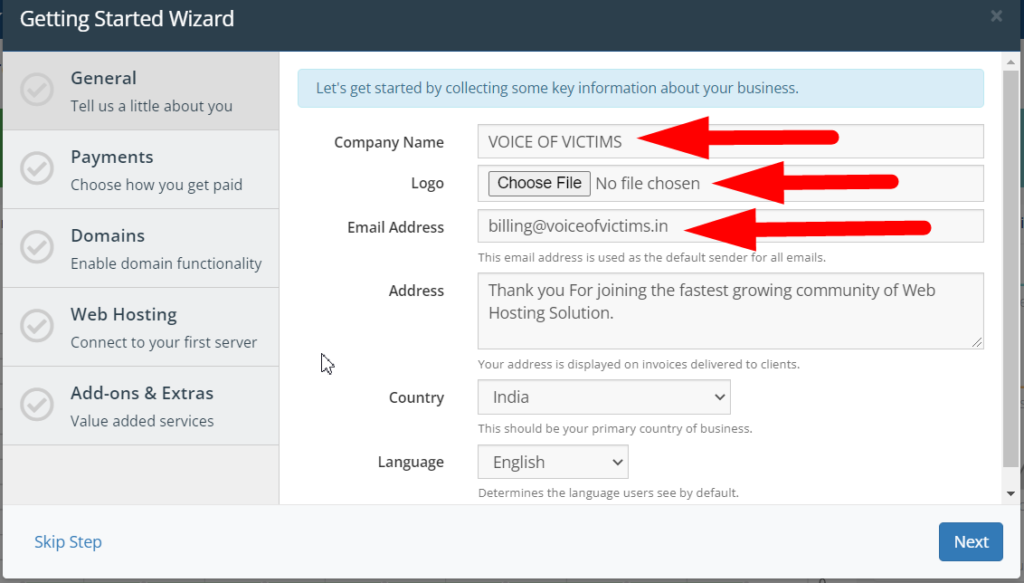
- Fill in the simple credentials such as; Company name, Logo, Email Address, Etc. When done, click over the Next button.

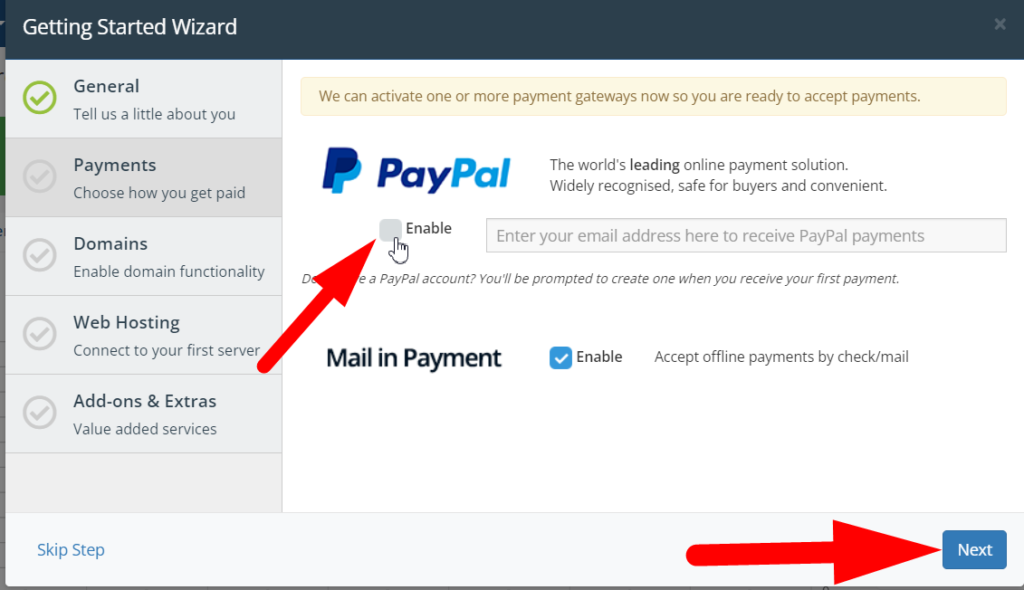
- Tik the Enable checkbox and hit the Next button if you wish to integrate PayPal. Else, UnCheck the Enable box and click over the Next button (You can add it later also).

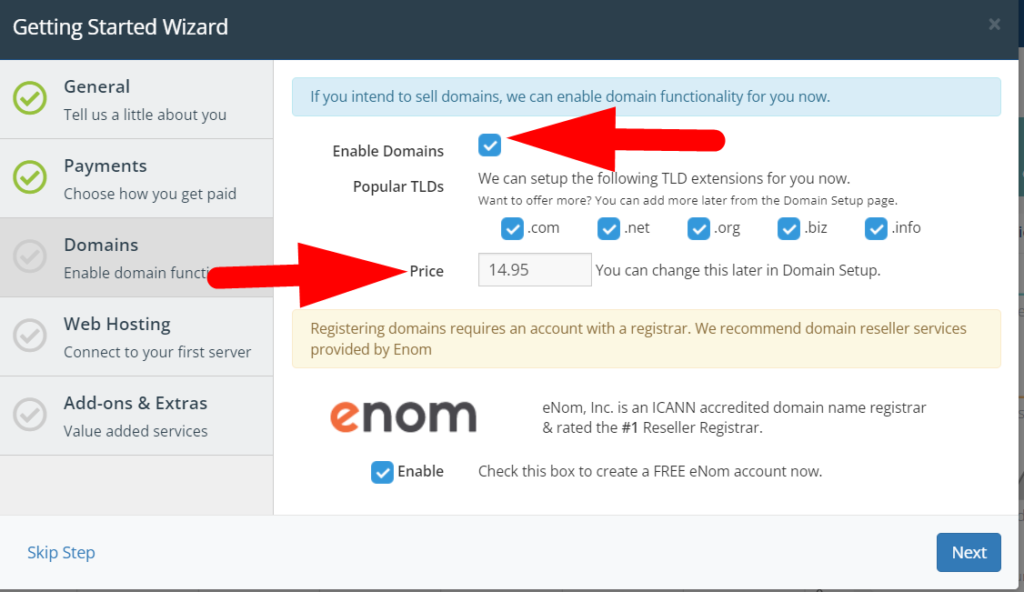
- By clicking over the Next button, you’ll jump to the Domain setup section. If you wish to sell domains also on your website, Tik the Enable Domains checkbox & modify the Domain price according to you. Hit the Next button to move towards the next step.

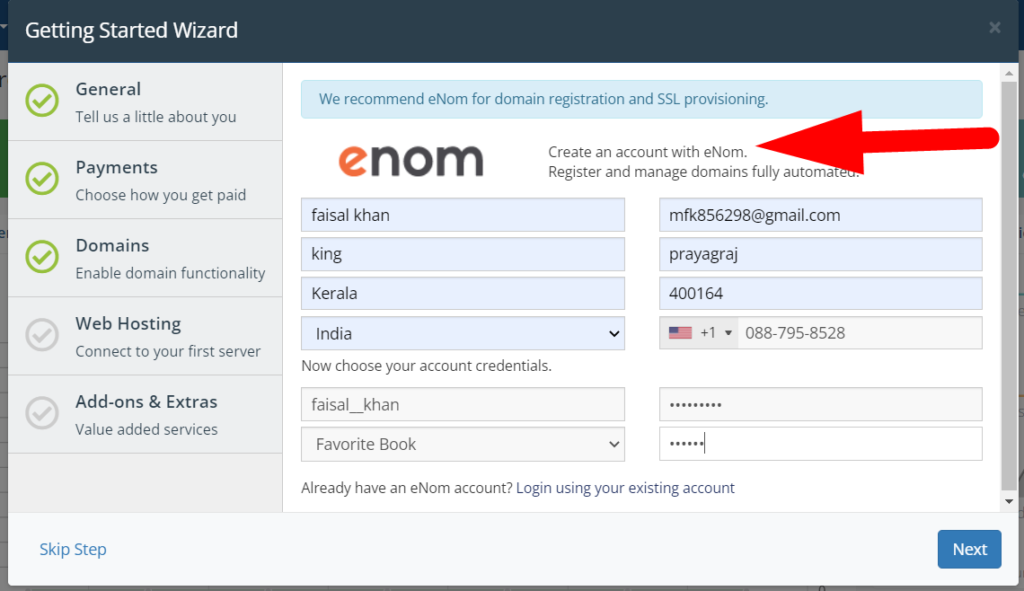
- You’ll see a registration window if you’ve Enabled Domains on the previous step. Enom is the leading domain reselling company that provides premium domains & products and automates the services with the help of WHMCS. You can register on Enom from the WHMCS setup wizard window.
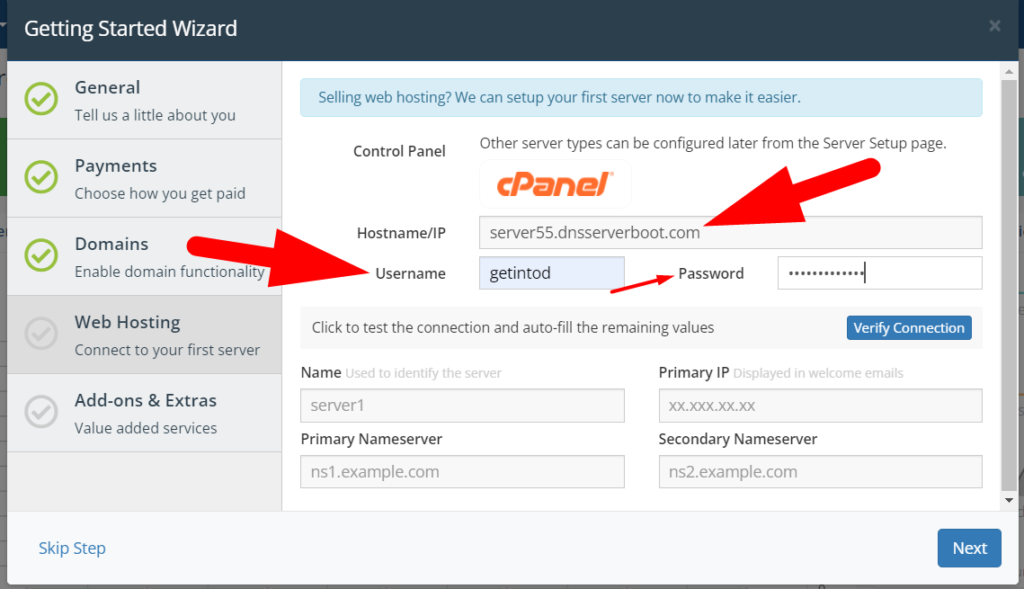
- You’ve successfully filled in the general details, Payment details, and Domains. Now it’s time to configure the Web Hosting Server. Connect your server by entering the Hostname, Username, and Password of the server.
- Hit the Verify Connection option after entering the credentials.
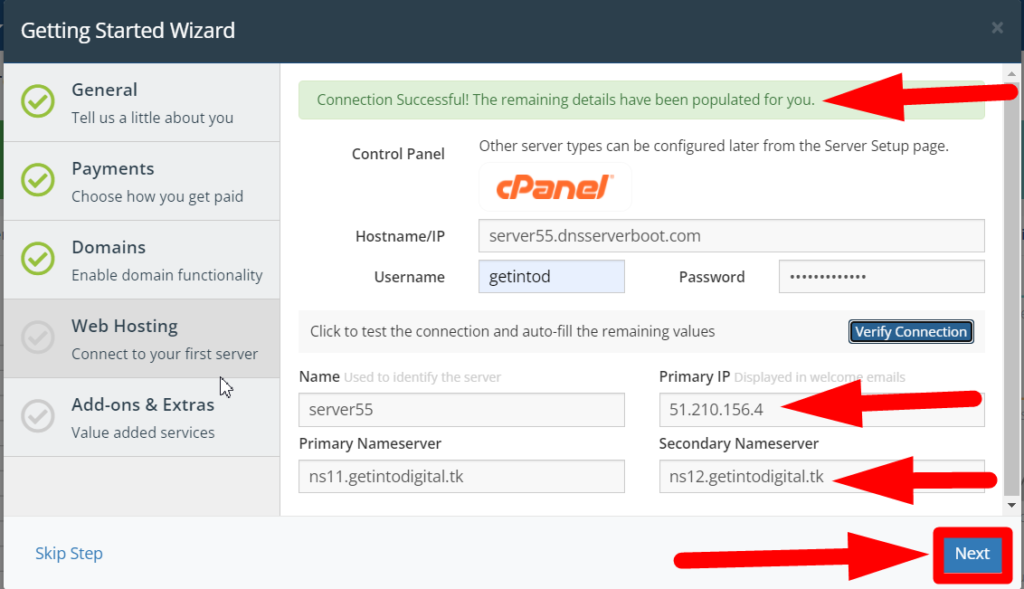
- If you’ve entered the correct credentials, you’ll receive a Connection Successful alert on the top and all the below fields will be filled up automatically. Now click over the Next button again.

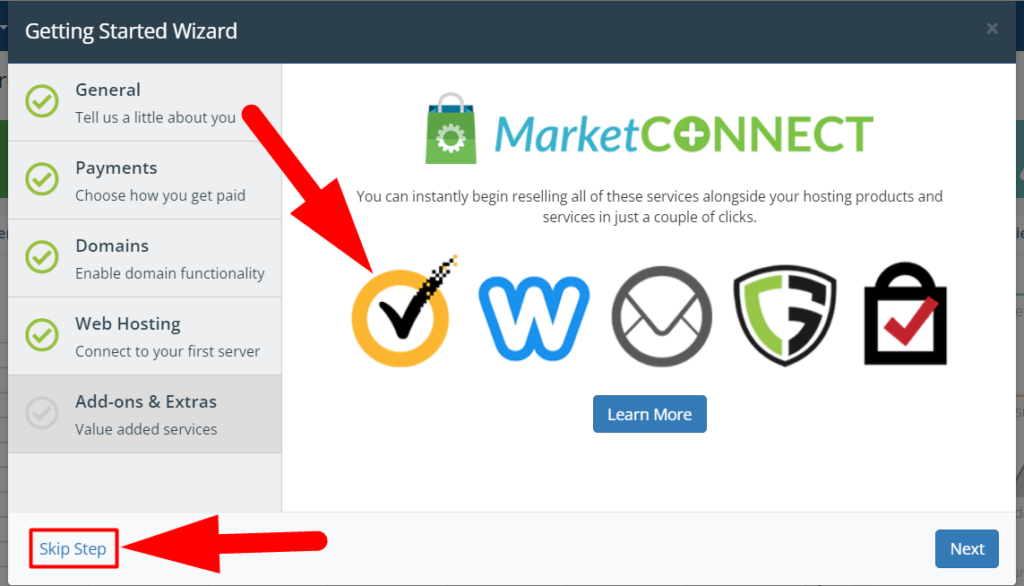
- You can add Extra Add-ons if you want or just click over the Skip Step button as you can do it later also.

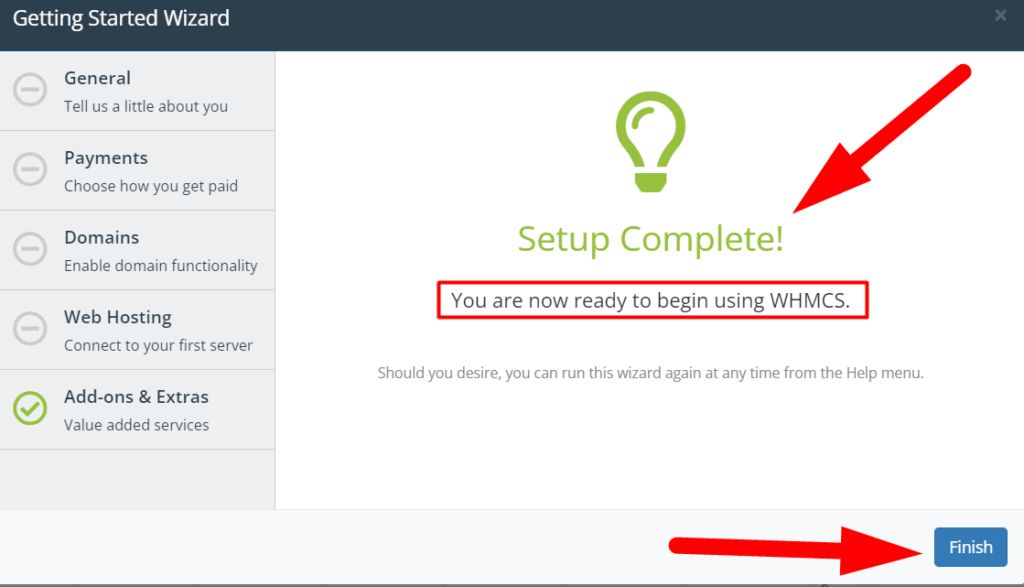
- That’s it. You’ve finished the configuration of WHMCS. Now click over the Finish button to close the window.

- You’ve done all the basic configurations of WHMCS, and now, to start accepting orders, you need to set up WHM in WHMCS. However, you’ve already connected the WHM server in WHMCS from the Setup Wizard section but, you can add multiple servers as well. Let’s walk you through adding another WHM server in WHMCS.
How To Setup WHM in WHMCS?
Well, It’s quite easy to set up WHM in WHMCS from the General Settings section. Follow the below steps for a practical tutorial.
- Log in to your WHMCS admin Dashboard.
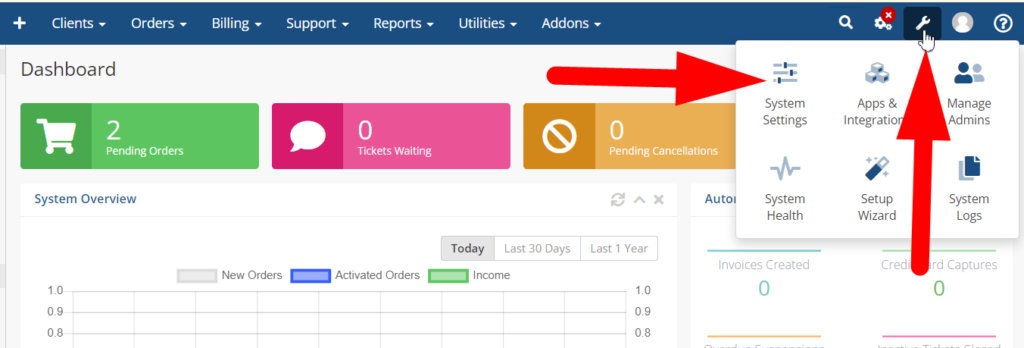
- Move your cursor towards the Configuration Settings icon & click over the System Settings.

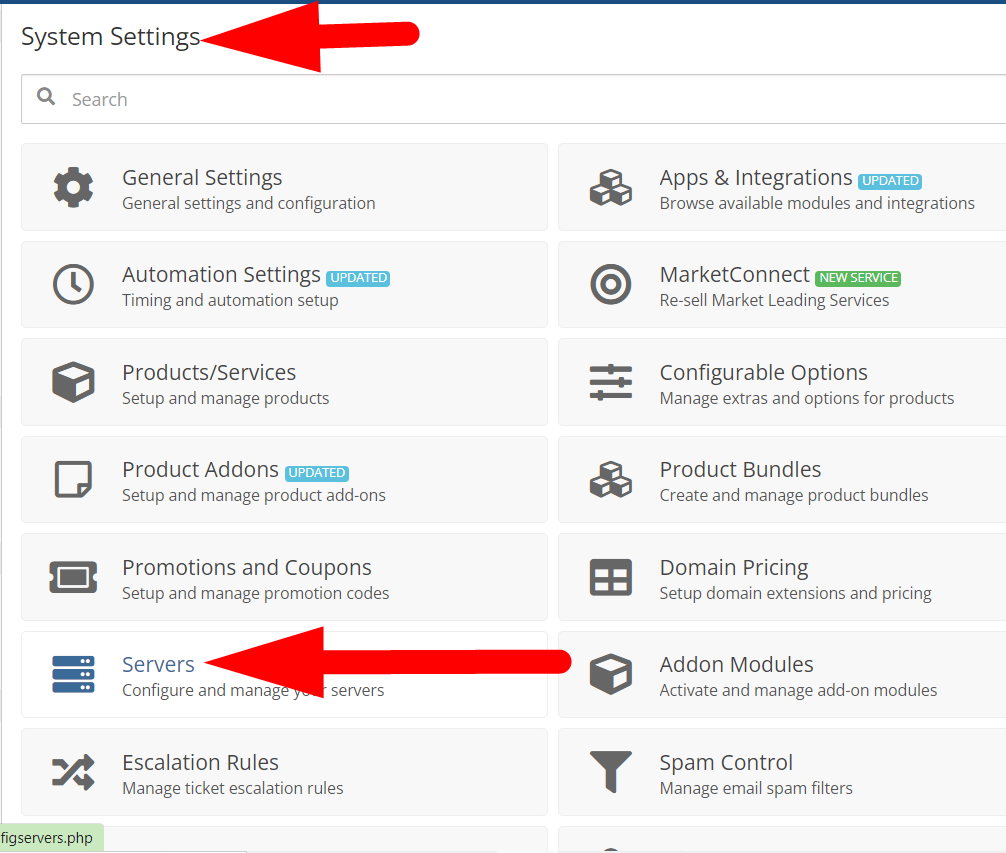
- Inside the System Settings, click over the Servers option.

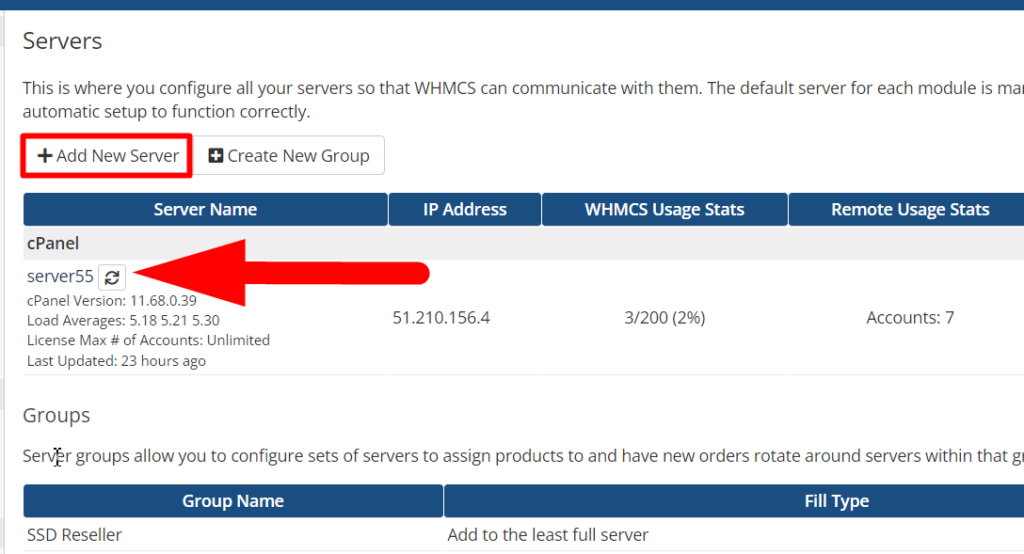
- You can add, view, edit, and delete the servers from here. To set up WHM in WHMCS, click over the +Add New Server button.

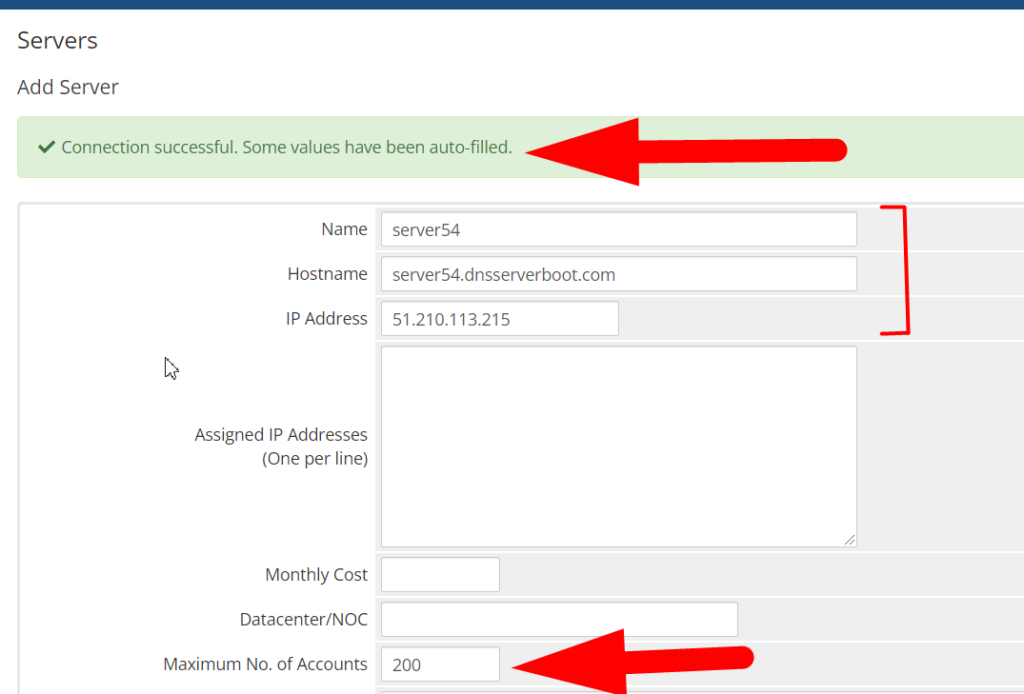
- Fill in the server credentials & click over the Test Connection button.

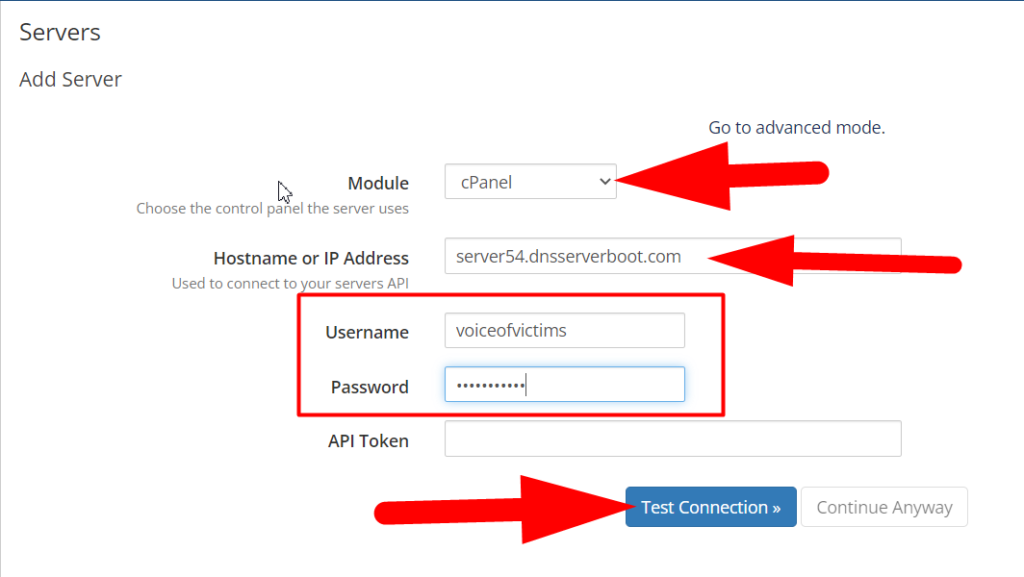
- You’ll receive a Connection Successful alert, which indicates that the credentials were correct. You can customize settings such as a maximum number of cPanel accounts, primary nameservers, etc.

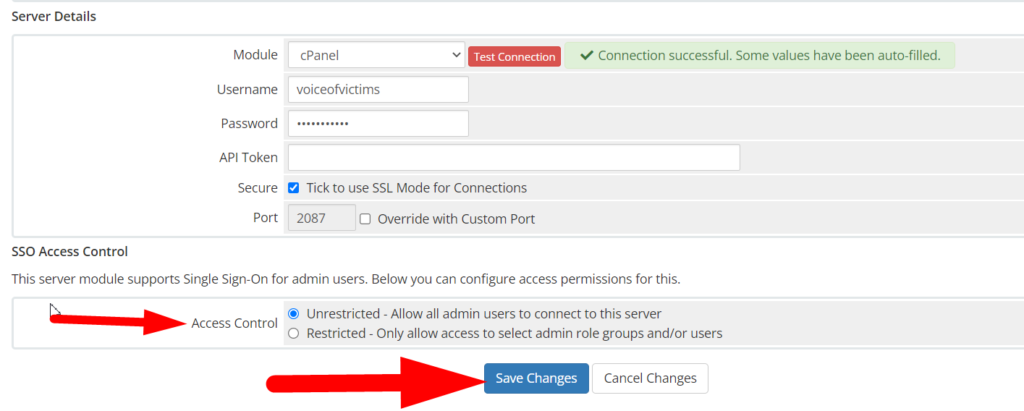
- Scroll down to the Server Details section and there you can customize a couple of things such as; Port, Mode of Connection & you can restrict clients to browse & customize client area in cPanel by restricting the Access Control option.
- Once done, hit the Save Changes button to integrate WHM server in WHMCS.

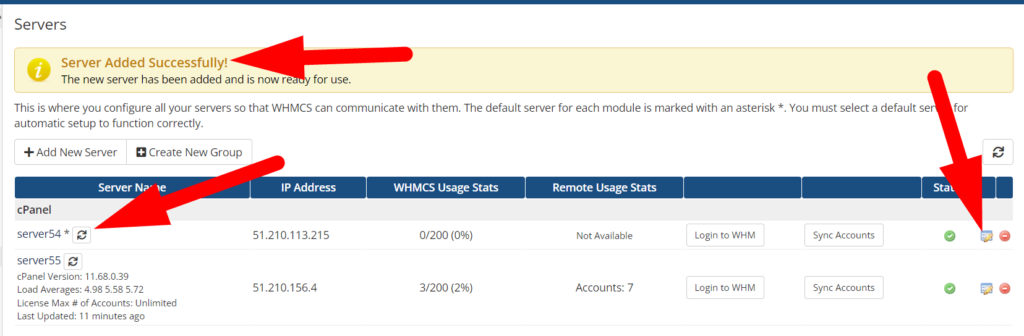
- You’ve successfully configured the WHM server in WHMCS. The Server has been added successfully and now you can start receiving orders on your newly added server.

You’ve done all the basic settings to get started with WHMCS but still, you have to have knowledge of all the important tabs and features in WHMCS such as products/services, automation settings, clients, and all the features inside system settings. Let me walk you through some of the Important options of WHMCS.
Important WHMCS Features
Creating/Managing Products & Services:
There are two types of Products/Services options present inside the WHMCS. The first one is in the System Settings while the second one is in the Clients section.
In the Products/Services section, you can Add a New Product to Your Website such as; Linux hosting, VPS Hosting, Reseller Hosting, and others. 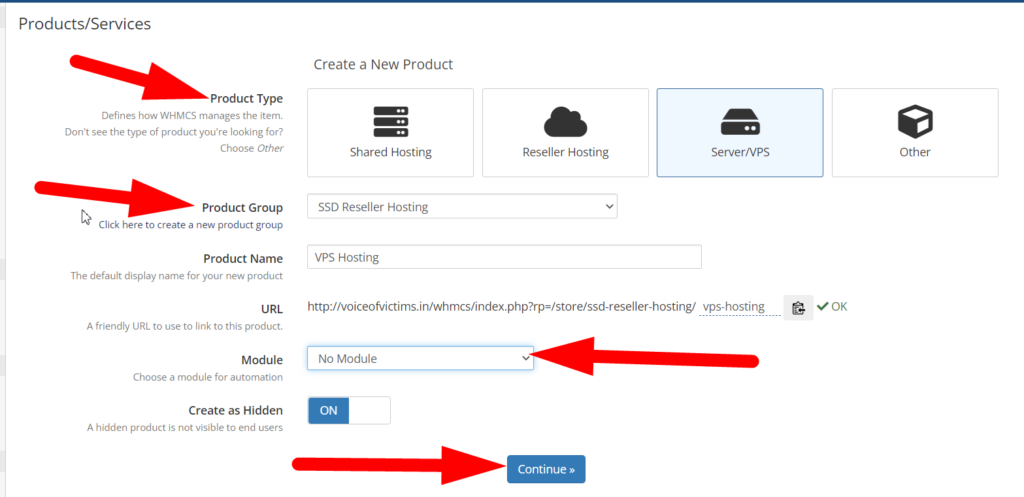
On the other side. You can view Products/Services assigned to the client, Manage the Services such as; Transferring the ownership, managing billing information, Upgrading/Downgrading the Product/Services, Etc.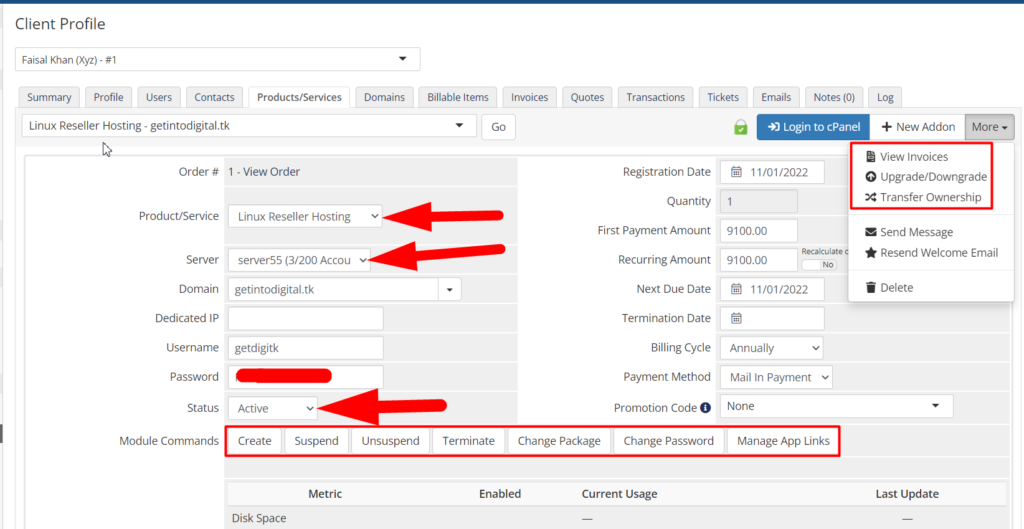
Automated Billing Structure
Most of the Automation Settings are present inside the System Settings > Automation Settings. Let me show you practically.
- Log in to the WHMCS admin Dashboard.
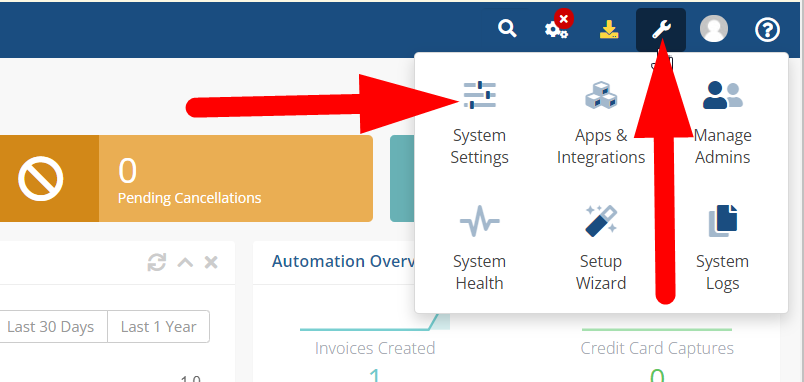
- Move towards the Configuration Settings icon & click over the System Settings.

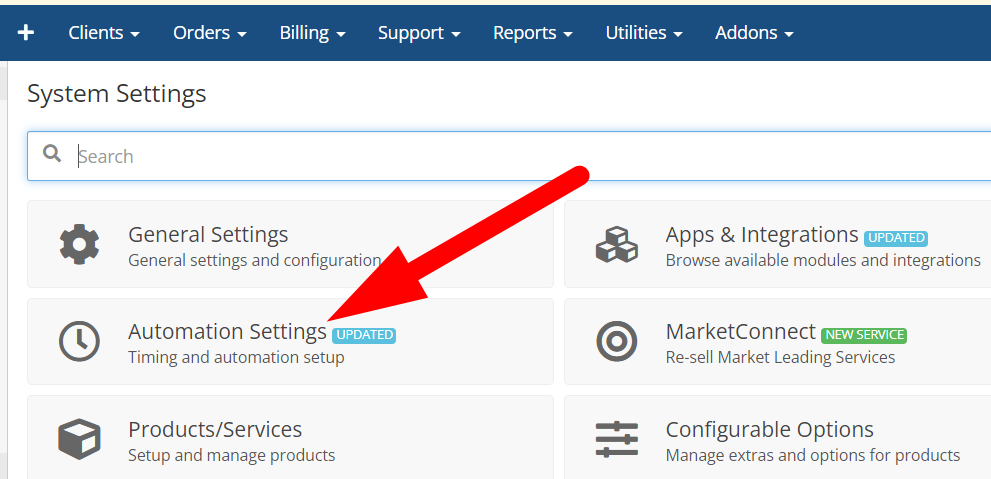
- Click on the Automation Settings present inside the System Settings.

- Now move towards the Billing Settings section present inside the Automation Settings.


Invoice Generation: Enter the days to automatically generate invoices for all the clients before the due date.
Payment Reminder Emails: You can Tick the box if you want to send Payment reminder emails to your clients.
Add Late Fee Days: You can add Late Fee Days & late fee charges to collect the due fee amount.
Overdue Reminder: Overdue reminder is used to send a reminder email to the clients that have exceeded the due dates. You can add a maximum of three reminders.
There are more options in the Automation Settings that you must know about such as Scheduling, Automatic Module Functions, Etc.

Scheduling: You can set the exact time for the daily automated action to be executed.
Enable Suspension: If Enabled, It will automatically suspend all the client’s cPanel accounts that exceeded the due date.
Termination Days: WHMCS will completely destroy the data from your server by terminating the account.
Send Suspension/Unsuspension Email: Tik the checkbox if you want to send Suspension/Unsuspension Emails to the client.
Not only this, you can enable/disable a lot more options such as; Credit Card Expiry Alert, Auto Update the Currency Rates, Renewal Notices, Automate the client’s status, Etc.
Do not forget to hit the Save Changes button at last.
Configuring the Security Settings
If you want to add an extra layer of security features to your clients, you can configure the security settings from System Settings > Security Questions.
In the Security Questions section, you can add an extra layer of security by configuring the Security Questions for your clients so that they can recover their accounts in case they forgot the password.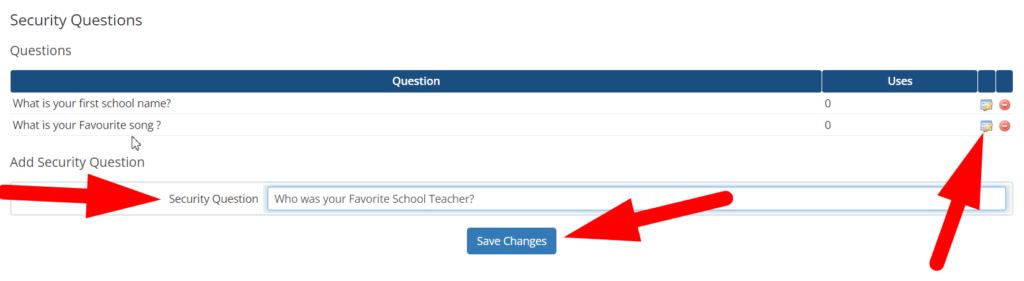
It’s entirely simple to add security questions in WHMCS. Just type the Question in Security Question Box & hit the Save Changes button. Moreover, you can also Edit & Delete the existing questions by clicking on the icons pointed in the screenshot above.
Customer Support
Bad customer support is one of the major reasons for clients to switch their services with another provider. It is highly recommended to provide End-to-End customer support to the users with chat, call, and other options. WHMCS can minimize these headaches with their automated & pre-defined replies features.
You can reduce the manpower for Customer Support by automating the basic customer support process in WHMCS. Let’s do this practically.
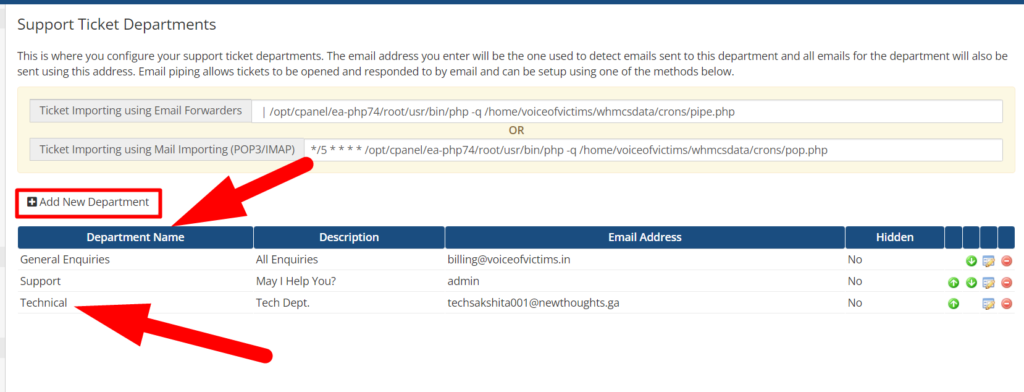
- Go inside the System Settings, scroll down to the bottom and click over the Support Department option.


- Here you can see I’ve created a couple of departments for the clients to open a support ticket. You can add your custom departments and assign the pre-made replies to them.

- You can also customize the settings of the Department by clicking over the Edit icon.

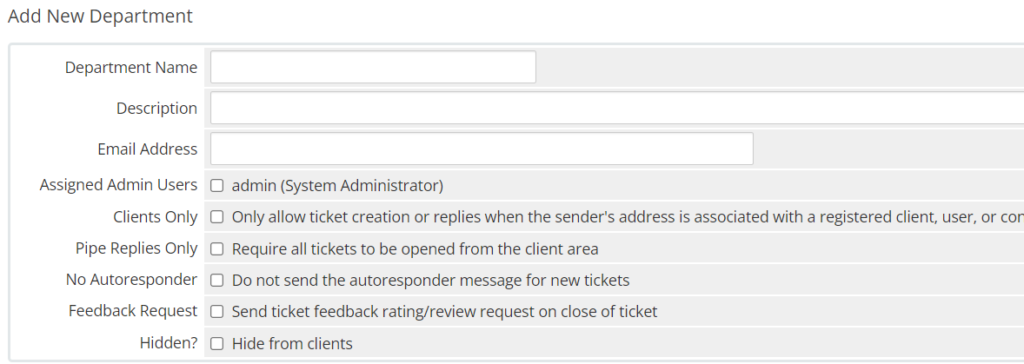
Assigned Admin Users: Tick the checkbox if you want to specify the administrator handle the selected department. In this way, you can isolate users to handle their specific department, and reduce the mess.
Clients Only: When checked, clients cannot raise a ticket with a different address or username which is not your registered client.
Pipe Replies Only: When checked, clients can only open a ticket from the client area.
Hidden: If you want to use this feature as a demonstration, you can hide it from clients and do your work smoothly. clients will not be able to see & browse the department you have hidden.
- As you’ve already created departments for multiple queries, move back to the homepage of WHMCS and hover your cursor towards the Support tab. You’ll see several options present inside the Support tab.
- You can easily manage Customers from the Support tab.
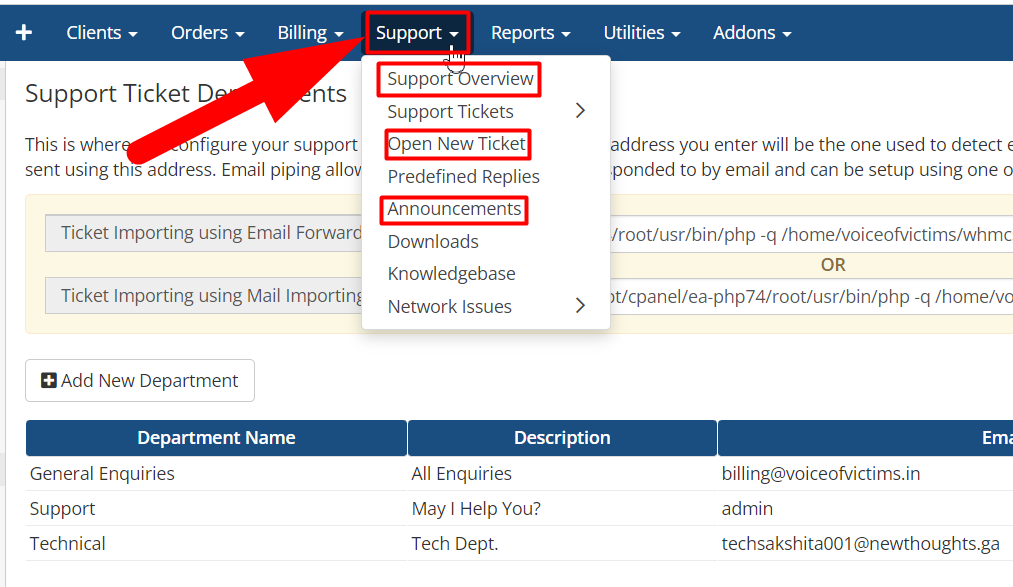
You can check my quora post for a detailed explanation about each and every feature of the Support tab in WHMCS.
Conclusion
In this article, I’ve covered almost everything required to get started with WHMCS smoothly. If you still face any issues in WHMCS, comment it down & I’ll be glad to solve it. Moreover, In RedserverHost, we provide the Cheapest Reseller Web Hosting solution across the Internet. So, If you’re looking forward to starting your business as a Web Hosting Provider, RedserverHost can be your dost (Friend) in terms of quality & services.