How do I connect an FTP account using FileZilla? [STEP BY STEP] ☑️
Most of the cPanel accounts comes with a system FTP account, through which you can access and manage all the files in your home directory. Passwords of system account for cPanel and FTP are same in most cases. So let us quick watch this video to connect FTP account using FileZilla.
So let us begin this tutorial by first creating an FTP Account in cPanel.
Follow the steps below to create an FTP account in cPanel:
Step::1 Login to your cPanel interface
Step::2 Go to Files section, Click on FTP Accounts
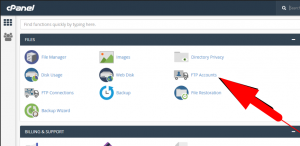
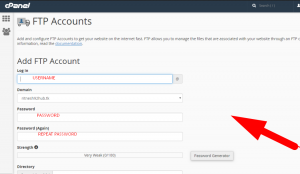
Step::3 In the Add FTP Account section, fill in the fields as needed
- Log in: FTP Username like “newuser” (without the quotes and spaces)
- Password: (Enter new FTP Password or generate a new password by clicking on the “Password Generator” button)
- Directory: If you would like to allow access to the entire /public_html folder, enter “public_html” or modify folder path to a unique path like “public_html/newuser”

How to Create FTP account in cPanel
How to Connect to FTP Using FileZilla?
FileZilla is a free FTP client which is available for most of the popular operating systems including Windows, Linux, and Mac OS. In order to use this FTP client, you should follow these steps:
- Download FileZilla to your local computer
- Install the client
- Specify your FTP login details
- Connect to your FTP account on the server
The installation package of FileZilla can be obtained from the official website of the application. Once you download it, start the file and follow the setup instructions until the application is successfully installed. Finally, start FileZilla.
To Quickconnect follow the steps:
- FTP Hostname: enter your hostname here or the IP Address of your hosting server where your account resides
- FTP username: your cPanel username or FTP account username
- FTP password: your cPanel password or you can also use FTP Account’s password
- Port: The default FTP port is 21.
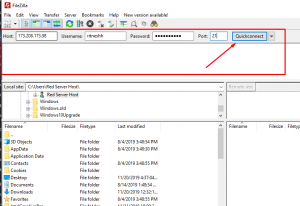
When ready click “Quickconnect”. When you connect successfully, you’ll see a note in the status area at the top of your screen indicating that you are connected. The files and folders on your own computer will appear under the “Local Site” pane on the left side of your screen. Your Web Hosting account files and folders will appear in the “Remote Site” pane on the right. You can now transfer files and folders between your local computer and your hosting account by dragging them from the left pane to the right.
If you are still not getting connected then go ahead with the Site Manager option:
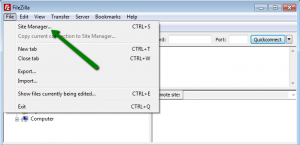
Open FileZilla and Go to File->Site Manager
Click on “New Site” button and enter a short description for the connection.
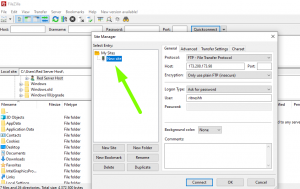
On the right panel enter the host field which is usually yourdomainname.com. You can also use the IP of the server. For port number use 21 – the default FTP port number. Set Encryption: to “Only use plain FTP (insecure)”. For “Logon Type” choose Ask for password. Enter the User on the same name field.
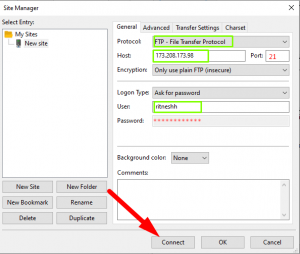
Click the Connect button. On the right side of the window you will see the remote files. On the left side are your local files. You can then copy/remove files.
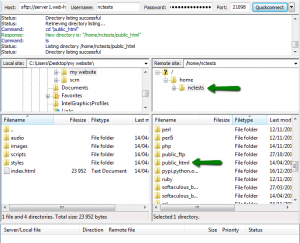
Congratulations!!! you are now ready to use FileZilla.
Hope this helps you!!!
Follow the methods mentioned in the tutorial to quickly connect to your server with FileZilla.
If you enjoyed this tutorial, please consider following us on Facebook and Twitter.
Facebook Page- https://facebook.com/redserverhost
Twitter Page– https://twitter.com/redserverhost.com
If you have any query, feel free to let us know via the comments section below.
Thanks for Reading!!!
Tags: cheap linux hosting, buy linux hosting, cheap reseller hosting, buy reseller hosting, best reseller hosting, cheap web hosting, cheapest web hosting, cheapest reseller hosting, cheap reseller host, cheap linux host, cheapest linux hosting, best linux hosting, best web hosting
