How to Configure MX records for G Suite in cPanel? [STEP BY STEP]☑️
Here in this tutorial we will explain you how to configure MX Records for G Suite in cPanel. You can use Google’s G Suite for email while hosting your domain on a cPanel. For this you’ll have to configure your MX records in cPanel to point to Googles G Suite mail servers.
Video Tutorials– “How to Configure MX records for G Suite in cPanel?”
Follow the steps to configure MX records for G Suite in cPanel:
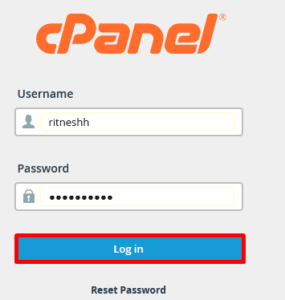
Step::1 Login to your cPanel dashboard.
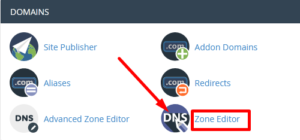
Step::2 Go to Zone Editor within the Domains section.
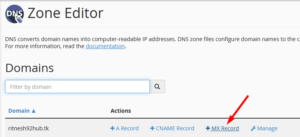
Step::3 Click on the MX Record link for the domain that you want to configure.
Step::4 Enter Priority and Destination values and click on the Add an MX Record button.
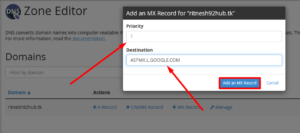
Google G Suite MX Records
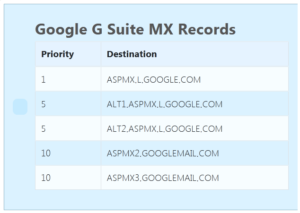
Step::5 Repeat the process with the rest of the entries.
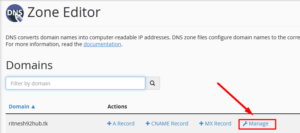
Step::6 Delete previously configured MX record entries.
If you’ve previously configured other MX records for the domain. Find the MX entries that doesn’t belong to Google. 1. Click on the Manage icon and then click the Delete button

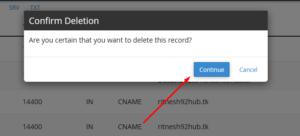
2. Finally Click on the Continue button to confirm deletion.
3. Repeat the steps with other MX entries.
Thanks for Reading this article !!! We hope this was helpful to you all.
For more information, kindly follow us on social media like Twitter and Facebook and for video tutorials, subscribe to our YouTube channel –https://youtube.com/redserverhost.com
Facebook Page– https://facebook.com/redserverhost
Twitter Page– https://twitter.com/redserverhost.com
If you have any suggestions or problems related to this tutorial, please let us know via the comment section below.
Tags: cheap linux hosting, buy linux hosting, cheap reseller hosting, buy reseller hosting, best reseller hosting, cheap web hosting, cheapest web hosting, cheapest reseller hosting, cheap reseller host, cheap linux host, cheapest linux hosting, best linux hosting, best web hosting


