How to Enable Maintenance Mode in Magento? [STEP BY STEP]☑️
Here in this tutorial we will learn how to enable Maintenance mode in Magento. But before getting started you need to check your IP address in Google by searching “my IP address” in your browser. Once you get your IP address simply copy it.
Video Tutorial– “How to Enable Maintenance Mode in Magento?”
Follow the steps to enable Maintenance mode in Magento:
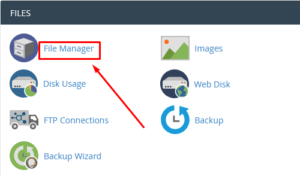
Step::1 Login to your cPanel and go to File Manager section
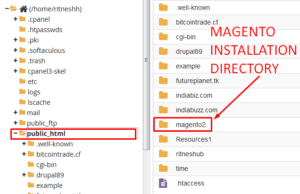
Step::2 Now go inside the root directory i.e public_html and find the Magento installation directory
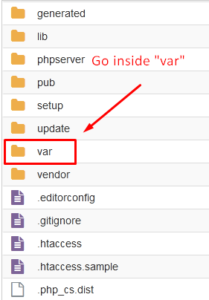
Step::3 Find the “var” directory and create a new file inside it
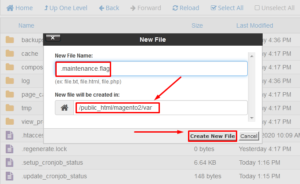
Step::4 Name the file as “.maintenance.flag”
Step::5 Once the file is created, right click over the file and choose the Edit option
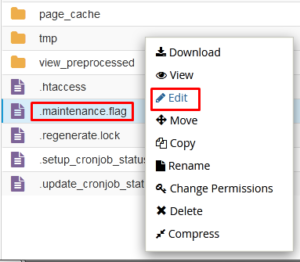
Step::6 In the editor section, add the code given below-
magento maintenance:enable-ip=163.112.98.13 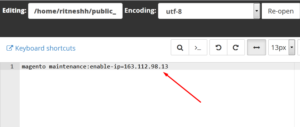
[Note: Make sure you replace the ip with your actual <ip address>]
Step::7 Once you have added the above code click on Save Changes button and close the editor.
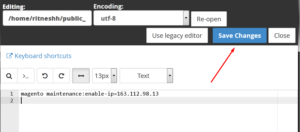
This code will enable maintenance mode in Magento.
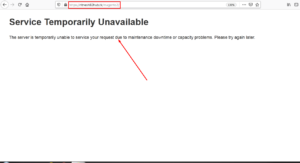
If you want to disable the maintenance mode you can simply replace the “enable” keyword with “disable” in the code.
Congratulations, you have successfully enabled Maintenance mode in Magento !!!
Thanks for Reading this article !!! We hope this was helpful to you all.
For more information, kindly follow us on social media like Twitter and Facebook and for video tutorials, subscribe to our YouTube channel –https://youtube.com/redserverhost.com
Facebook Page– https://facebook.com/redserverhost
Twitter Page– https://twitter.com/redserverhost.com
If you have any suggestions or problems related to this tutorial, please let us know via the comment section below.
Tags: cheap linux hosting, buy linux hosting, cheap reseller hosting, buy reseller hosting, best reseller hosting, cheap web hosting, cheapest web hosting, cheapest reseller hosting, cheap reseller host, cheap linux host, cheapest linux hosting, best linux hosting, best web hosting


