SPHP-FPM is a web tool that is used to increase the performance of the website. It is mostly used for heavy websites as this has the ability to handle tremendous loads simultaneously.
In this tutorial, we will illustrate the procedure to enable PHP-FPM from WHM.
Let us go through the procedure.
- Login to WHM as root.
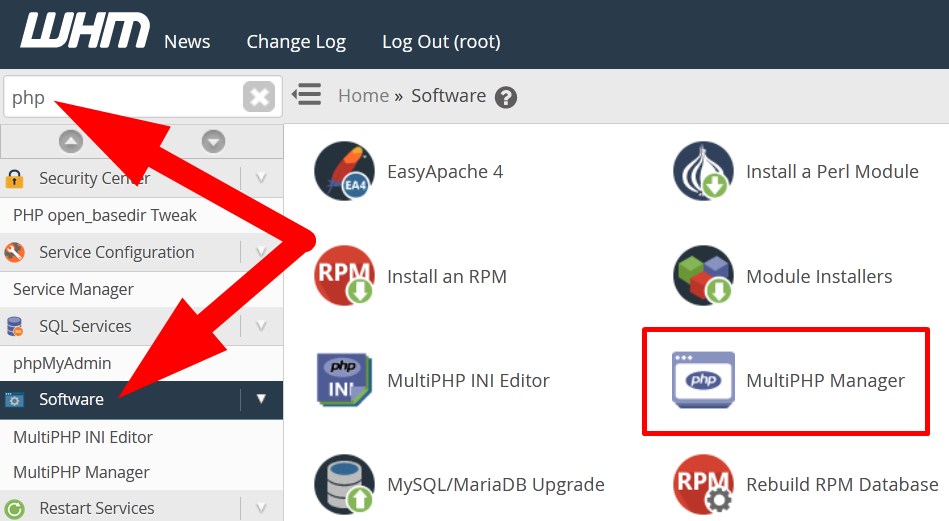
- Search
phpin the search bar or navigate to Software section and select MultiPHP Manager.
MultiPHP Manager - You will be directed to the next page.

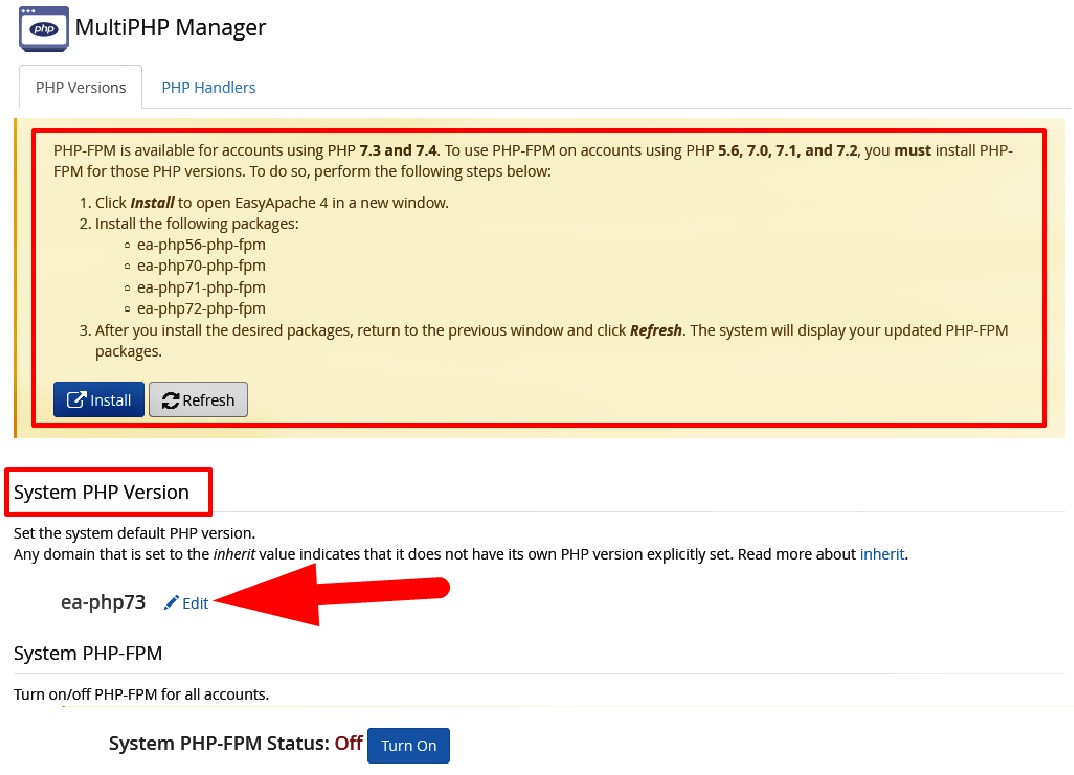
System PHP version
*In the above given image, it is given that, your server has the configuration to enable PHP-FPM with current PHP version but if you want to enable the feature for other version, then you need to Install PHP-FPM with the given steps. You can also change System PHP version from the interface as directed in the image.
Now, you can enable PHP-FPM for one or multiple domains by following the below mentioned steps.
#1. Enable PHP-FPM for one Domain:
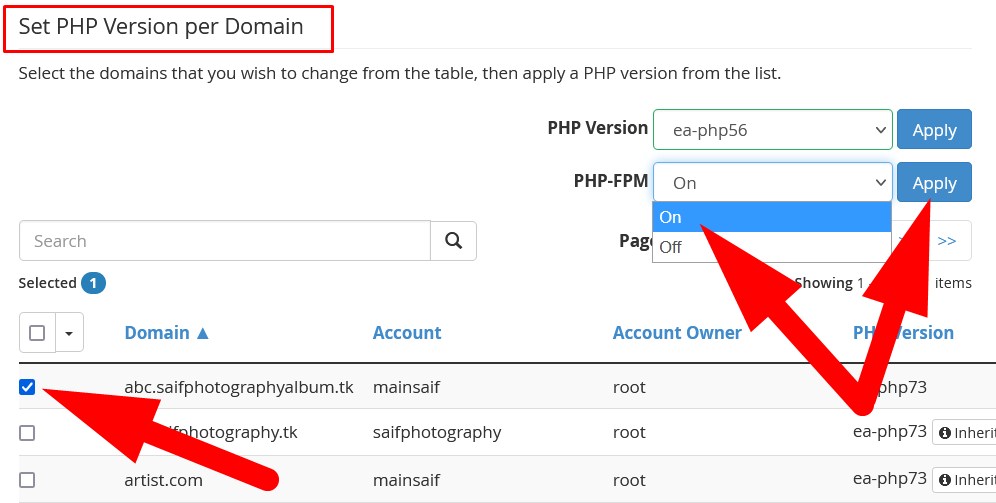
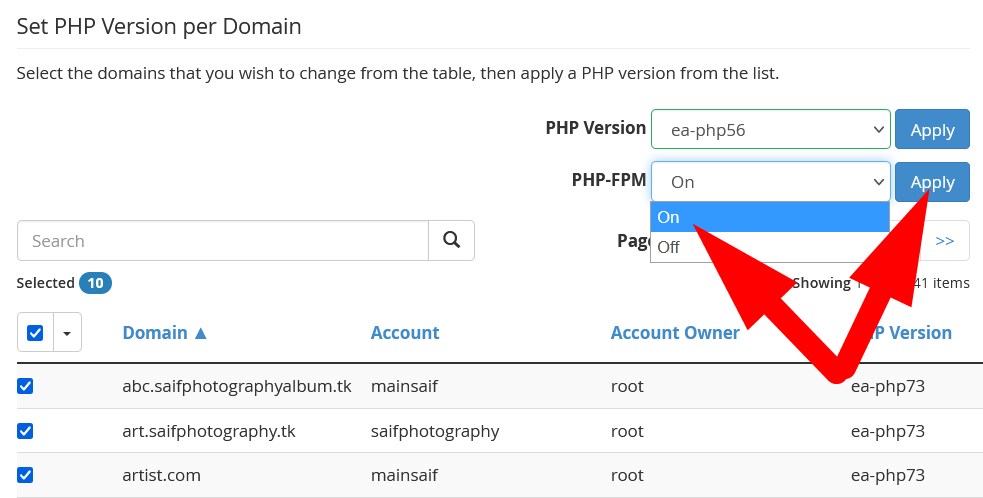
- Scroll down to Set PHP Version per Domain and select the domain for which you want to enable the feature.
- Select the PHP version from the drop down list and Apply.
- Then move to PHP-FPM and select the On from the drop down and Apply.

Enable PHP-FPM for a Domain
#2. Enable PHP-FPM for all Domain:
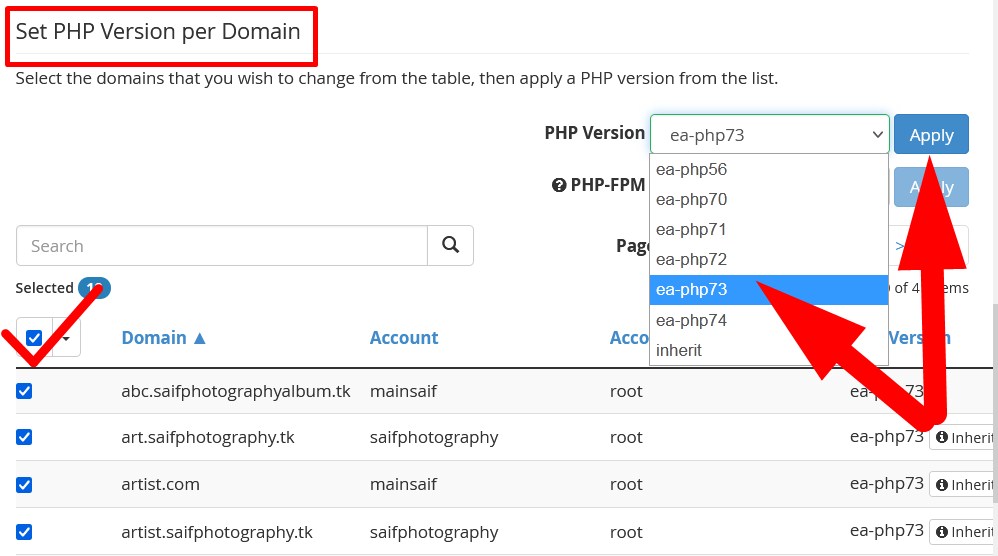
- In the Set PHP Version per Domain section scroll down to list of domains.
- Check the box and select PHP version from the drop down and Apply.

Select PHP version - Switch to PHP-FPM and click over On from the drop down and Apply.

Enable PHP-FPM for all Domains - You will receive a message that the PHP-FPM has been seccessfully enabled.

Successfully Enabled PHP-FPM
That’s It !
Hope the article better describes the procedure to enable PHP-FPM from WHM. Do share it with your colleagues if you find it working. Also share your suggestions and drop your queries to start the discussion on the related topic. Lets connect on social media with the below links.
Facebook Page: https://facebook.com/redserverhost Twitter Page: https://twitter.com/redserverhost.com
