
In this tutorial, you will learn about the following:
#1. JetBackup
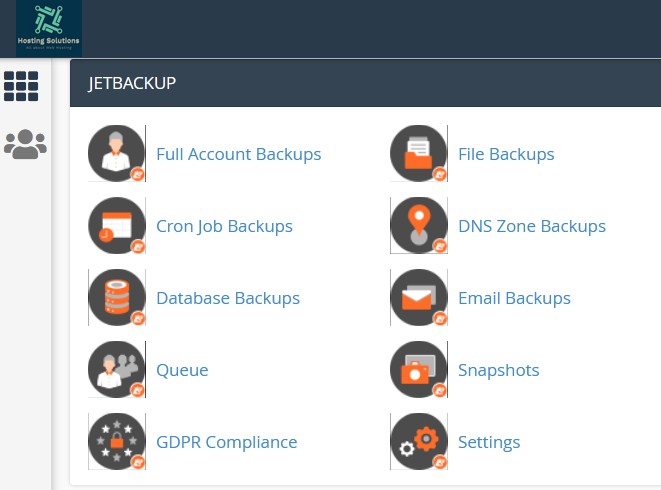
JetBackup is the backup feature available in the cPanel interface of REDSERVERHOST that provides users with multiple options to generate, download and restore backups. The backup feature is available on almost all plans of REDSERVERHOST, including the Backup Wizard interface as well. You can check the article to know the detailed description to backup and restore websites.
Let us move to the topic. In this tutorial we will share the detailed description of features that are available with the Jetbackup interface in cPanel. To find out about various backup services, check the article here.
#2. Features in JetBackup
In the JetBackup interface there are multiple features available that allows user to create and generate backup easily. Features that are available in Jetbackup are as follows.
These given features are used to manage the backup. Some Additional features are:
- Queue: User can check all the restore and download process in this section. We will review the details of this section below in this article.
- Snapshots: This feature created full backup of your account and get stored on your hosting provider’s backup storage destination.
- Settings: This will help you to make changes in settings.
#3. How to Restore Backups in JetBackup?
Here, we will learn about the features that are used to restore backups in JetBackup. To do the same, login to your cPanel account and get inside JetBackups section.
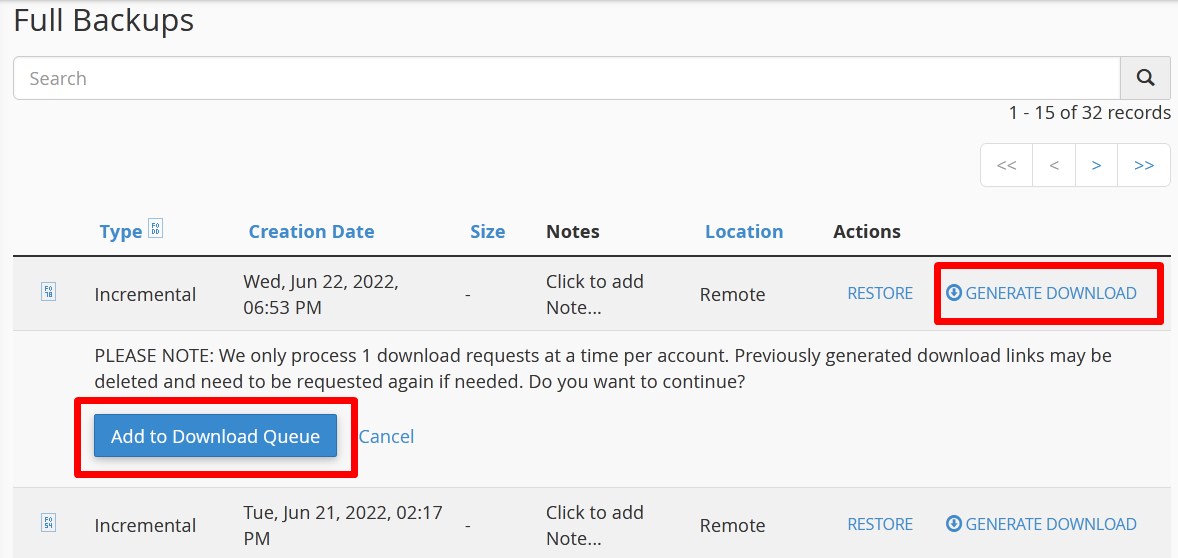
#1. Full Account Backups
Click over Full Account Backups in the JetBackup section and proceed.
- On the next page, list of backups will appear from where you can restore and download as per your choice.
- Click over Generate Download to download the Backup. It will ask you to add it to queue click over Add to Download Queue.
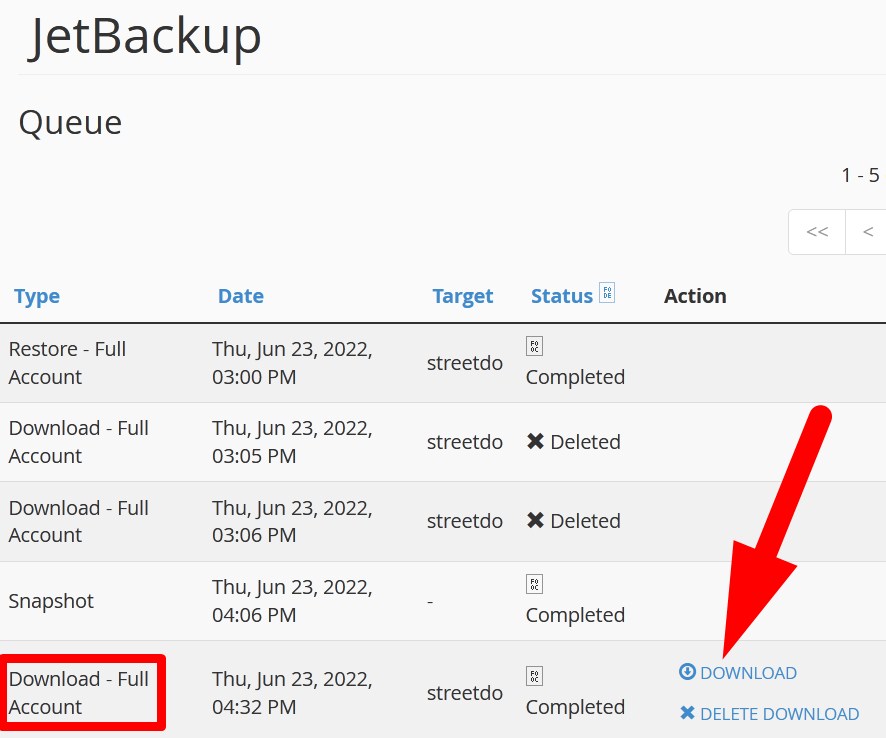
- Now, go back to cPanel feature list page and click over Queue.
- On the next page, you will get list of all actions. You can download backup in your local PC by clicking over Download.
#2. File Backups
Click over File Backups in JetBackup and proceed.
- On the next page, you will get list of all your website files and directories. Click over any directory to get inside it. From here, you can perform an action related to particular file or directory.
- Mark the box to perform an action related to particular directory or file and select an action from the below options.
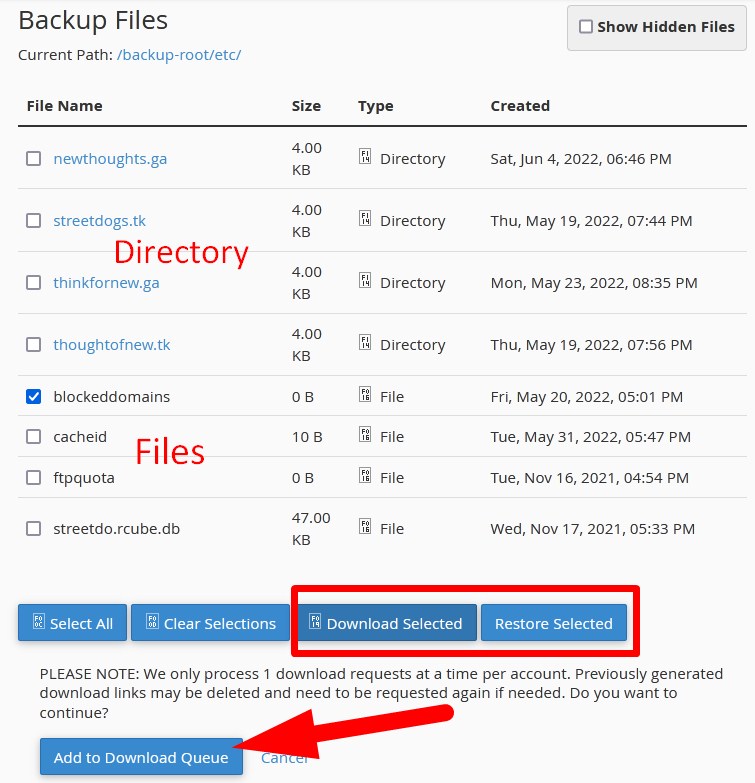
From the above image, you can see the files and directories.
- The selected action,i.e, download or restore get added in the queue.
You can get inside Queue section and download the backup of file or directory in your local PC.
#3. Cron Job Backups
Select Cron Job Backups from the cPanel feature list page and proceed.
- On the next page, backup of all the cron jobs are listed.
- Click over Restore or Generate Download from the option given next to the created backup.
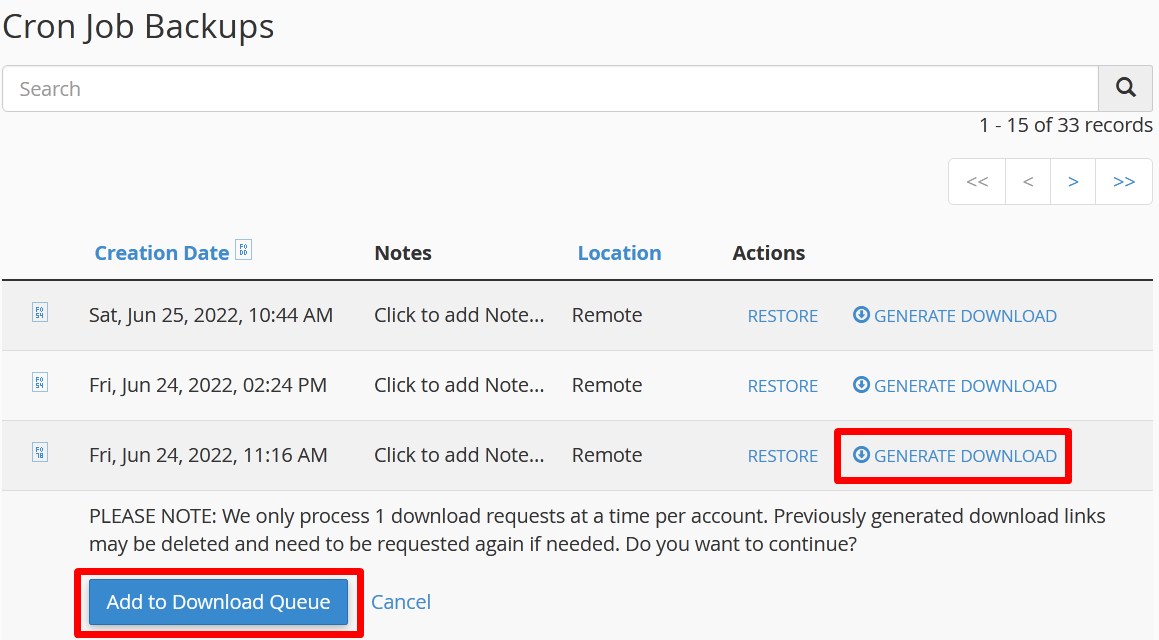
- Click over Add to Download Queue and the selected action,i.e, restore or download gets added into queue.
- You can download the backup file in your local PC from the Queue section.
#4. DNS Zone Backups
Select DNS Zone Backups in cPanel feature list page in JettBackup section and proceed.
- List of all DNS backups will appear on the next page.
- Click over Generate Download option given with the backup.
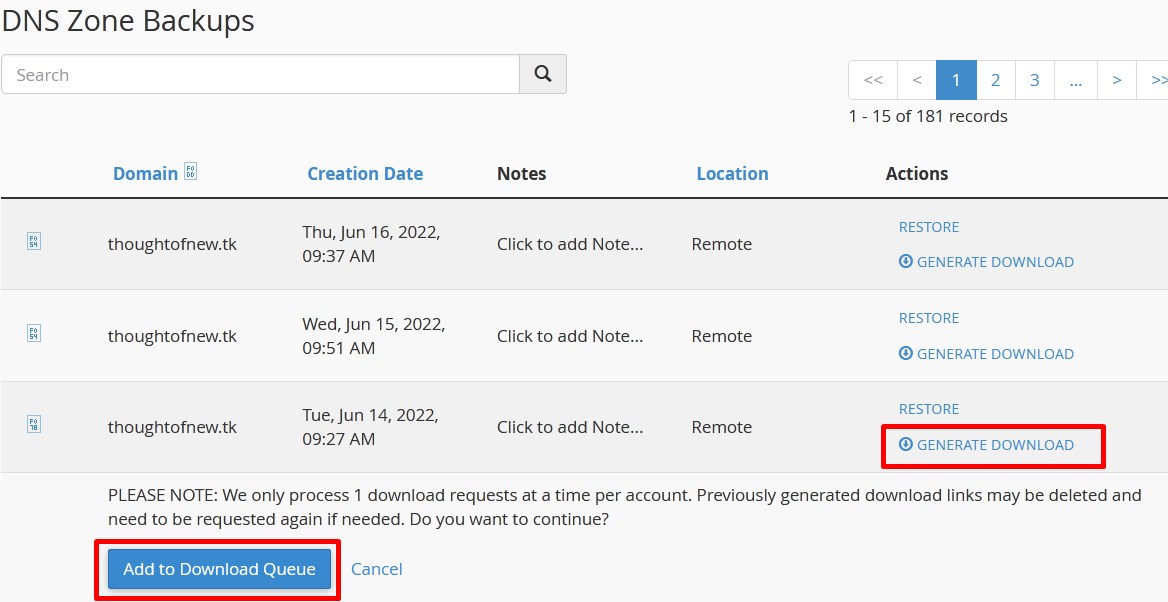
- Click over Add to Download Queue and proceed.
- The action will get added in the queue section and you can download the backup to your local PC from here.
#5. Database Backups
Select the option from JetBackup section and proceed.
- List of all database backups will appear.
- Click over Generate Download option given next to the backups.
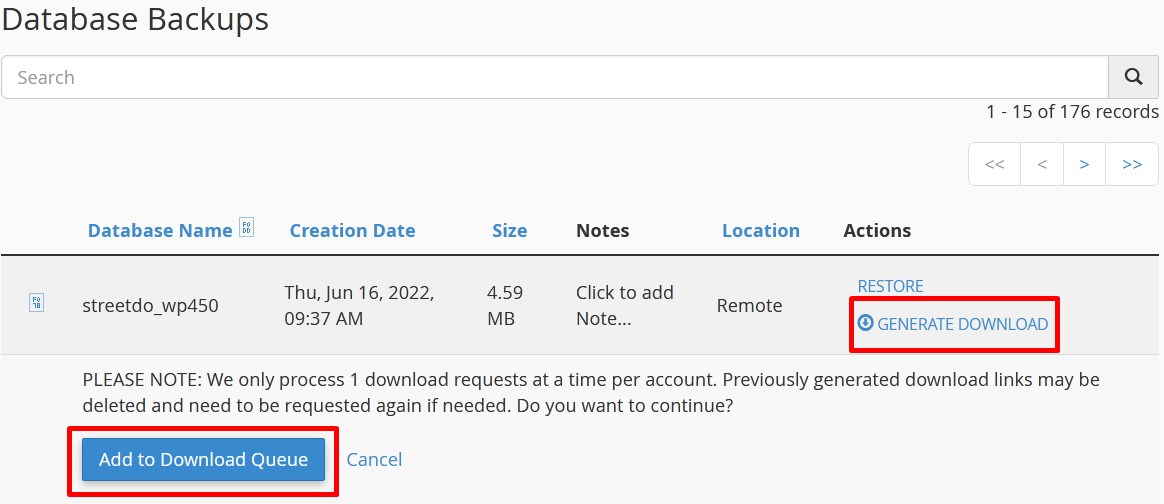
- Click over Add to Download Queue and the action will added in the queue.
- Get inside Queue section and download the backup in your local PC.
#6. Email Backups
Select the feature from JetBackup section and proceed.
- All the email backups will appear listed on the next page.
- Select the option Generate Download given with the domain email and then Add to Download Queue.

- The selected action get queued in Queue section from where you can download the email backup in your local PC.
That’s it !
Hope the steps explained help you to restore backups using JetBackup in cPanel. I’ve shared all the features of JetBackup which are mostly used by users to generate backup. If you found this article helpful then do share with your colleagues. Follow us on social media. Facebook Page: https://www.facebook.com/redserverhost
Twitter Page: https://twitter.com/redserverhost


