How to secure ‘public html’? [STEP BY STEP]☑️
Today in this tutorial we will help you learn how you could secure public_html. Permissions can be very important when it comes to hosting your website. Permissions can allow our server computer to write and edit your files. Along with that, some files need to be protected from writing and editing, as a security measure.
Watch this Video Tutorial– How to secure ‘public html’
Follow the methods to change the file permissions and secure public_html:
1. At cPanel user level:
Step::1 Login to cPanel and open File Manager

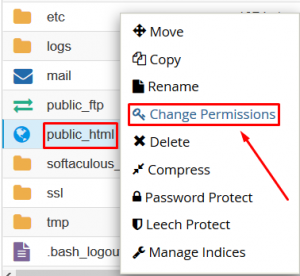
Steps::2 Scroll over public_html and right click on it and choose Change Permissions option
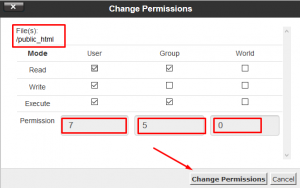
Step::3 Set the permissions to 0750.
2. At Root level:
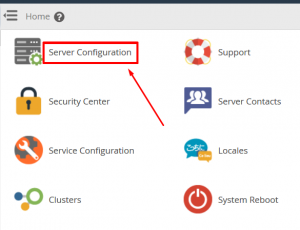
Step::1 Login to WHM root and open Server Configuration
Step::2 Open Tweak Settings
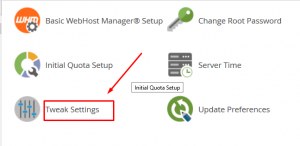
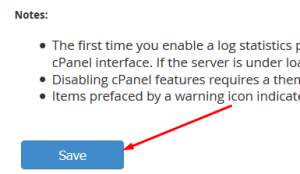
Step::3 Go to Security tab and find the option “Enable File Protect”


Step::4 Click over On button and the Save.
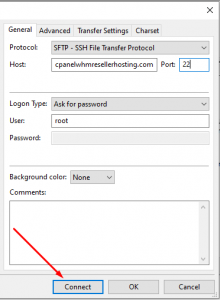
3. Via Filezilla SFTP;’
Step::1 Login to Filezilla as root
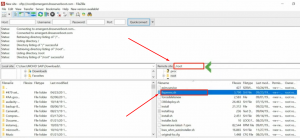
Step::2 Go to /root and look for “fixperms.sh” file
Step::3 Open this link- https://pastebin.com/K8Xd4DWy
Step::4 Copy the entire code and paste it fixperms.sh file
Step::5 Now you need to add a Cron Job to the following location- /var/spool/cron and edit the file “root”
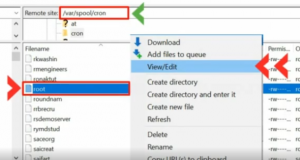
Here add an hourly cronjob to hit the file fixperms.sh. Add the line given below and save it:
0 * * * * root/fixperms.sh
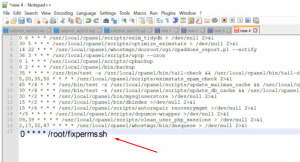
This cron will hit the file fixperms.sh repeatedly so that the file permission of all the cpanel’s public_html will remain 0750. In this way you can secure public_html.
In this way you can setup file permissions of any file in cPanel.
Thanks for Reading this article !!! We hope this was helpful to you all.
For more information, kindly follow us on social media like Twitter and Facebook and for video tutorials, subscribe to our YouTube channel –https://youtube.com/redserverhost.com
Facebook Page– https://facebook.com/redserverhost
Twitter Page– https://twitter.com/redserverhost.com
If you have any suggestions or problems related to this tutorial, please let us know via the comment section below.
Tags: cheap linux hosting, buy linux hosting, cheap reseller hosting, buy reseller hosting, best reseller hosting, cheap web hosting, cheapest web hosting, cheapest reseller hosting, cheap reseller host, cheap linux host, cheapest linux hosting, best linux hosting, best web hosting

