Hi Friends!!!
FileZilla application is needed for every website hosting user. FileZilla is FTP (File Transfer Protocol) Application. Working through FTP is very comfortable and fast. This protocol is used to exchange data, files and folders. Once you created your FTP account then you can login in FileZilla application with FTP account credentials. While logging in FileZilla application you can suffer from connection error like “Connection Refused Timeout error”.
So here in this blog we will resolve “Connection Refused Timeout error” in Filezilla.
How to solve “Connection Refused Timeout error” in FileZilla? [Important]
To resolve FTP “Connection refused timeout” error you need to do some customization settings in your FileZilla Application.
Steps to resolve “Connection Refused Timeout error” in Filezilla [Updated May 2019]
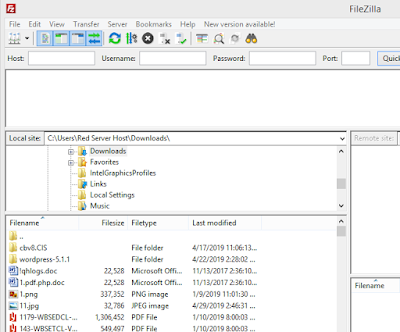
1. Open FileZilla Application.
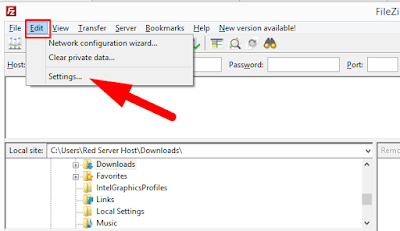
2. Go to Edit Menu then Click on Settings
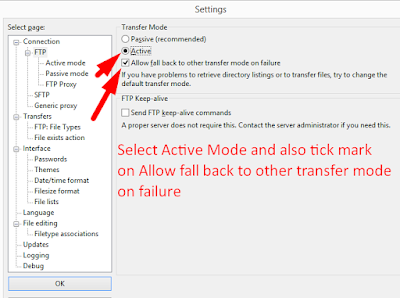
3. Click on FTP in the left panel

4. In that Transfer, mode must be Active & check out the Allow Fall back to another transfer mode on failure.
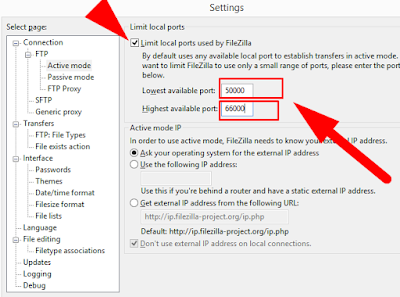
5. Now Click on Active Mode from left panel directory. In this check out the Limit local ports used by FileZilla
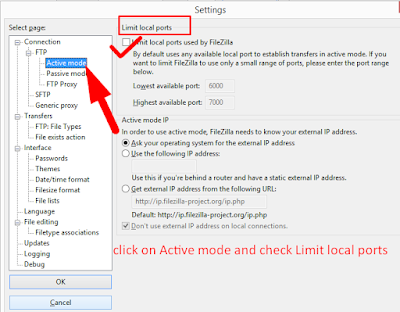
6. Set Lowest available port as 50000 and Highest available port as 66000.
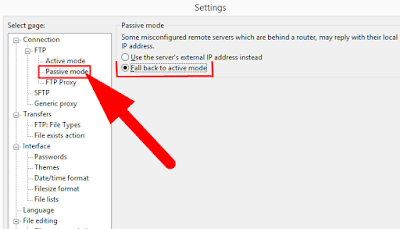
7. Now Click on Passive Mode from left panel. In this tick mark on Fall back to active mode button.
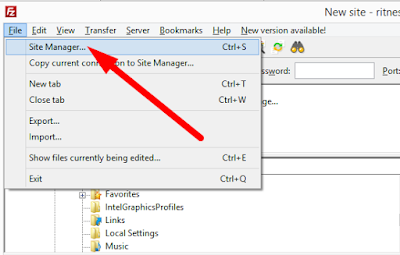
8. Now close this setting page and Click on File and Open the Site Manager
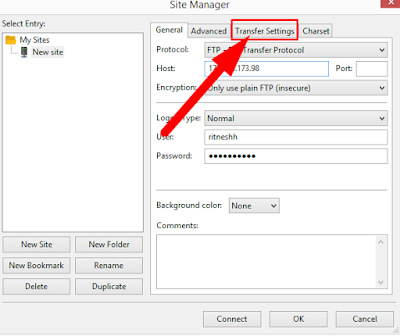
9. Click on General and Fill hostname, In the port section write 21, the protocol must be FTP-File Transfer Protocol. Encryption must be use Only use plain FTP (insecure). Logon on type must be Normal .
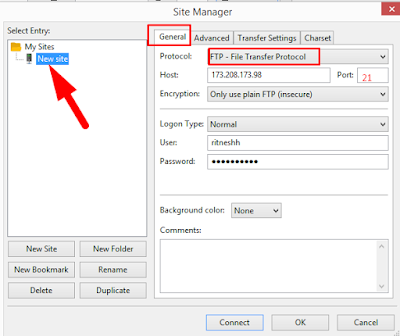
10. Fill the username and password of FTP account.
11. Now go to Transfer Settings
12. In this tick mark on Active button and check out a Limit number of simultaneous connections. A maximum number of connections set to 1.
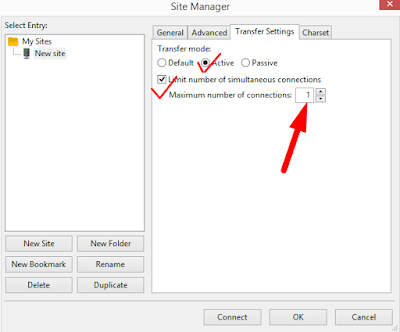
13. Click on OK to save all the configured settings.
14. In this way we resolve FileZilla Timeout Error.
Hope this answer helped you.. for more queries and suggestions feel free to write or you can also comment below.
Thanks for Reading!!!


