Today in this article, we’re gonna learn to transfer files using the WinSCP file transfer protocol. But, before getting ahead, it’s better to have a brief knowledge of File Transfer Software first. Transferring files from WinSCP isn’t a big deal. Anyone can do it easily if he has basic knowledge of FTP. So let’s learn about the WinSCP first.
What is WinSCP?
WinSCP is a free open-source file transfer software used to transfer files between a local computer to a remote server. It is a popular SFTP and FTP client for Windows. WinSCP could use several protocols to make a secure connection between a server to a remote such as File Transfer Protocol (FTP), Secure Shell (SSH), and Secure Copy (SCP). It is intentionally designed for windows users, and it also supports some common windows features like the drag-and-drop feature.
However, the main work of WinSCP is to transfer files between a local computer to a remote server.
It uses Public-key encryption or the Secure Password method to transfer files from a client’s computer to a server. That’s why WinSCP is one of the safest ways to transfer files between remote servers to a local computer.
Install WinSCP in Windows
Follow the below steps to easily download & install the WinSCP on your Windows OS.
- First of all, download the WinSCP installation package from the below link.
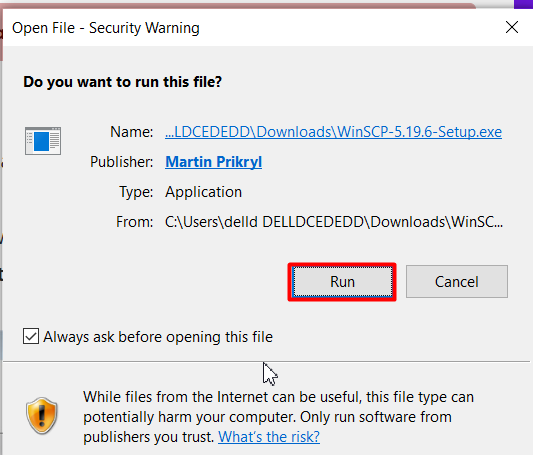
- Once the installation package is downloaded, run it.

- Follow the other simple processes you use to install any other software.
- Once the installation process is done, click over the Finish button.
- That’s it. You’ve successfully installed WinSCP.
Transfer Files Using WinSCP
As I said before, transferring files in WinSCP is fairly easy. It also doesn’t need any special settings during its installation process. However, before going through the transfer process in WinSCP, you must have the practical knowledge to connect your local computer to a remote server. So, let’s log into the remote server from your local computer using the WinSCP software.
1. Log into Remote Server
- Launch the WinSCP Software.
- A login window will be popped up in front of you.
- Type the credentials of your remote computer such as hostname, username, and password. Hit the Login button at the end.
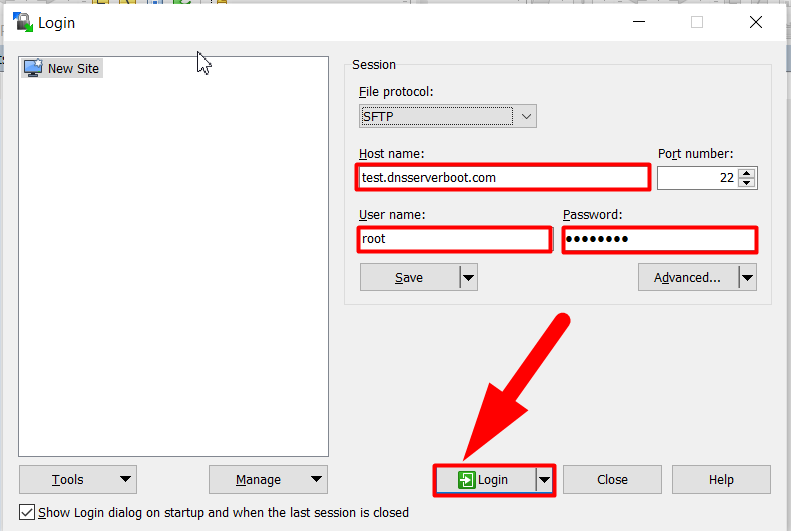
Change the port number to 22 if it’s not 22 by default.
- As soon as you’ll hit the Login button using the correct credentials, you’ll again receive a below pop-up alert.
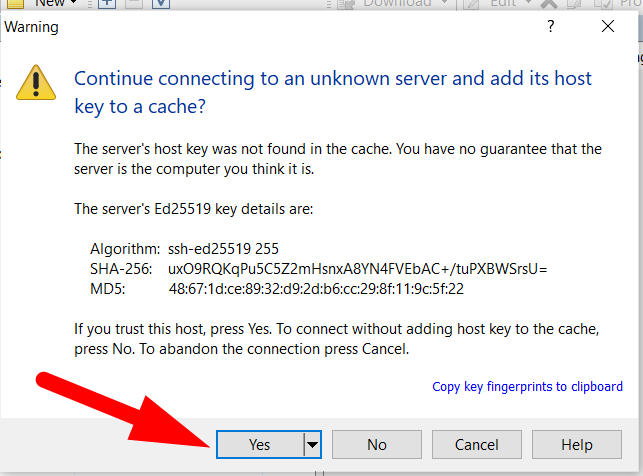
- Hit the Yes button to jump to the next step.
- That’s it. You’ll be connected to the desired server in a couple of seconds.
2. Drag & Drop To Transfer Files
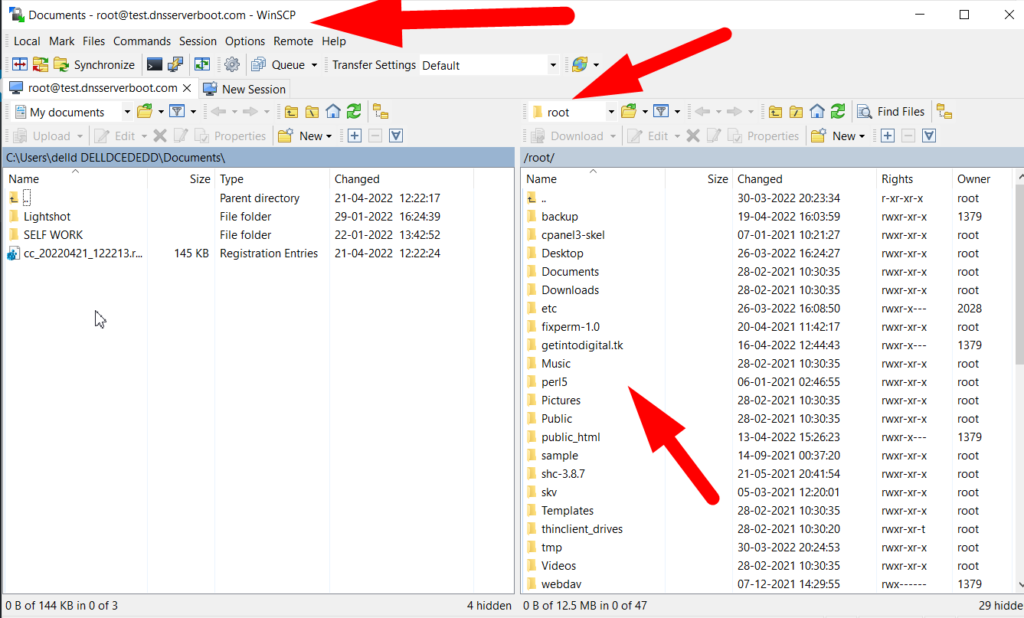
- You’ve successfully connected to the remote server. Now you can easily drop and drop to transfer files between your local computer and server.

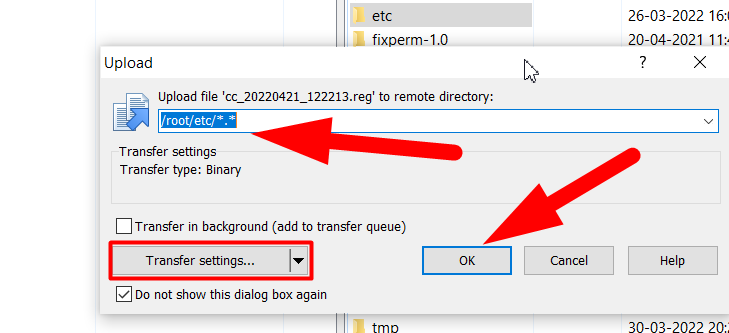
3. Define the Path/Location
- A new pop-up window will appear asking you for confirmation to transfer your desired file to the location. You can change the file location from there also or simply click over the OK button to transfer files.
- You can navigate to the Commands tab and hit the Quit button or simply press the F10 key from your keyboard to close the WinSCP software.

That’s it.
I hope you got it. If not, you can directly visit our official page Redserverhost.com and open a Free Support Ticket. Our experienced Technical Support Team will be happy to assist you.
Other than this, you can follow us on Facebook & Twitter for any further inquiries or suggestions as we always appreciates the suggestions.


