How to Change Image Sizes in cPanel? [STEP BY STEP]☑️
Today in this documentation we will learn about How to change image sizes in cPanel. If you find yourself spending a lot of time scaling or resizing images before you upload them to your site, let me show you how to change image sizes in cPanel with the “Images Scaler.”
Video Tutorial– “How to Change Image Sizes in cPanel”
Follow the steps to change the image size or dimension in your cPanel:
Step::1 Login to your cPanel and go inside Images under Files section
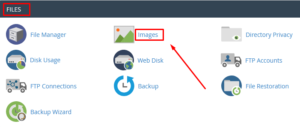
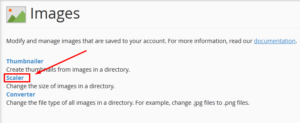
Step::2 On the next page, click over Scaler button
Step::3 Now go to public_html directory
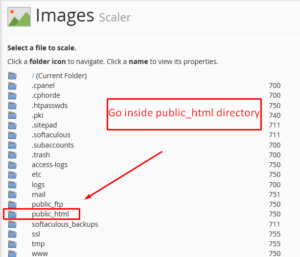
Step::4 Next you need to go inside a particular folder where you image files are situated

Step::5 Choose the image for which you want to change the dimension

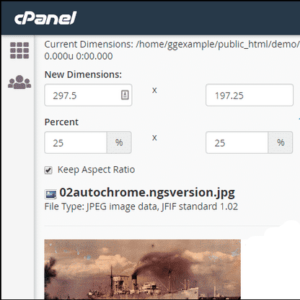
Step::6 This is where you enter the new image dimensions. You can change the image dimension to a total new dimension. You can keep aspect ratio to prevent image stretching or distortion.
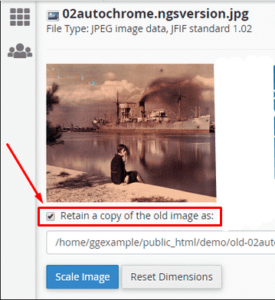
Step::7 You can also select the option “Retain a copy of the old image” if you want to have a backup of your old image.
Step::8 Finally click over Scale Image button.
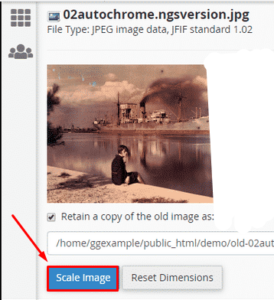
This is how you can change image size in cPanel.

Thanks for Reading this article !!! We hope this was helpful to you all.
For more information, kindly follow us on social media like Twitter and Facebook and for video tutorials, subscribe to our YouTube channel –https://youtube.com/redserverhost.com
Facebook Page– https://facebook.com/redserverhost
Twitter Page– https://twitter.com/redserverhost.com
If you have any suggestions or problems related to this tutorial, please let us know via the comment section below.
Tags: cheap linux hosting, buy linux hosting, cheap reseller hosting, buy reseller hosting, best reseller hosting, cheap web hosting, cheapest web hosting, cheapest reseller hosting, cheap reseller host, cheap linux host, cheapest linux hosting, best linux hosting, best web hosting
