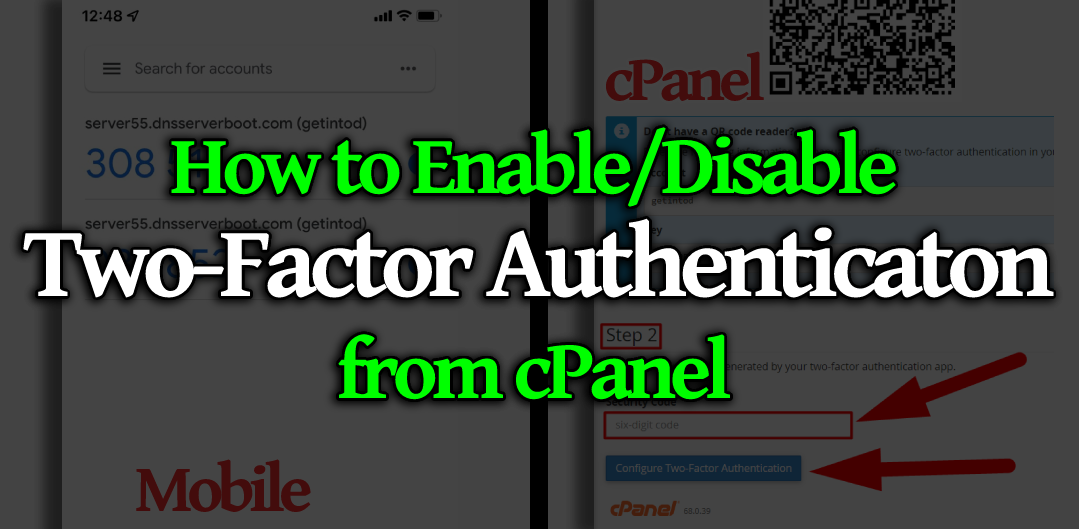
cPanel’s Two-Factor Authentication feature allows you to enable 2FA to harden your website security for the login interface. You can easily set up two-factor authentication for your website from cPanel itself. It requires two forms of identification:
- Password
- A six-digit security code.
Enabling the 2FA to your cPanel could be done by two methods:
- By scanning the QR Code in your authenticator app (Google Authenticator, Duo Mobile, Etc).
- By pasting the Account & Key.
In this tutorial, we’re gonna walk you through a comprehensive guide to enabling or disabling two-factor authentication in your cPanel account. But, before going ahead, let’s talk about the prerequisites you’ll need to set up 2FA in your cPanel account.
If the Two-Factor Authentication feature isn’t available in your cPanel account, it might be disabled at the root level. You can contact your hosting provider to enable this feature or you can enable two-factor authentication from WHM by yourself if you have the root access.
The smartphone app must be able to generate time-based one-time passwords (TOTP). cPanel recommends the following smartphone apps:
For Android™, iOS®, and Blackberry® — Google Authenticator™
For Android and iOS — Duo Mobile
For Windows® Phone — Authenticator
Enable/Setup Two-Factor Authentication in cPanel
You can easily enable Two-Factor Authentication (2FA) in cPanel by following the below steps:
Step 1: Accessing Two-Factor Authenticator in cPanel
- Log into your cPanel account.
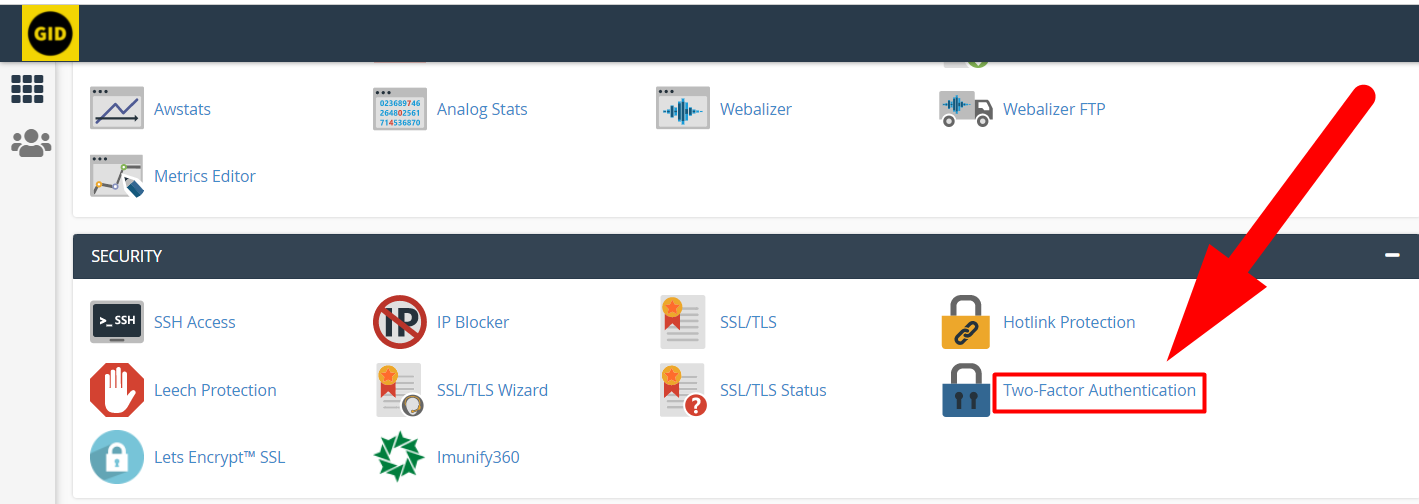
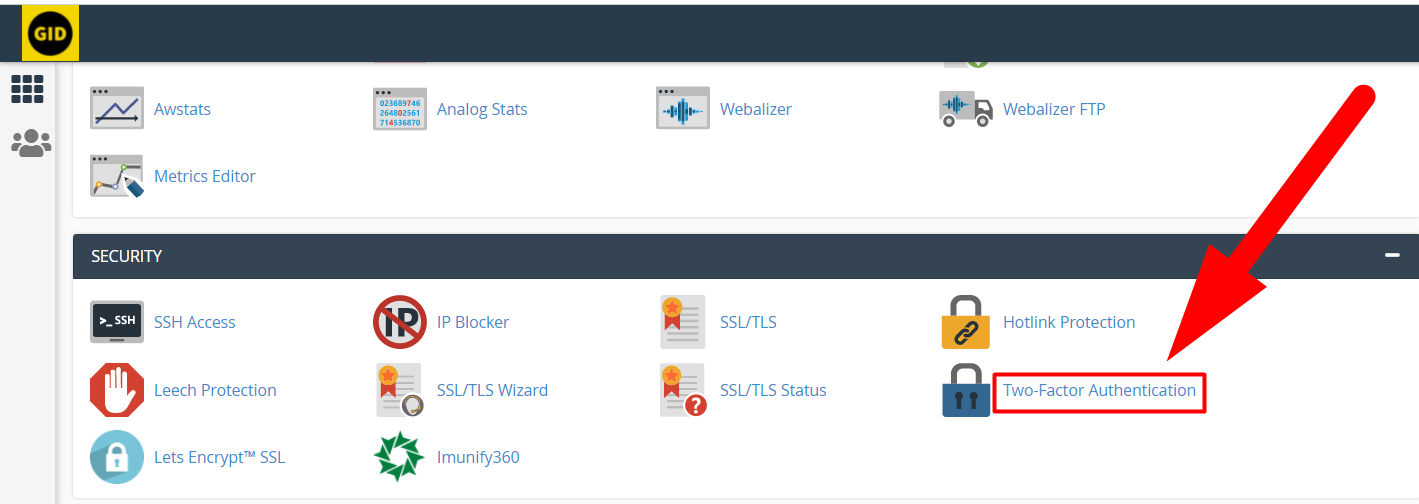
- Navigate to the SECURITY tab and click on the Two-Factor Authentication option.

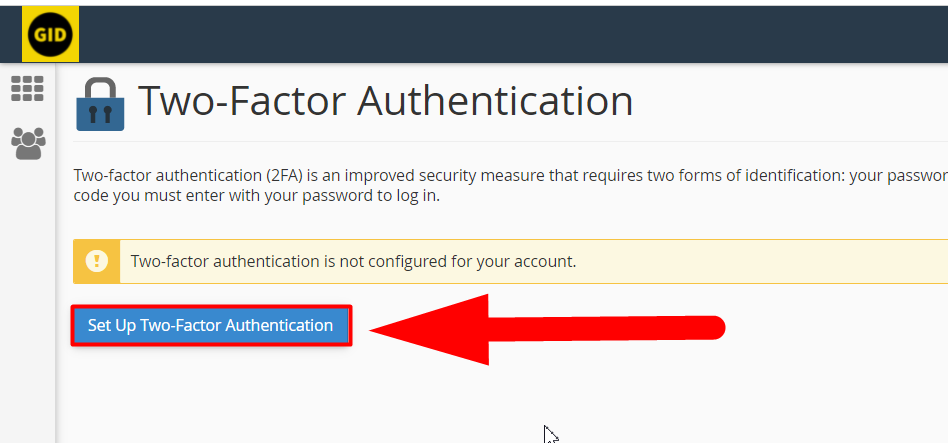
Security Tab cPanel - Now click on the Set Up Two-Factor Authentication button.

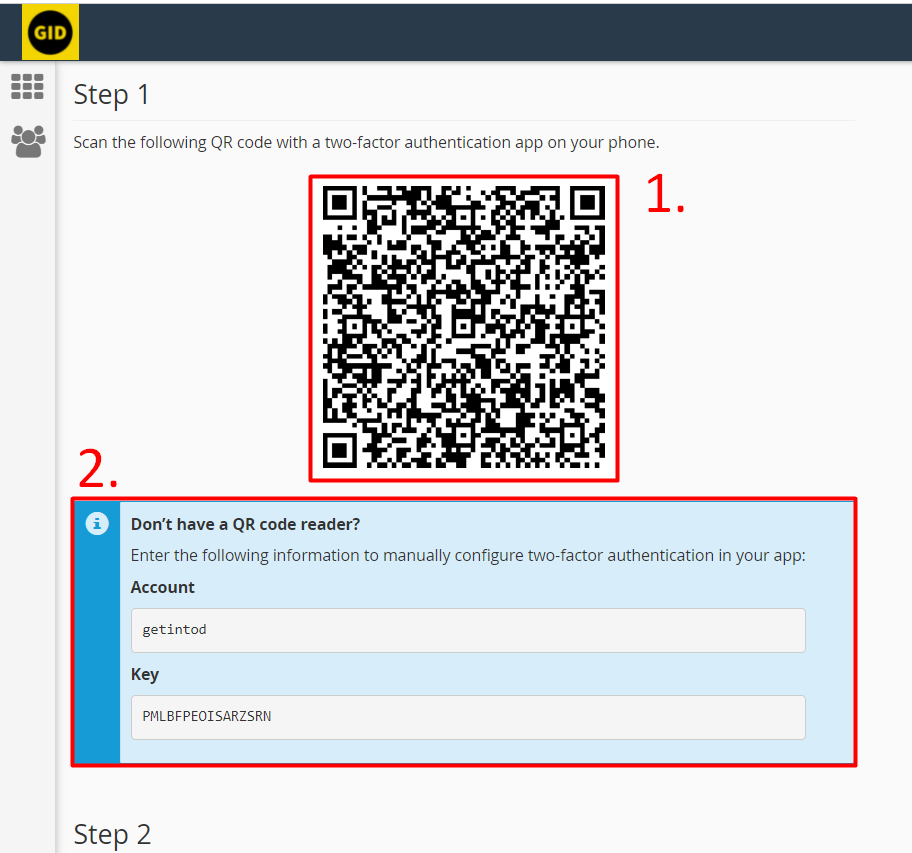
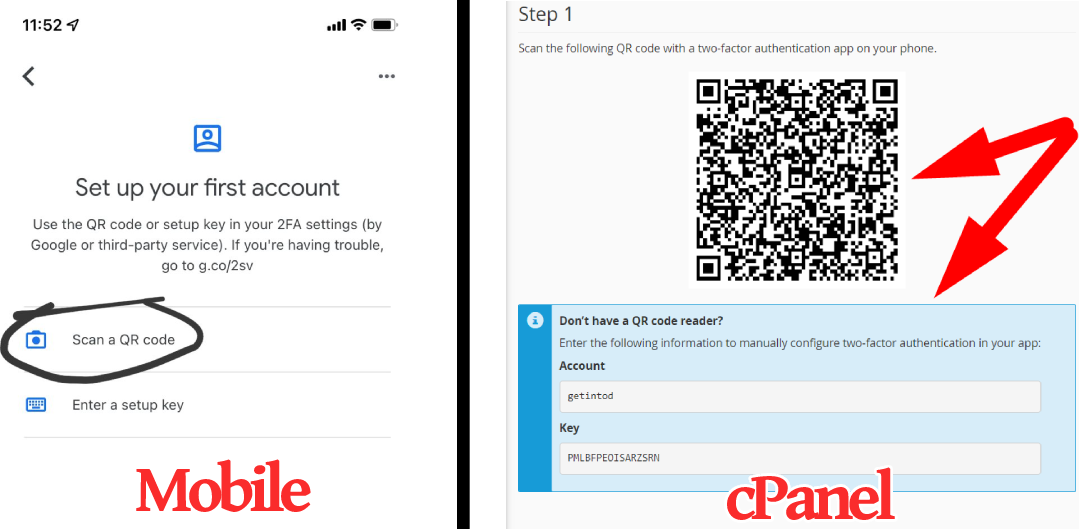
Setup Two-Factor Authentication - There you’ll see two options, authenticate by QR Code, and authenticate by Account and Key.

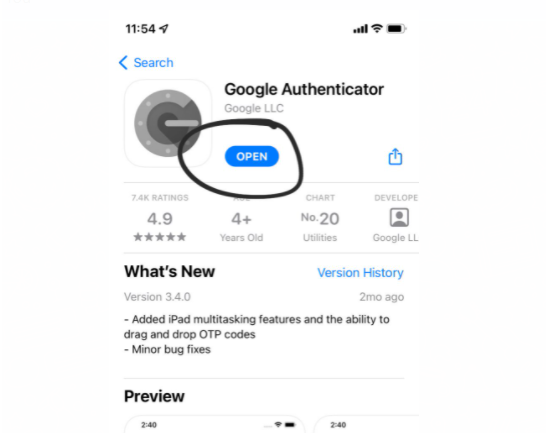
Setup 2FA - Now, download the Google Authenticator app on your phone, and open it.

Google Authenticator Mobile App - Once the Google Authenticator is opened, you’ll see two options there also.

2FA Authentication Options (2) - Simply press Scan a QR code option from your authenticator app and scan the QR located inside the 2FA section in cPanel.
- By doing this, you’ll complete the first step of configuring the Two-Factor Authentication.
Step 2: Configuring the Two-Factor Authentication
- As soon as you’ll scan the QR Code, a 6-digit code will be shown up in your authenticator app.
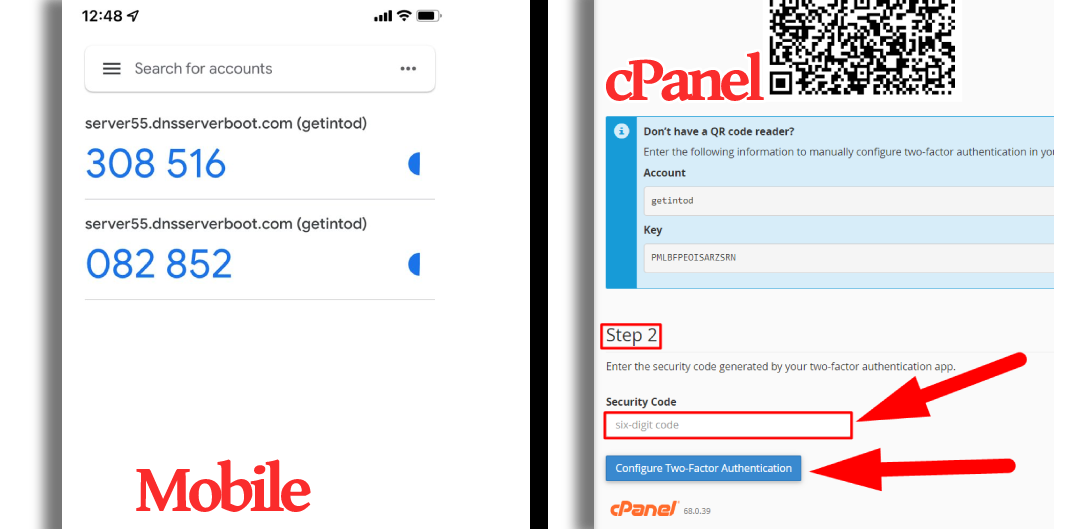
Note: You’ll have to submit the code before 30 seconds to successfully configure two-factor authentication. Once the time limit exceeds, it’ll again generate the new code and then the previous code won’t work.
- Paste the configuration code before it expires, hit the Configure Two-Factor Authentication button, and you’re done.
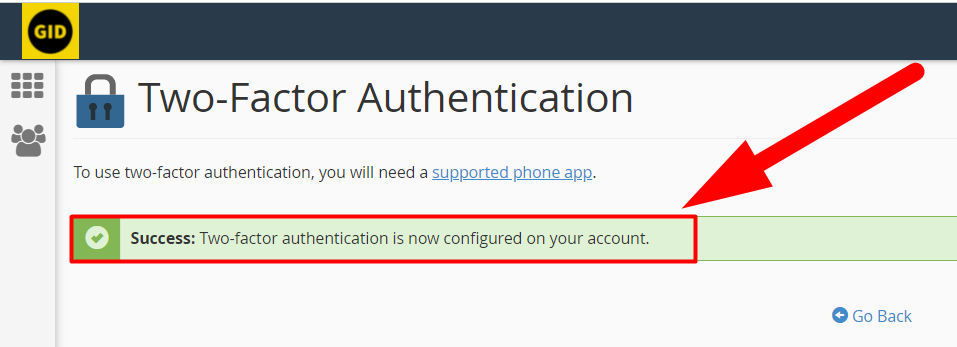
That’s it.
Also See:
You’ve successfully enabled two-factor authentication for your cPanel account. Once, the two-factor is configured, you’ll be automatically logged out from your cPanel account, and you’ll be asked to enter an authentication code to access your cPanel account.
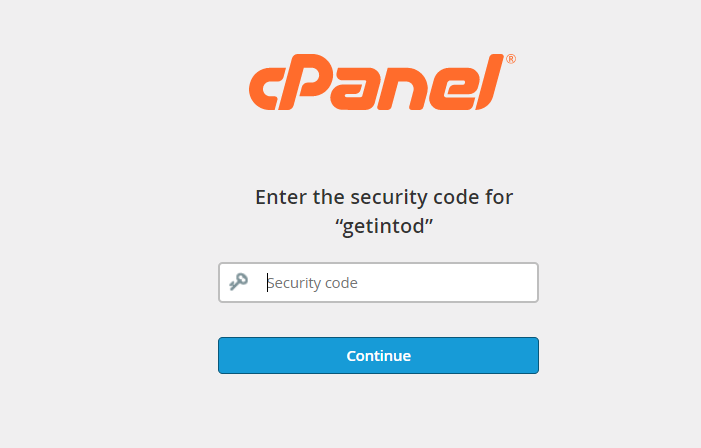
I believe that now you know what you have to do. You can easily enter the security code from the authenticator app that you’ve installed on your mobile.
Just enter the security code from the Google Authenticator App, and hit the Continue button.
That’s it.
You’ve successfully enabled the Two-Factor Authentication in your cPanel account. Now, let’s discuss how to disable it.
Disable Two-Factor Authentication
You can easily remove/disable two-factor authentication from your cPanel account by following the below steps:
- Log into your cPanel account.
- Navigate to the SECURITY tab and click on the Two-Factor Authentication option.

Two-Factor Authentication Section - Hit the Remote Two-Factor Authentication button.

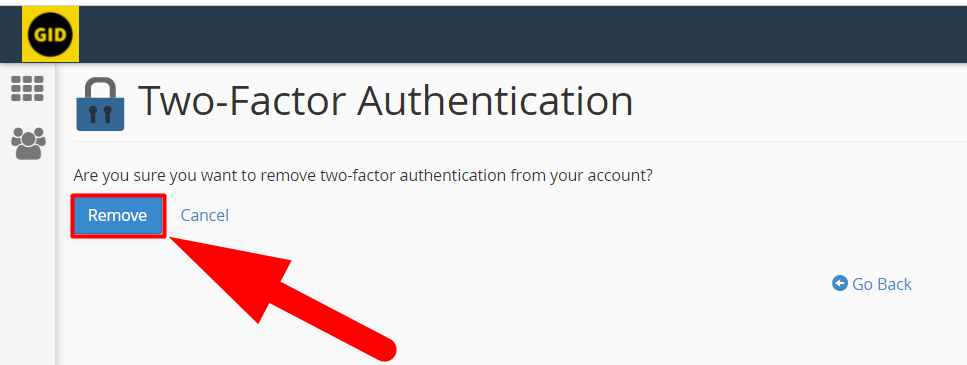
Remote Two-Factor Authentication Button - It’ll ask you for confirmation, hit the Remove button to finally remove the Two-Factor Authentication from your cPanel account.

Remove 2FA - That’s it. You’ve successfully removed Two-Factor Authentication from your cPanel account.

Two-Factor Authentication Removed Successfully
That’s how you can easily enable and disable two-factor authentication from the cPanel itself. I hope you liked this article, if not, you can hit the comment section to point out your confusion. Other than this, you can visit Redserverhost.com and open free chat support. Our expert technical team will be happy to assist you. We also offer a variety of hosting plans such as Shared Hosting, Dedicated Hosting, or Reseller Hosting. If you’re looking for the Best Web Hosting Provider that can fit your budget, just go with Redserverhost.com as we’re one of the Cheapest Hosting Providers across the Internet.
Additionally, you can follow us on Facebook and Twitter for any further inquiries and suggestions. We always appreciate suggestions.
