
Website security has a vital role in your website’s overall health. Where you can protect your website and its data by some other methods but, they won’t protect your website from external attacks. Happily, website security can be hardened with CloudFlare Security Support. In this article, we’ll walk you through a Complete Guide to Create & Setup CloudFlare on your Website. We’ll also discuss some major benefits of using Cloudflare on your Website. Let’s dive right in!
What is Cloudflare? – (A Brief Introduction)
Cloudflare is a high-tech security company that offers a wide range of website security & performance services. It will protect your website from Distributed denial of service (DDoS), Web Applications Firewall (WAF), and many other external attacks. It also enhances your website speed from the custom Content Delivery Network system. You can take your pages to the next level with Cloudflare’s CDN capabilities. Additionally, Cloudflare is one of the first to offer free SSL for websites.
Related Article =〉 What Changes Should Be Done In Cloudflare While Changing Hosting?Cloudflare has a variety of worth prices but you can go with the Free plan if you’re on a tight budget. More than 30 Million websites are already being protected by Cloudflare and increasing. Let’s dive into the practical steps to create & configure Cloudflare on your website.
Create & Setup the Website on Cloudflare
You can easily create a Cloudflare account and protect your website using Cloudflare by following the below steps:
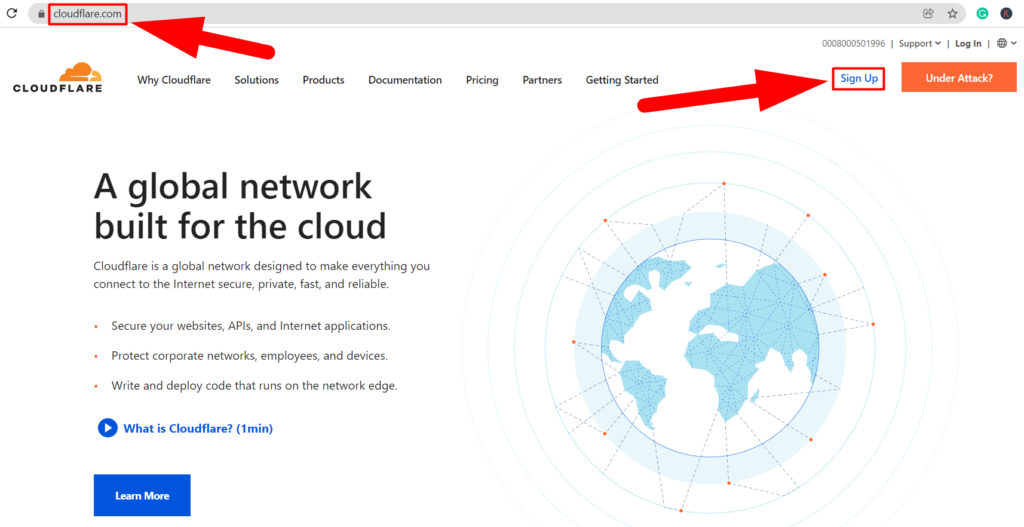
- Open Cloudflare.com and click over the Sign-up button from the top-right corner.

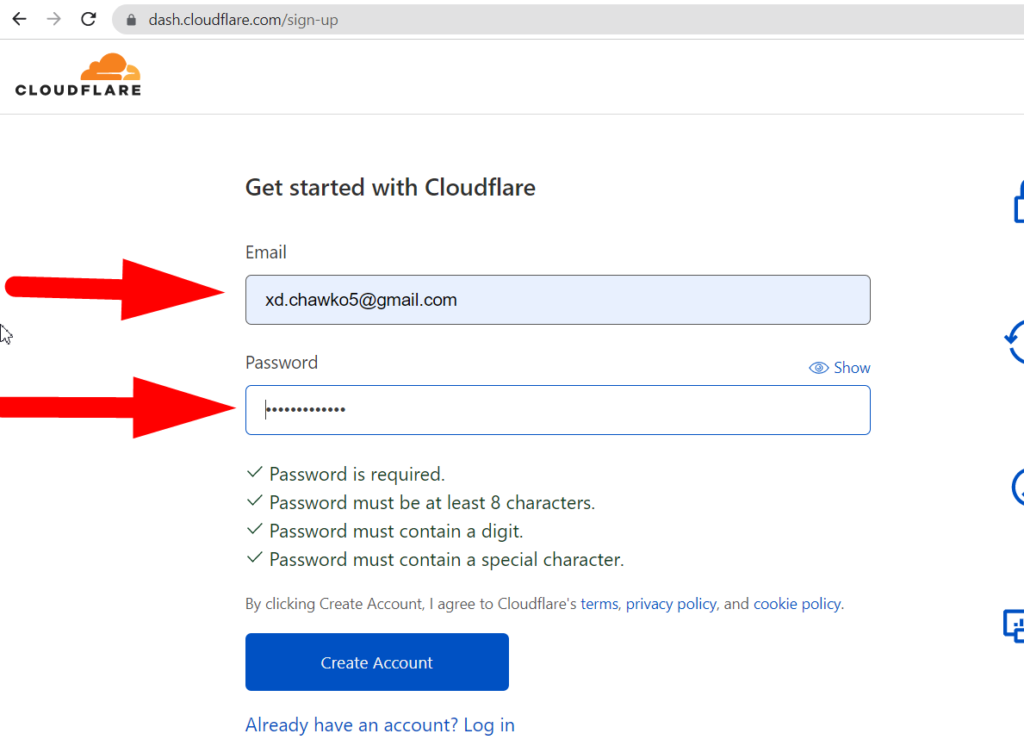
- Create your Cloudflare account by entering the Email & Password.

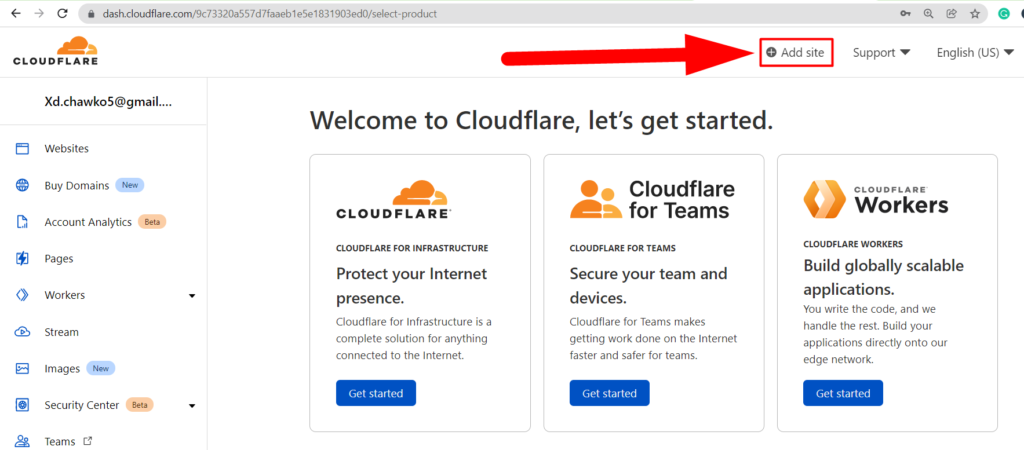
- You’ll jump to Cloudflare’s dashboard section. Click over the Add Site button from the top.

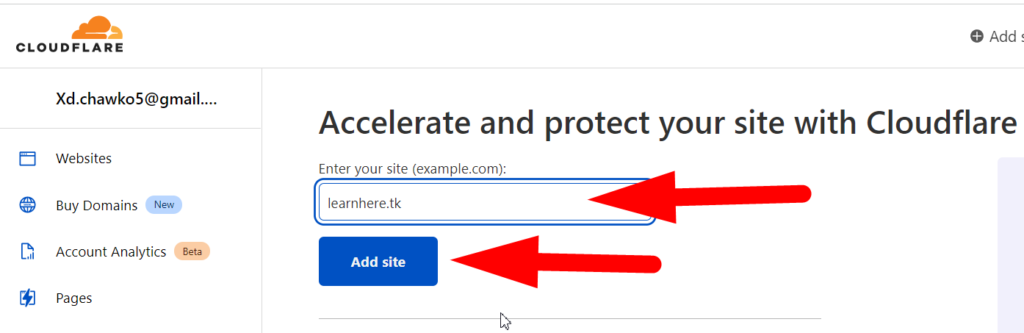
- Enter your website name and hit the Add site button.

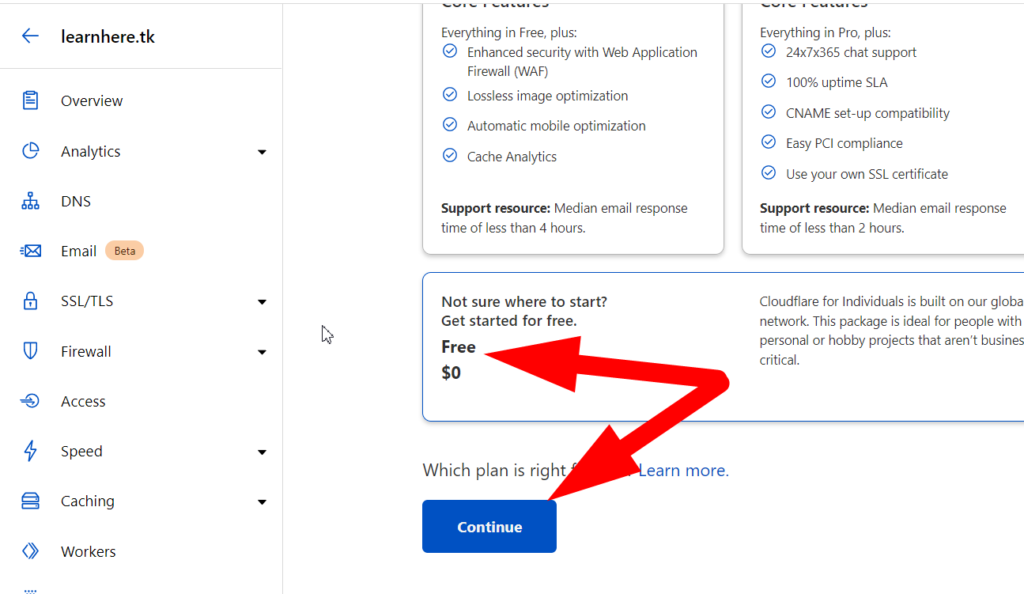
- Select the Free Plan and hit the Continue button.

Now you’ll be jumped to the DNS Records section. Open a new tab, type intodns.com, enter your website name, and hit the Report button.
All the DNS-related entries will be shown up there. As you can see in the primer image, my parent nameservers are from Redserverhost.com. Now let’s go back to the Cloudflare DNS Review tab.
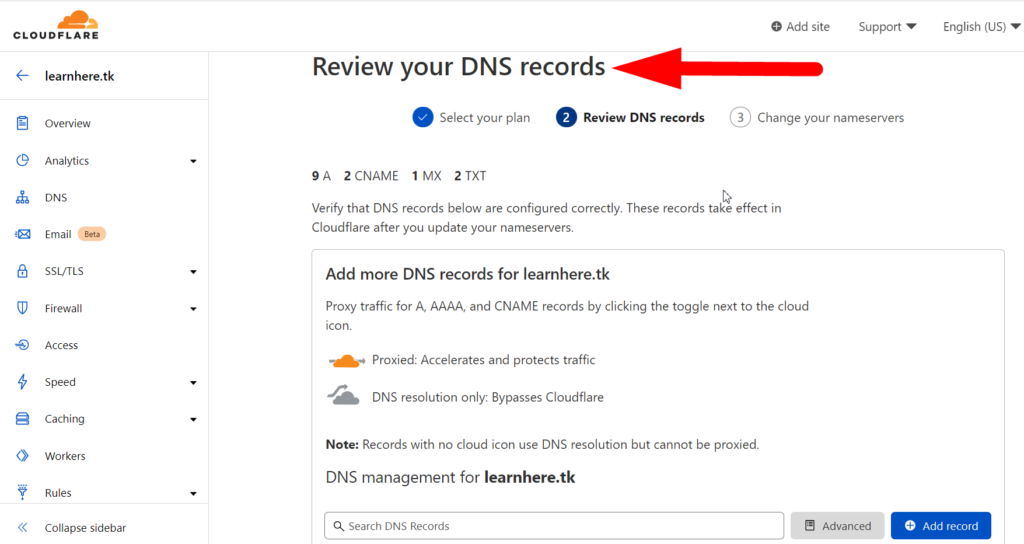
- It will ask you to Review your current DNS Records.

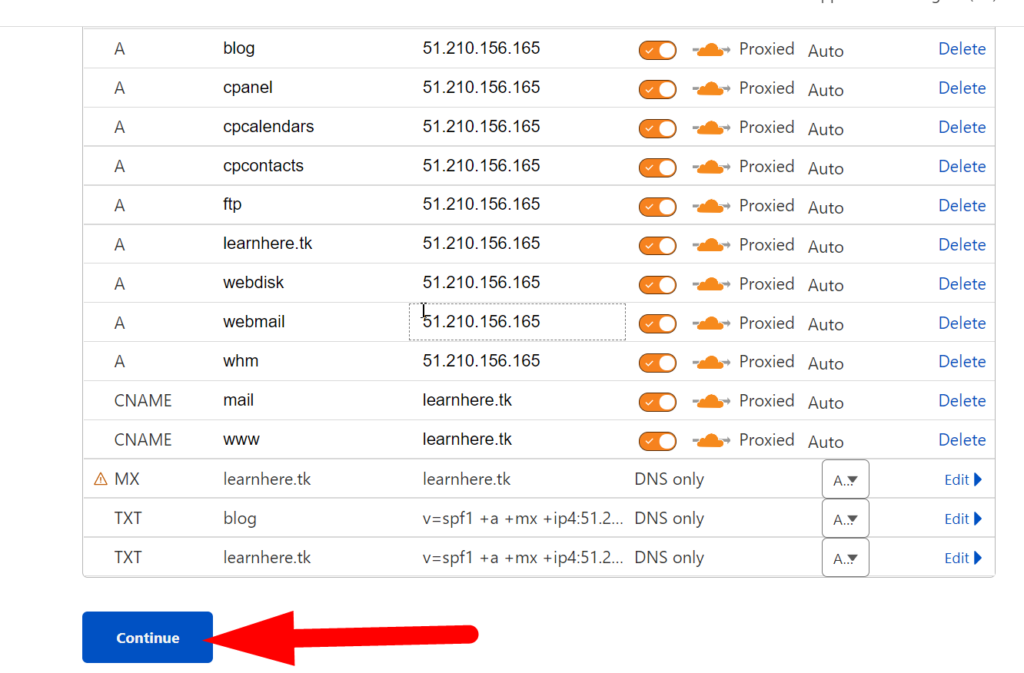
- Scroll down a bit, review all the present DNS records of your website & hit the Continue button.

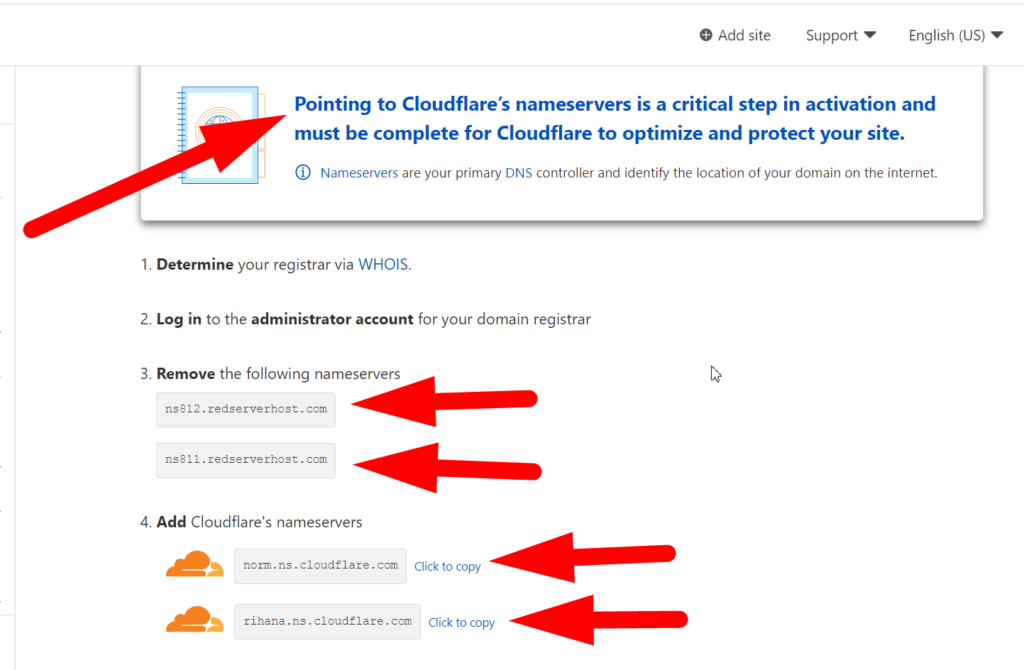
- Cloudflare will show the current nameservers of your website. Additionally, they’ll give you their custom nameservers that you’ll have to replace with your existing ones.

Replace Your Current Nameservers With Cloudflare’s Nameservers
- To change the nameservers, you have to log into your domain manager. For me, I’ll log into my freenom domain manager as I’m using a free domain.
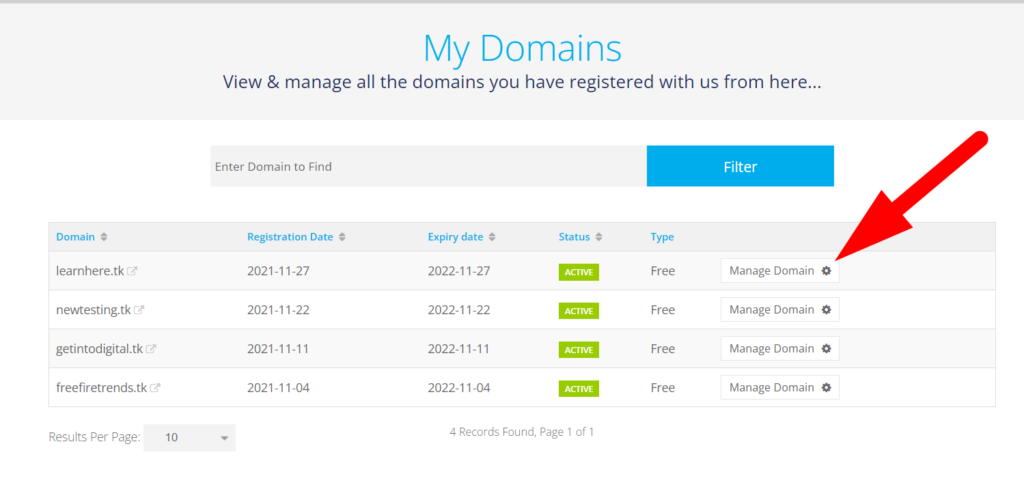
- Log in to your domain manager section & click over Manage Domain.

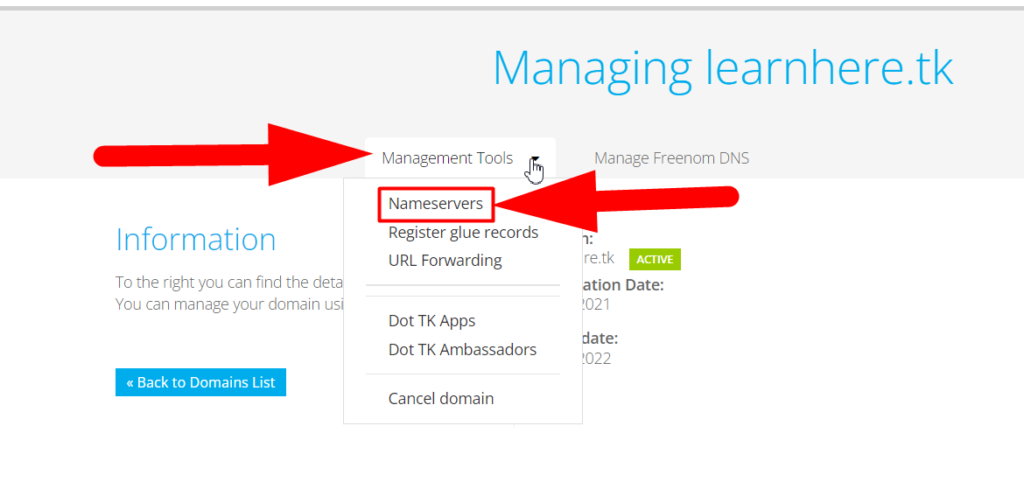
- Open the Nameservers section.

- There you’ll be able to see your parent nameservers, replace those nameservers with Cloudflare’s nameservers.

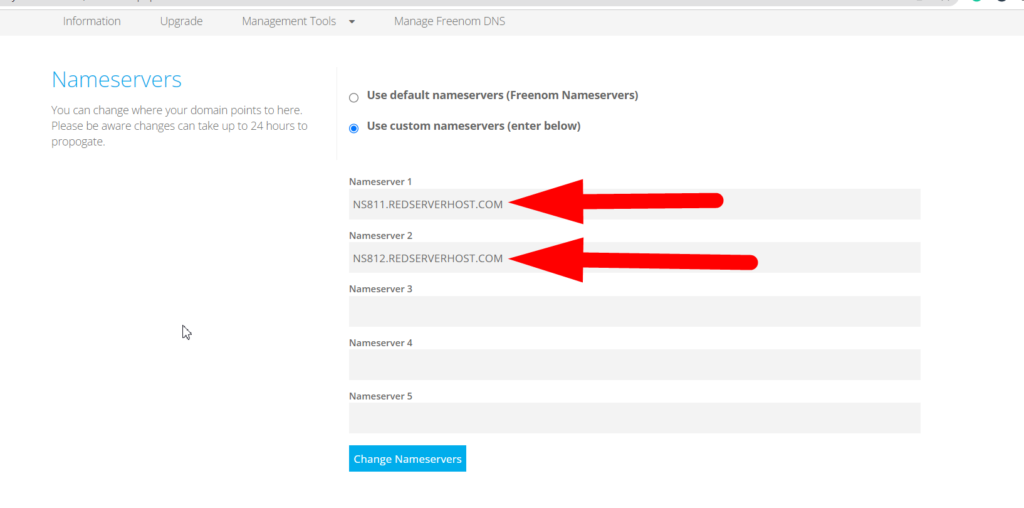
- Hit the Change Nameservers button to save the changes you made.


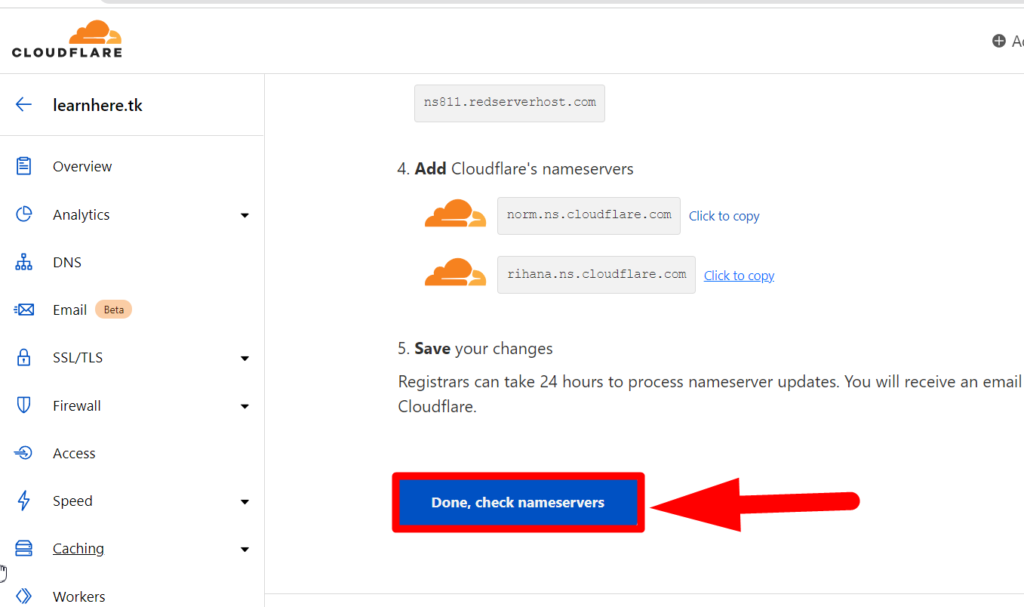
- As you’ve successfully changed your parent nameservers, move back to the Cloudflare DNS Review tab, scroll down to the bottom and click over the Done button to test your recent changes.

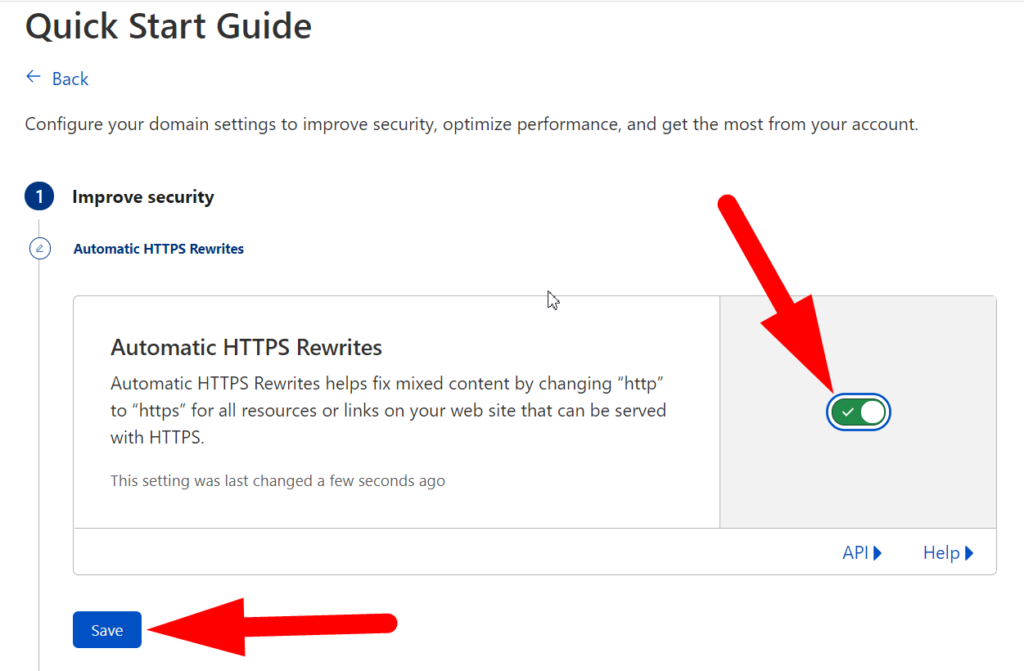
- Click over the Get Started button to start the Quick Guide.

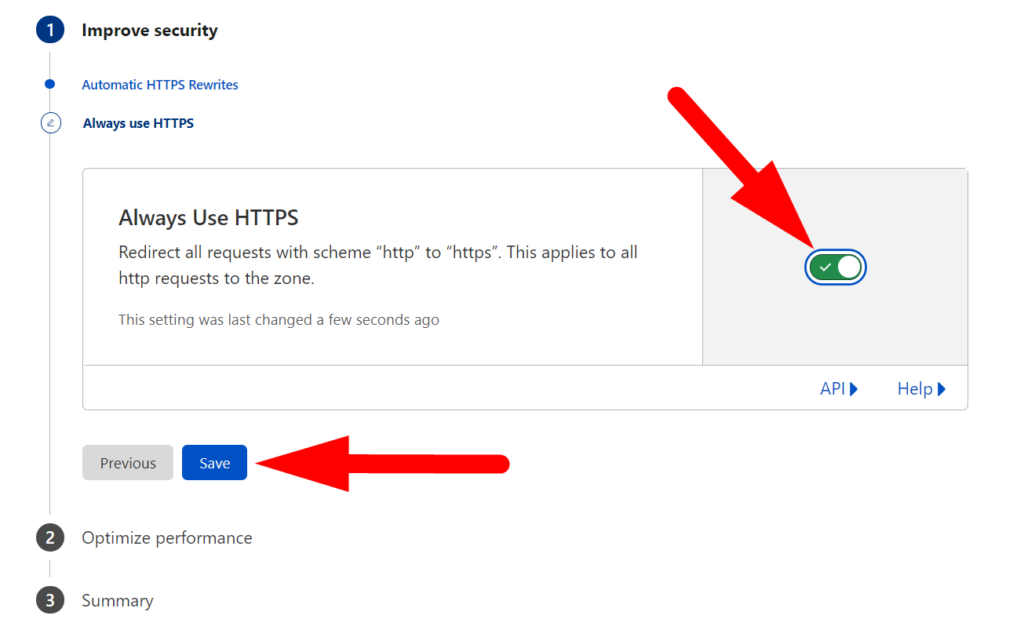
- Tik the checkbox and hit the Save button to always force redirect your website to HTTPS.
- Again, tik the checkbox and click over the Save button.

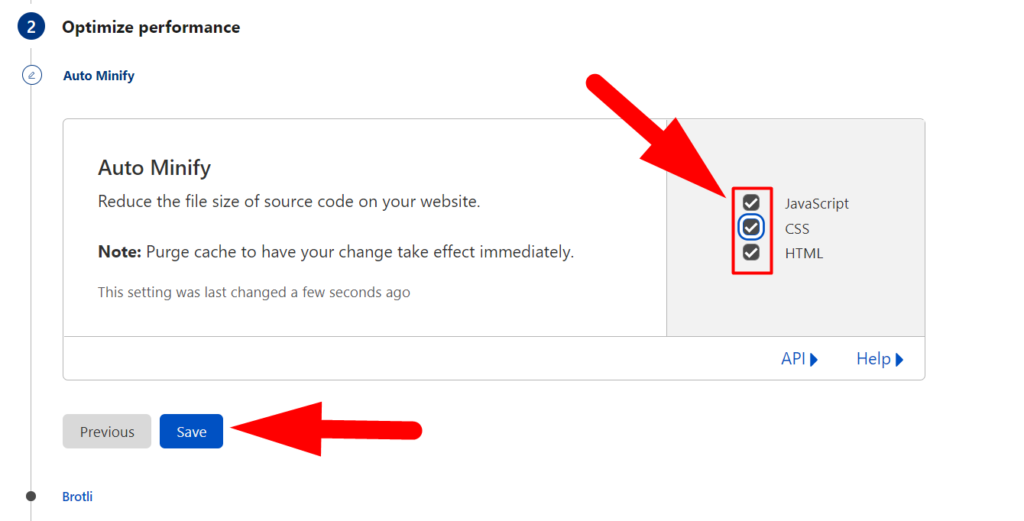
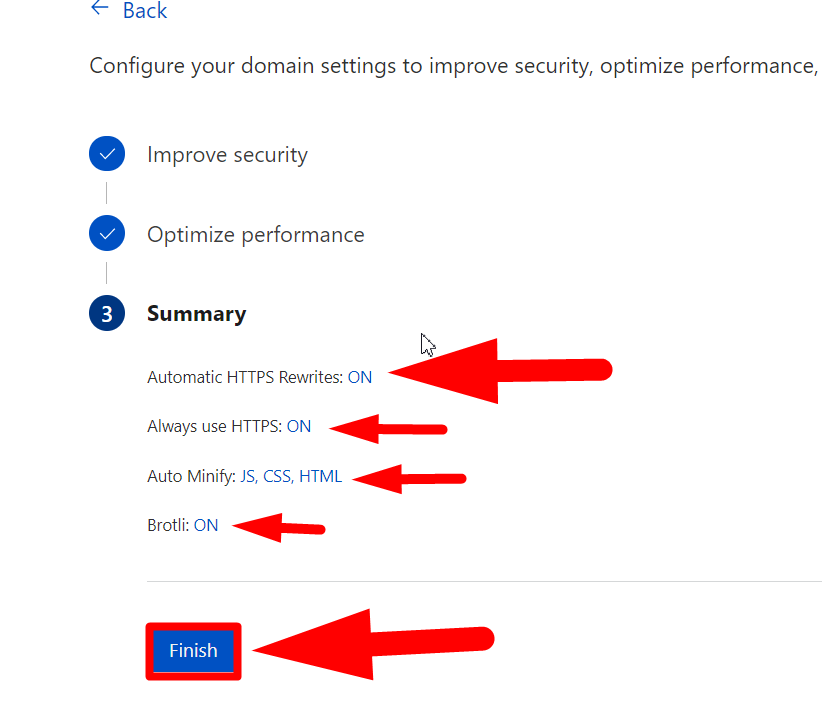
- If you want your website to minify the codes, remove all the garbage codes from your website, Tik all three checkboxes, and hit the Save button.

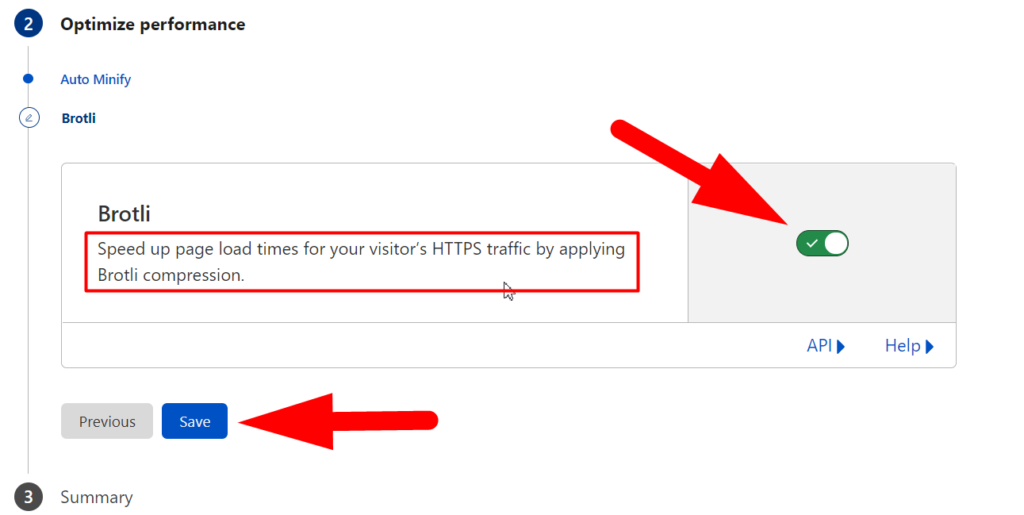
- If the Brotli option is enabled, it will increase your website’s loading speed by compressing the page file. Enable the Brotli option and hit the Save button.
- View your recently done tasks from the Summary section & finally, click over the Finish button to set up Cloudflare on your website.

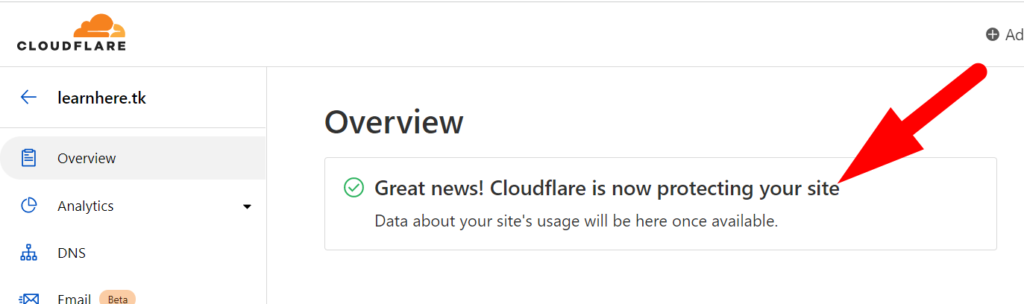
- Now visit Intodns.com and view your website Report again. You’ll see that the nameservers & IP of your website are changed to Cloudflare’s nameservers & IP.


- That’s it. You’ve successfully set up Cloudflare on your website. However, It doesn’t end here. There are many other things that you can do for the betterment of your website.

Other Free Benefits Of Cloudflare
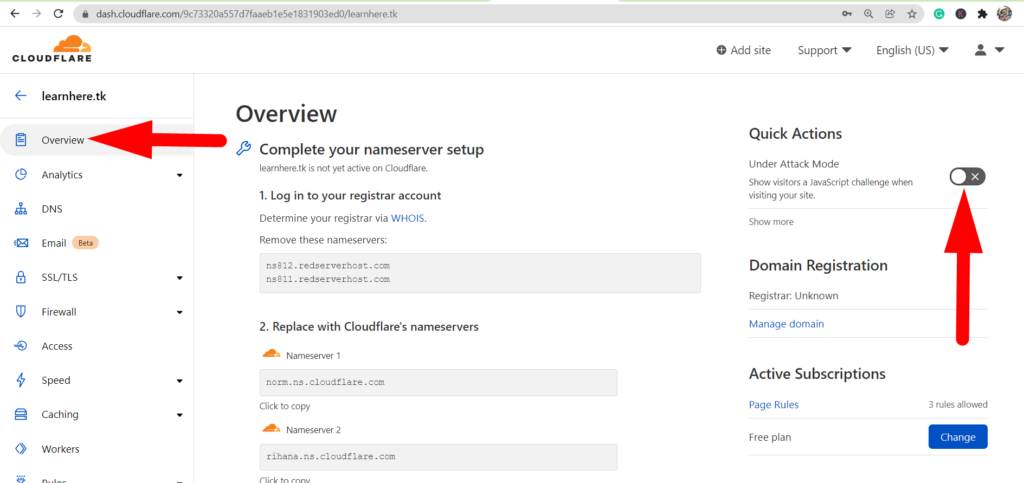
Website Protection :
You can perform several more tasks in Cloudflare to enhance your website security & performance. You can easily activate Under Attack Mode if you found any security breaches or malicious activity on your website externally.
Analyze your Website :
Deeply analyze your website with the help of the Analytics option present inside Cloudflare. You can easily take a deeper look at your website’s performance, security, traffic, and others.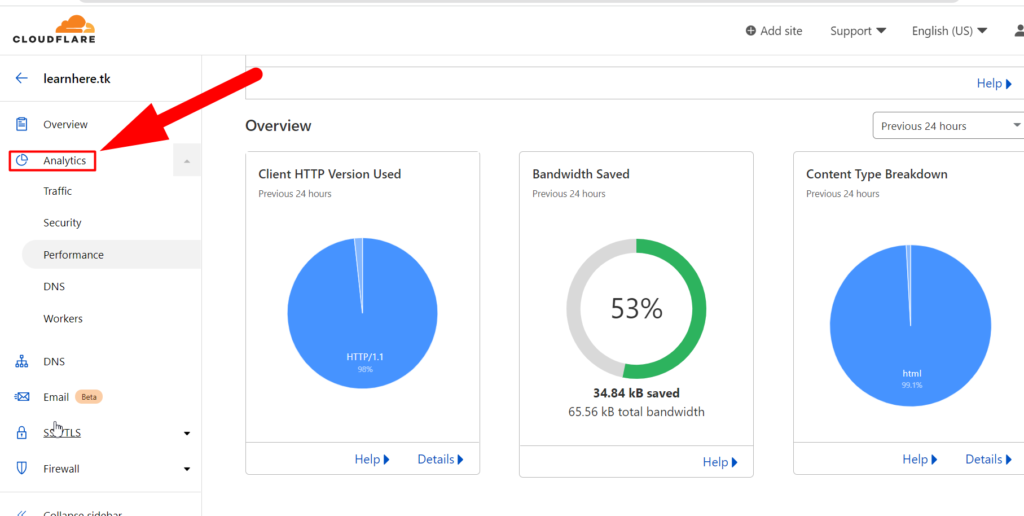
Manage DNS Entries :
You can directly manage your DNS entries from Cloudflare & hide your original DNS information such as; IP address & nameservers by using Cloudflare’s Proxied technology.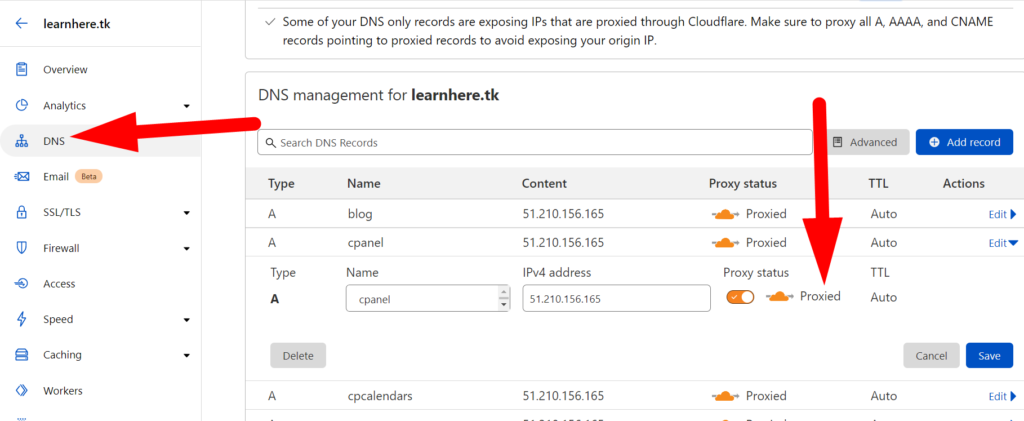
Customize the SSL Encryption :
You can easily customize the SSL priority to Flexible to Strict. Using Flexible SSL encryption is mostly recommended. However, you can use Full & Strict SSL Encryption if you don’t have any existing SSL on your website.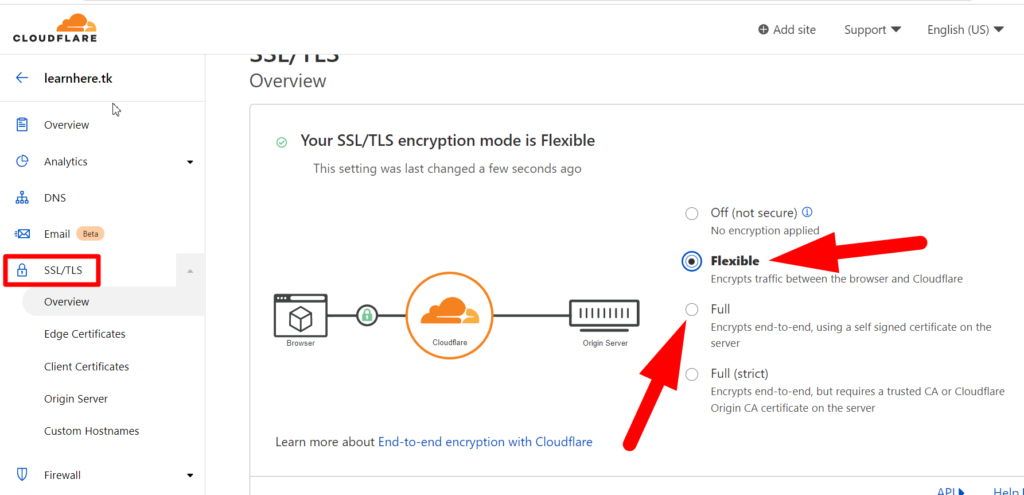
Extra Security With Firewall :
The Firewall events option is an important section of the Firewall to add an extra layer of security to your website by implementing the deep firewall for any specific IP, user, Country, etc. You can easily block/unblock any IP, Country, Host, Path, user agent, etc from accessing your website.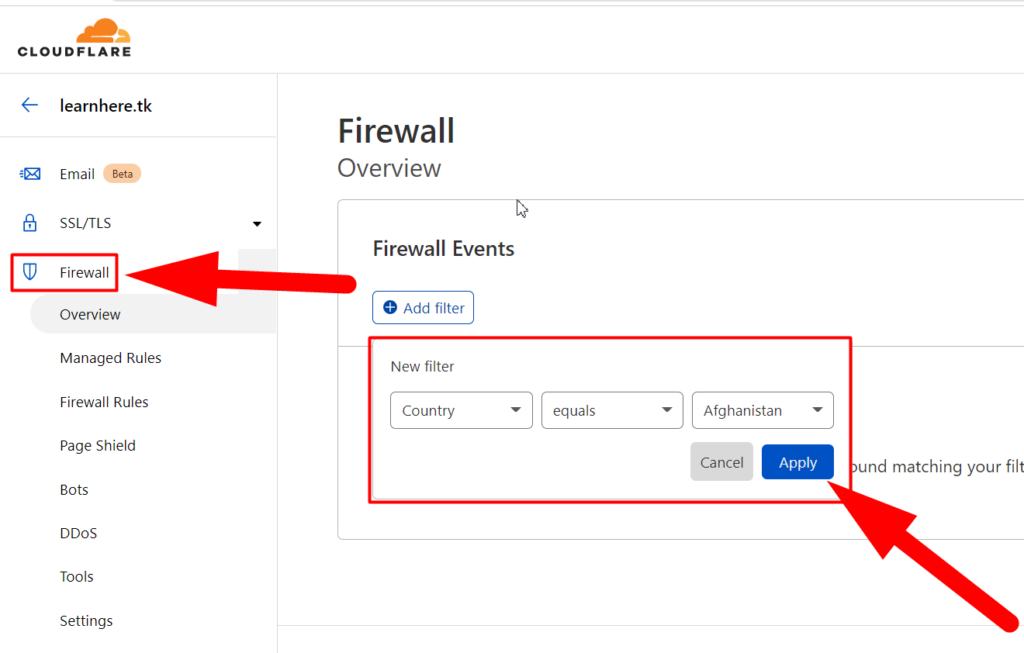
Other useful features are still left to describe but, you can start with these only.
Conclusion :
I hope now you can easily enhance your website’s performance & security with the help of Cloudflare. Additionally, you can Analyze your website Cache, customize the SSL settings & DNS, and do many other tasks.
Cloudflare was one of the first Free SSL & CDN providers that rapidly enhanced the Security & Performance of websites at the same time. It was established in 2009, and now, Cloudflare has more than 200 data centers across the world & blocking billions of DDoS threats daily.
Related Article =〉 How to create Subdomain and activate it on Cloudflare?Related Article =〉 How to eliminate/minimise downtime when adding your domain to Cloudflare?