With the help of Feature Lists, you can assign or restrict features to each cPanel account. Feature lists can be created from the Feature Manager option present inside the Packages section. In this article, we’re gonna walk you through the uses of Feature lists in WHM and its benefit.
A feature option is only available in Reseller Hosting, Dedicated Hosting, and VPS Hostings. A Shared Hosting user cannot use Feature lists as there is no WHM in Shared Hosting plans.
Several features can be assigned/declined in the feature lists option in WHM. I’m mentioning some of them below:
- FTP Settings
- File Manager
- Cron Jobs
- Webmail
- PhpMyAdmin
- MySQL
- Password & Security
- Subdomains
- Server Information
- Addon domains
- Email Accounts
- Advance Zone Editor
- Images
- JetBackup
These are a small list of features that you can assign from feature lists in WHM. Create a feature list to assign your desired features to cPanel.
How To Create a New Feature List
Follow the following steps to create a new feature list from WHM.
- Log into WHM.
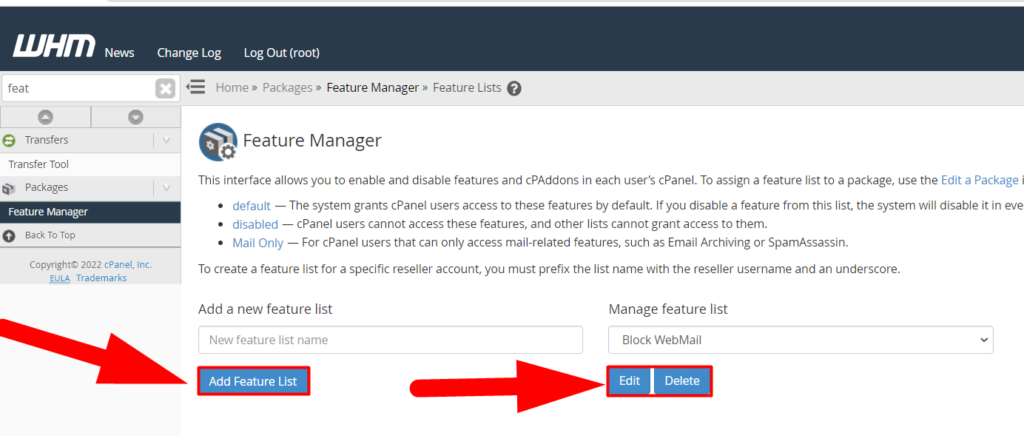
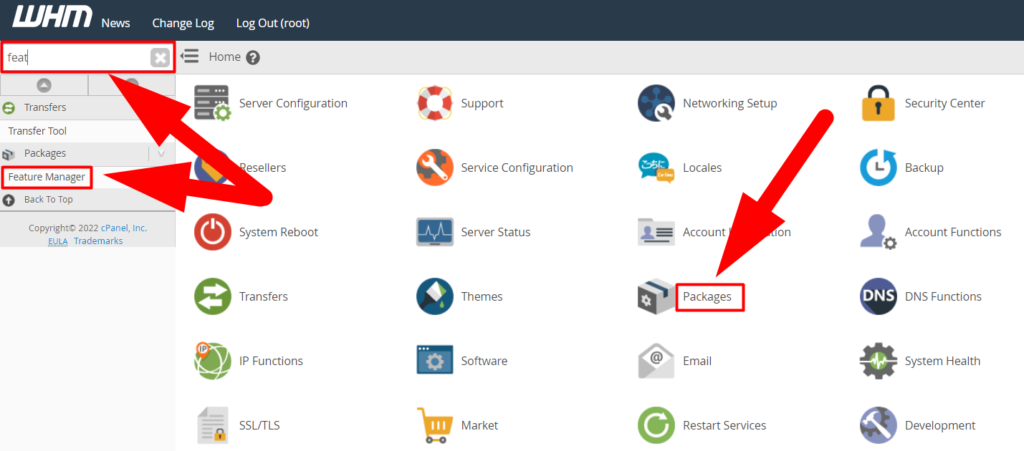
- Either type Feature in the search bar and click “Feature Lists” from the result or simply navigate to the Packages > Feature Manager
 WHM Feature Manager
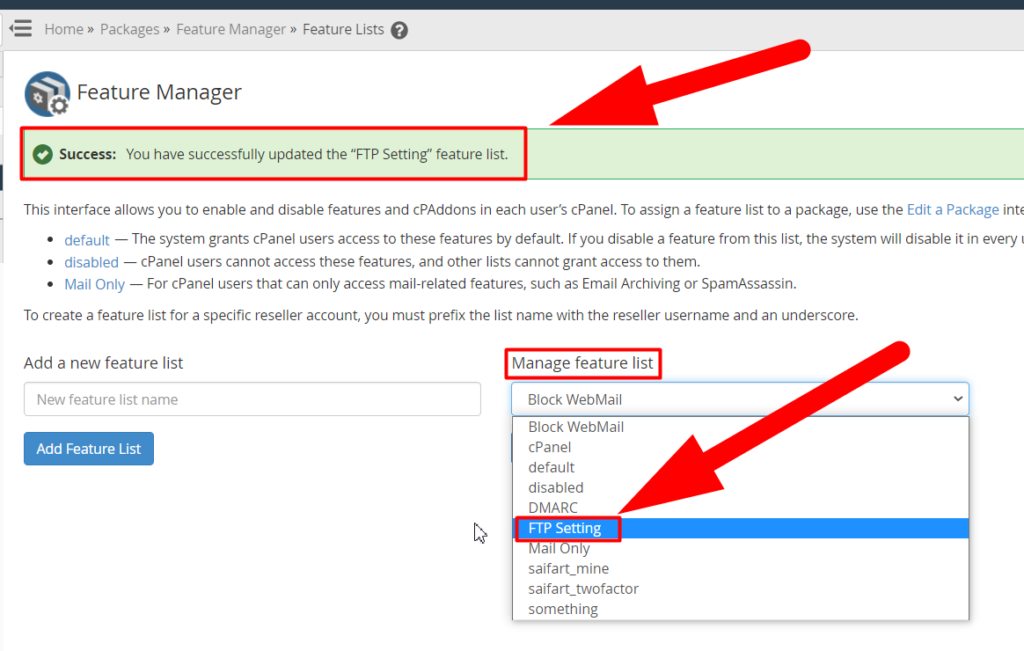
 - You can Edit and Delete existing feature lists from the right section or create a new feature list by clicking on the Add Feature List button.

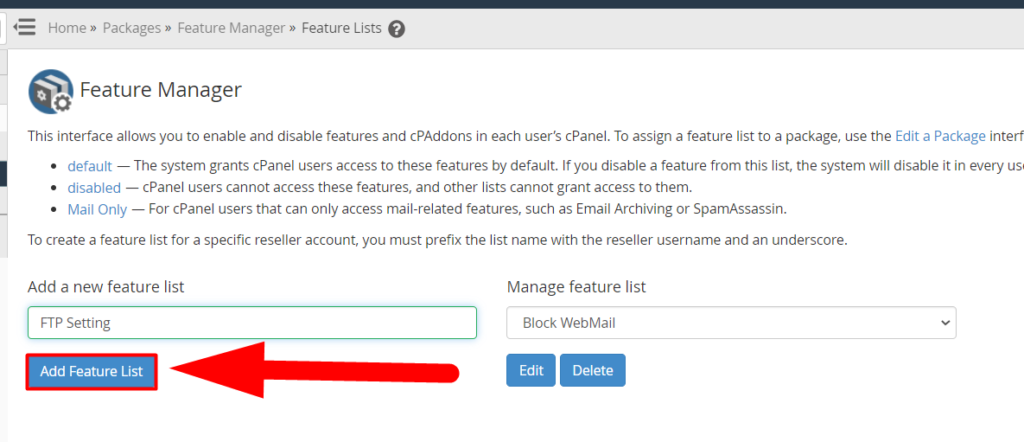
Add a new feature list - Type any suitable name for your new feature list. For example, I’m writing FTP Settings as I want to create a feature list where all the cPanel users won’t be able to view their FTP Settings.

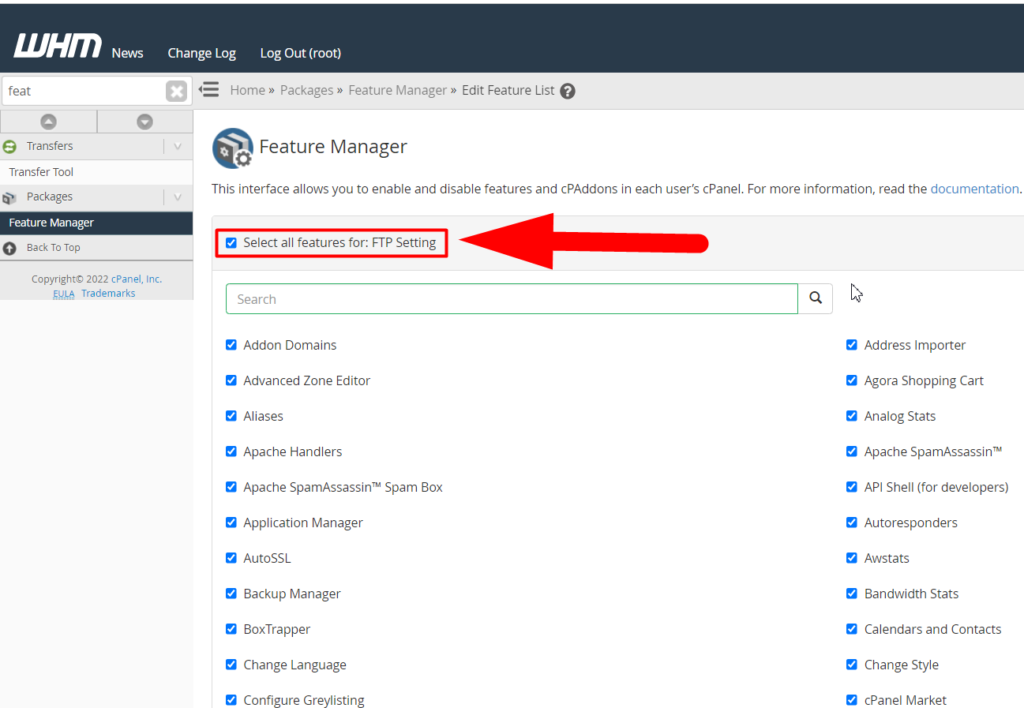
FTP Settings Feature List - Check the Select all features option as you only want to disable the FTP settings.

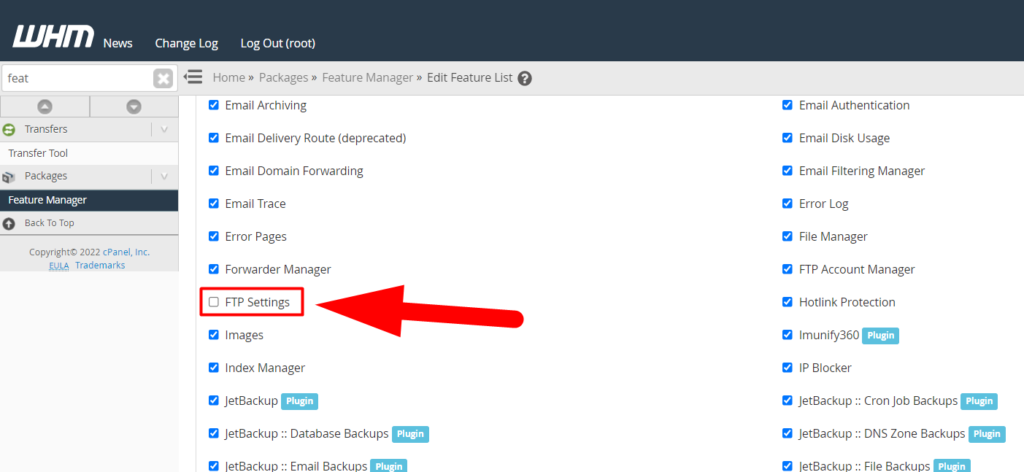
Select all for the FTP Settings option - Now scroll down and find the option you want to disable (FTP Settings).

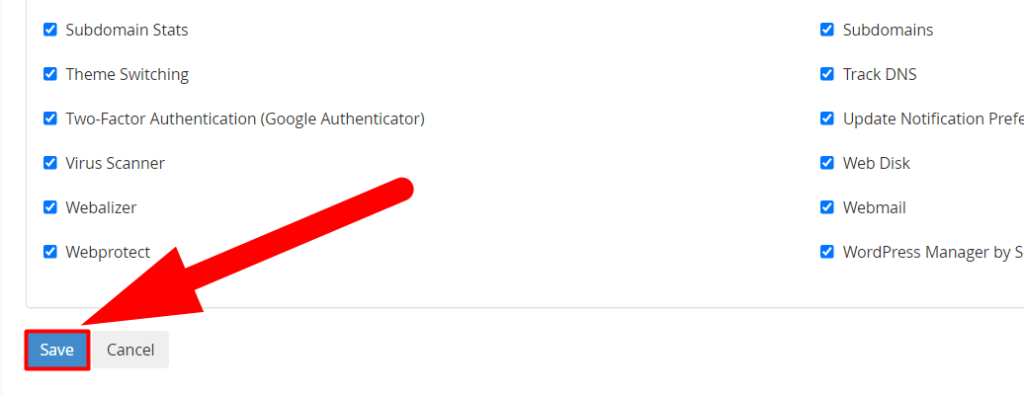
FTP Settings disable - Scroll down to the bottom and hit the Save button to create a new feature list.

Save to Create a new Feature list - You’ve successfully created a new feature list that can be viewed inside the Manage Feature List option.

How to assign Feature List to a cPanel account
As you’ve created a new feature list. The next step you might be thinking to do is to assign your cPanel users with these settings. Well, you can easily do it inside the Packages section itself. In short, to assign a feature list to a cPanel account, you’ll need to assign a feature list to a package, and then you can assign that package to a cPanel account.
How to assign Feature List to a Package
Follow the below steps to assign a Feature list to a Package:
- Log into WHM
- Navigate to the Packages section and click over the Edit Package option.
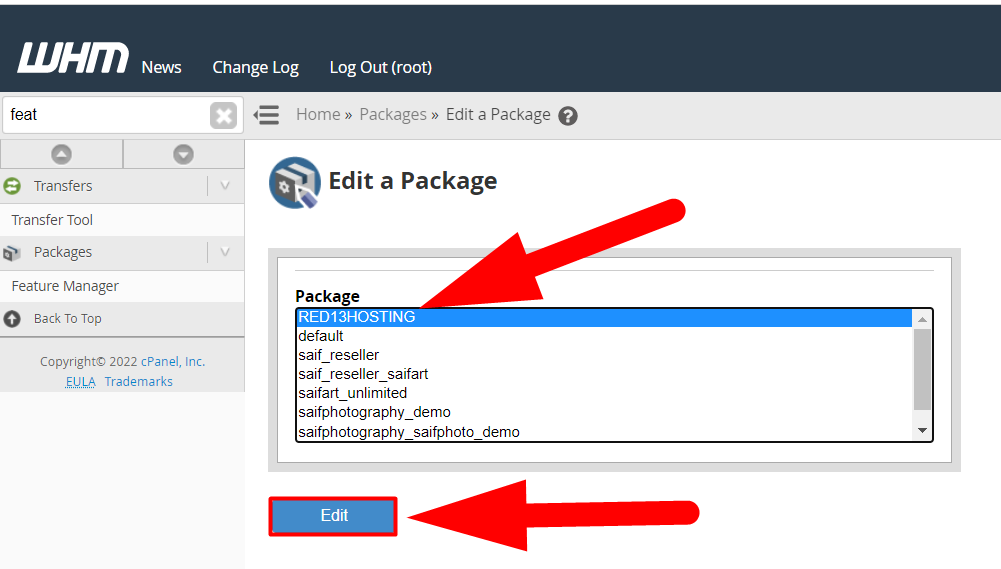
- Select the package you want and hit the Edit button.

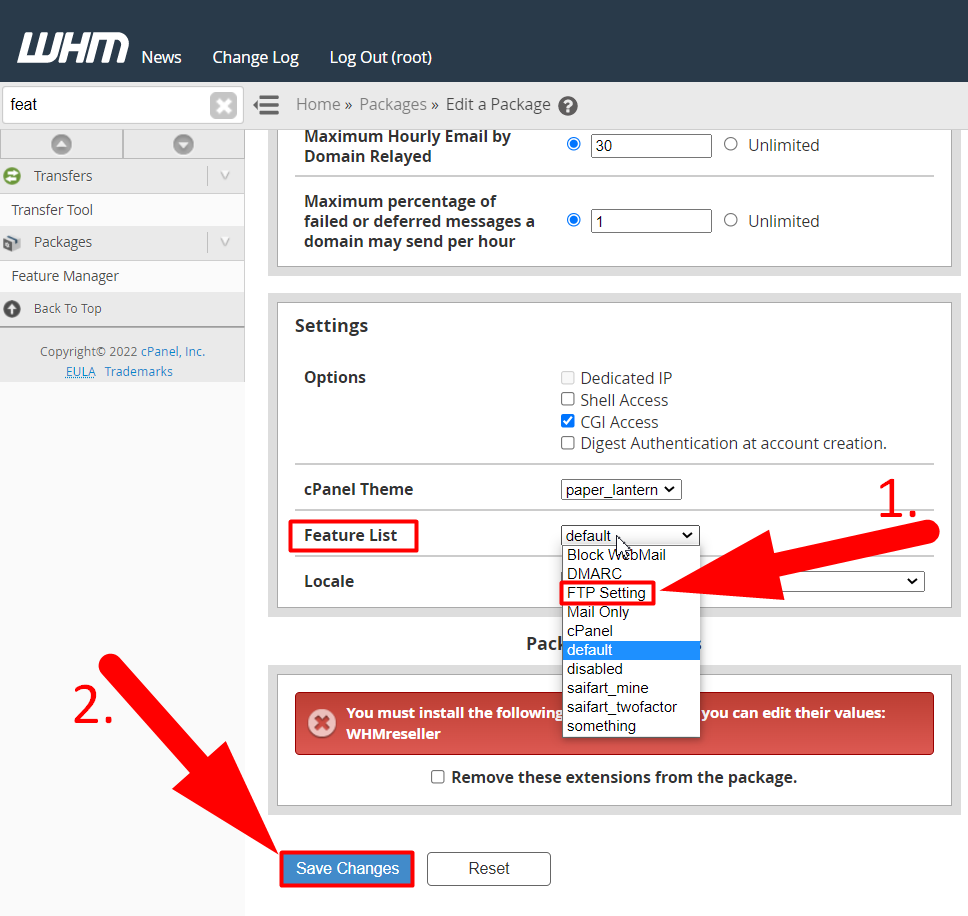
Edit a Package - Find the Feature List option, select the new feature list that you’ve recently created, and hit the Save Changes button.

Save the Package
That’s it.
That’s how you can assign a new feature list to a Package. Follow the below steps to change the cPanel package and assign your desired package.
How To Change the cPanel Package
Follow the below steps to change your current cPanel package:
- Log into WHM.
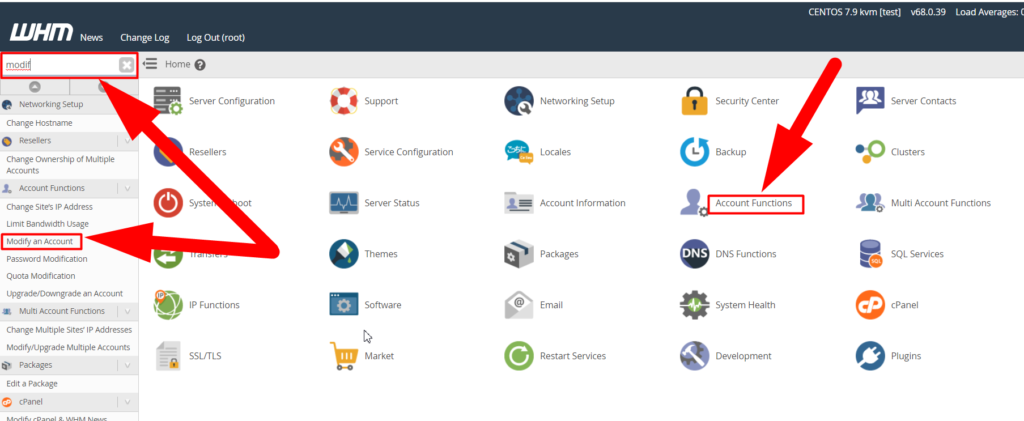
- Either type modify in the search bar and click Modify an Account from the result or simply navigate to the Account Functions > Modify an Account
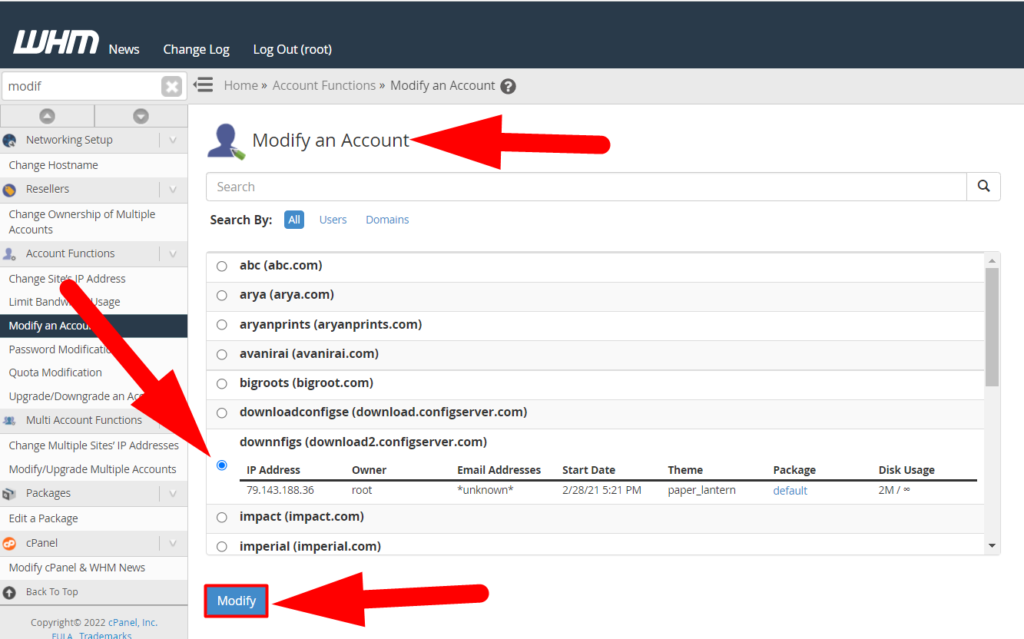
- Select the account you want to modify and hit the Modify button at the end.
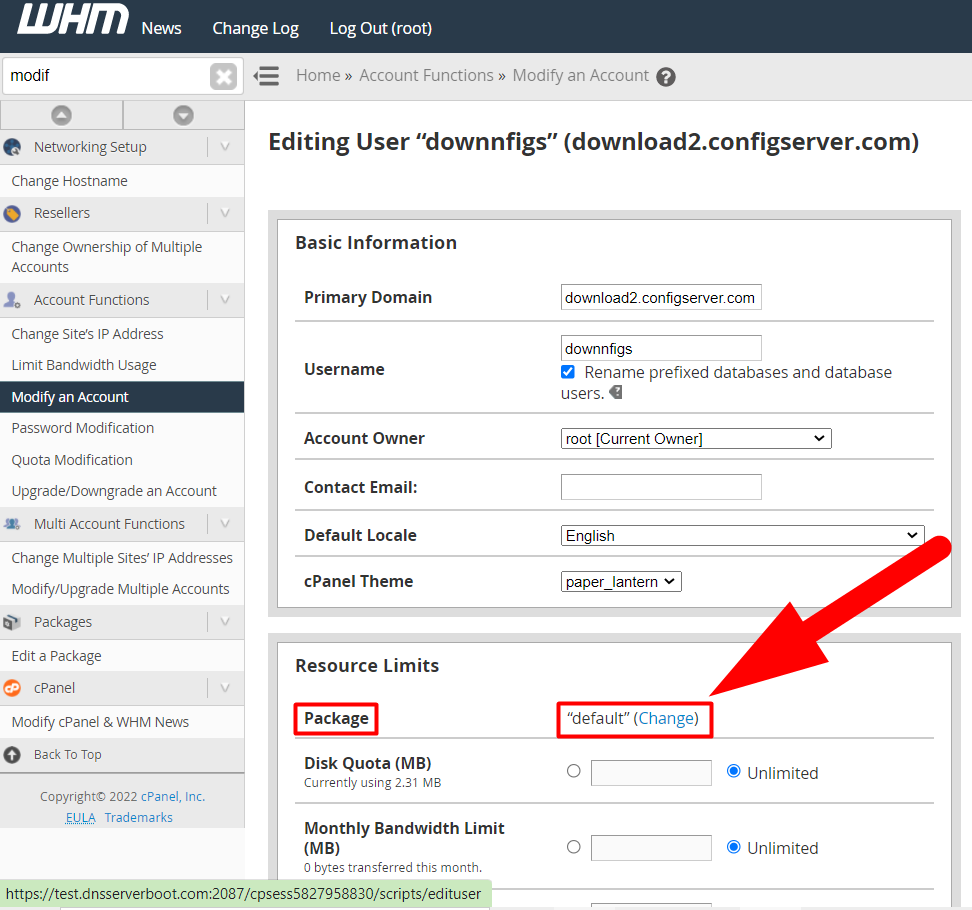
- Inside the Resource Limits section, hit the Change button present on the right of the Package tab.
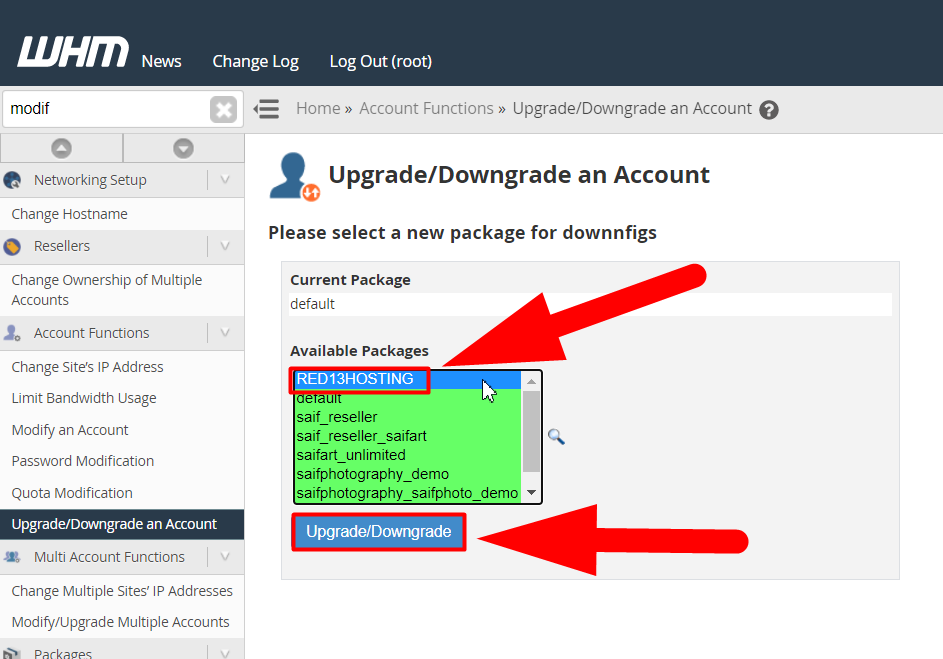
- Select that package in which you recently assigned the Feature list, and hit the Upgrade/Downgrade button.
That’s it.
You’ve successfully changed the cPanel package. For more assistance, you can visit Redserverhost.com and open free chat support. Our technical team will be happy to assist you. Moreover, for any further inquiries or suggestions, you can contact us on Facebook or Twitter.
 WHM Feature Manager