
Well, JetBackup offers several backup options such as Incremental Backup, Archived Backup, Compressed Backup, Etc. To automate these backup processes, we use the Backup Jobs option in JetBackup. If you don’t have JetBackup installed in your WHM, you can browse our previous tutorial to Install JetBackup in WHM Root and come to this post again, after installing the JetBackup.
So, I hope you installed the JetBackup. Let’s directly jump to the point now.
How to Create Backup Jobs via JetBackup
You can easily create Backup Jobs in JetBackup by browsing the Backup Jobs section in WHM root. However, you can’t create backup jobs without creating a Destination.
Let’s create the Destination first.
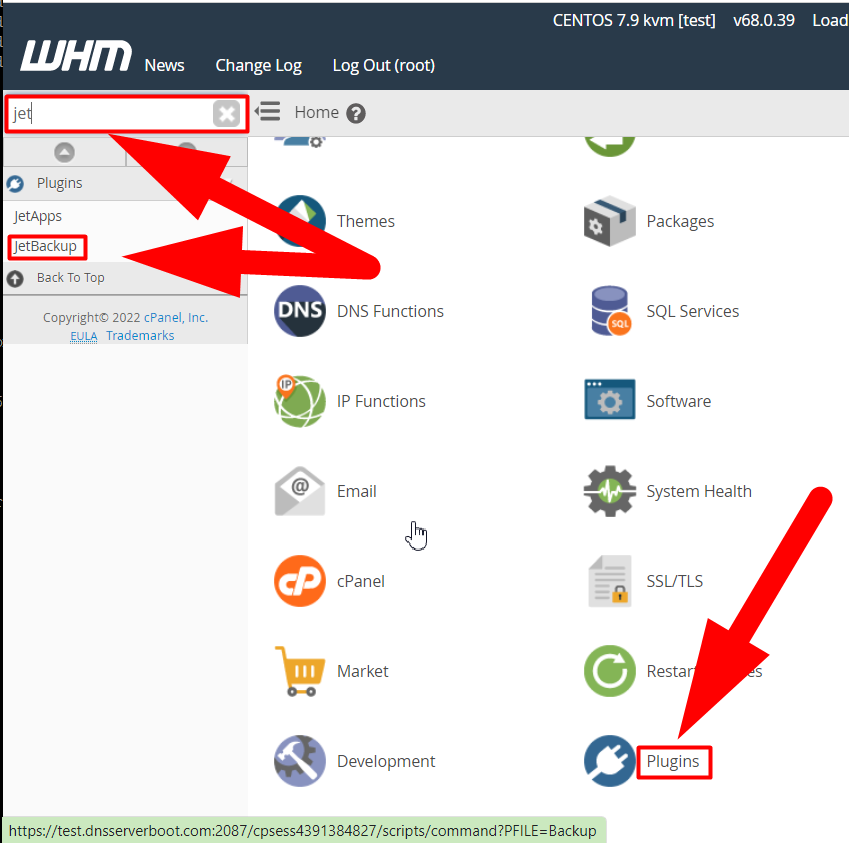
- First of all, log in to your WHM panel as a root.
- Either navigate to the Plugins > JetBackup or simply search Jetbackup in the search box and click on JetBackup from the result.
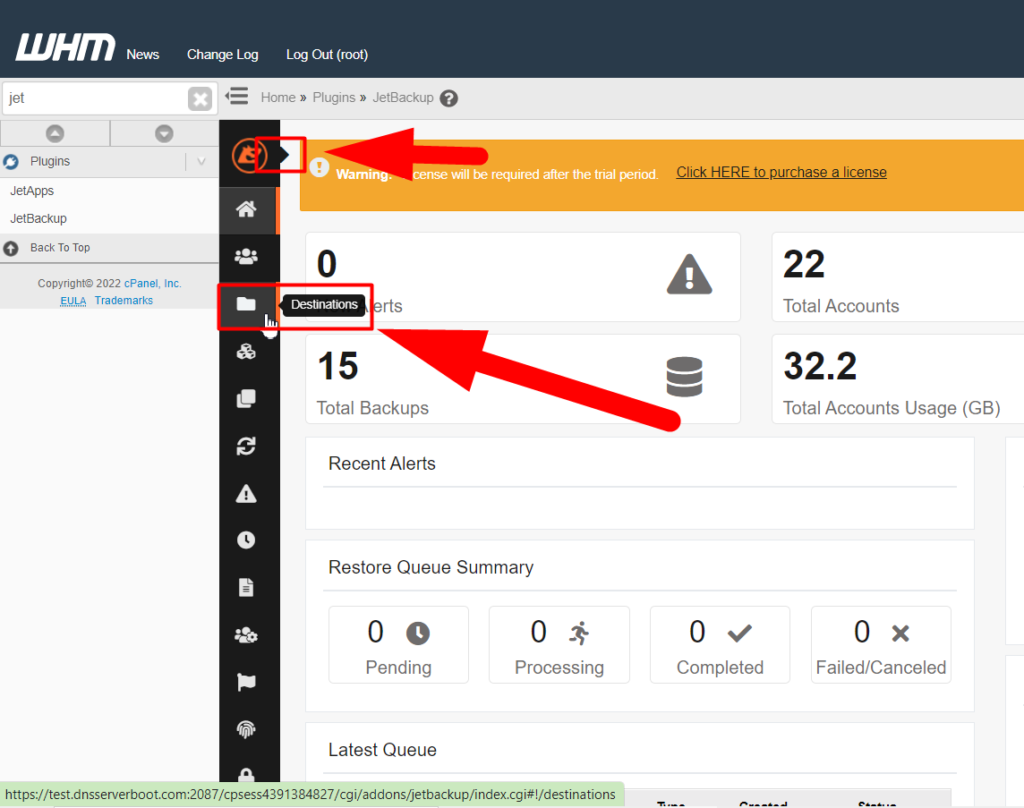
- Move inside the Destination tab.
Hit the top arrow (present beside the JetBackup logo) to maximize the option.
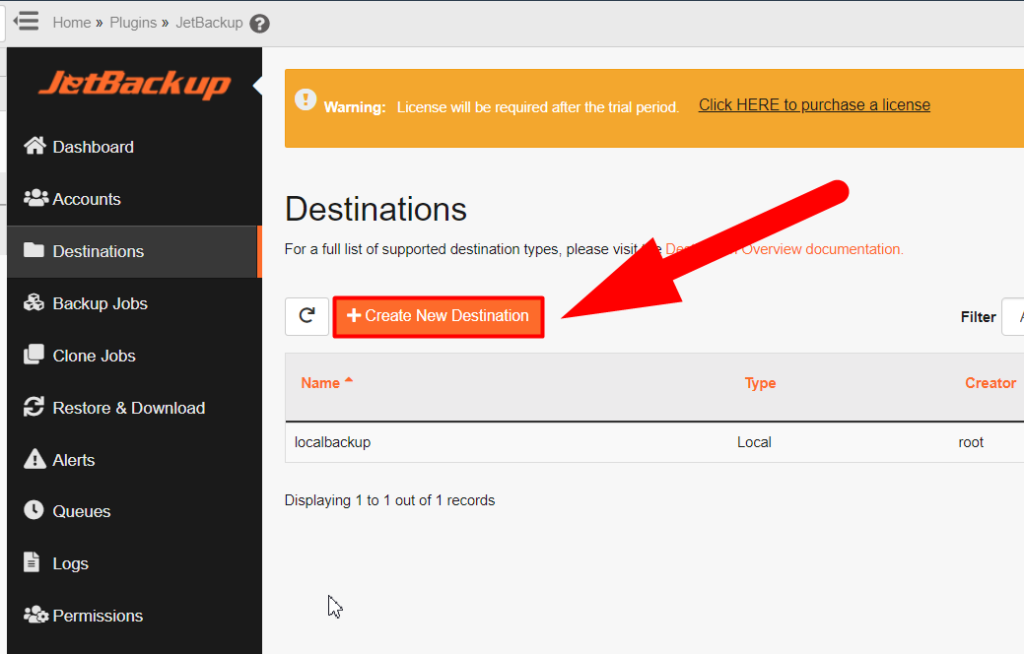
- Hit the Create New Destination button to create a new destination.
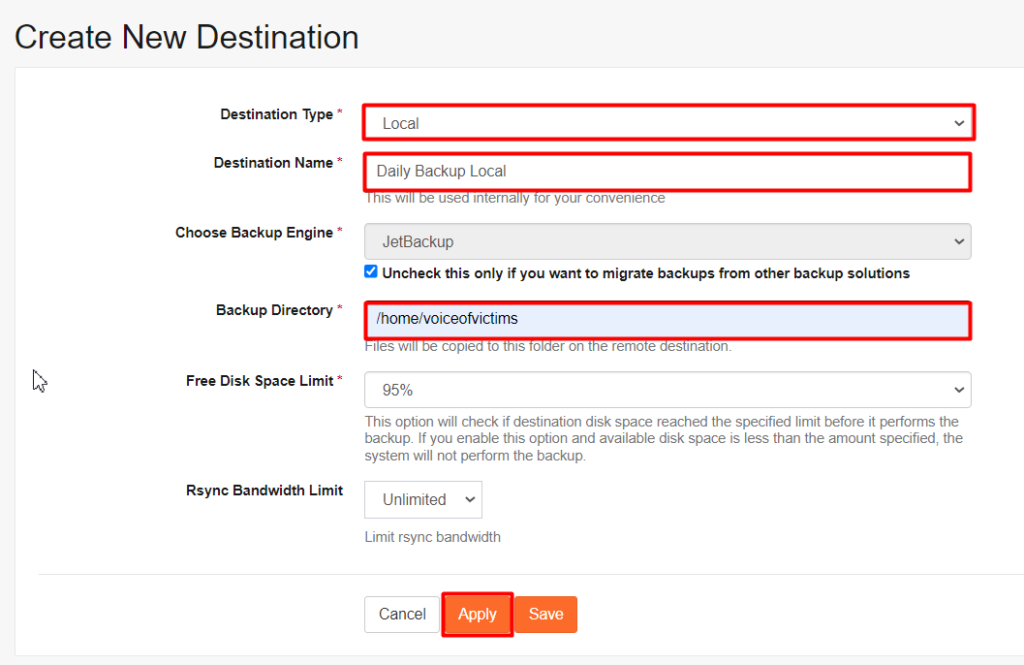
- Fill in some details like Destination Type, Destination Name, Backup Directory, Etc. I’ve selected the Destination Type as Local, but you can use other options such as SSH, FTP, SFTP, DropBox, Google Drive, Etc.
- Once done with the options, hit the Apply button to create the destination.
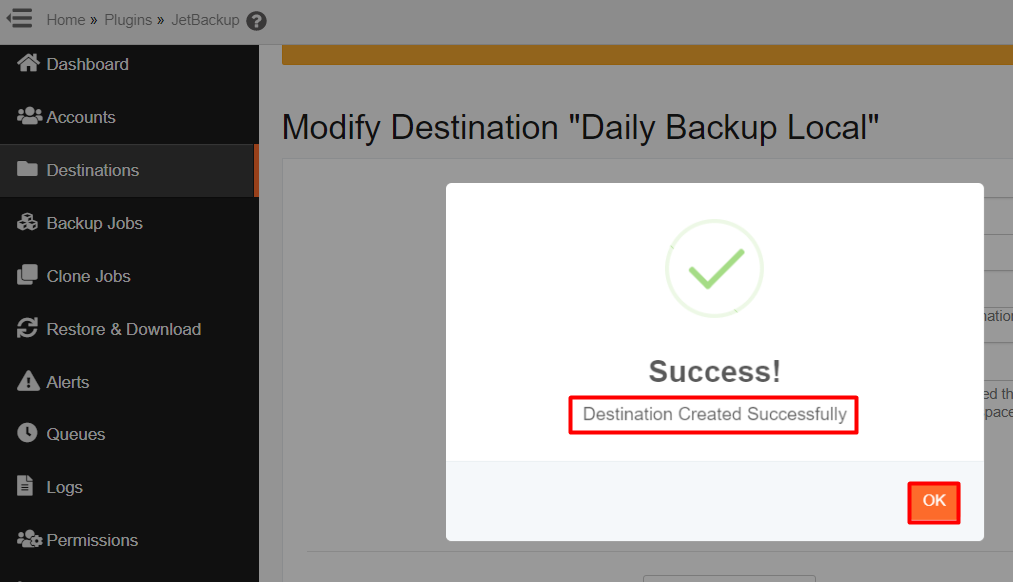
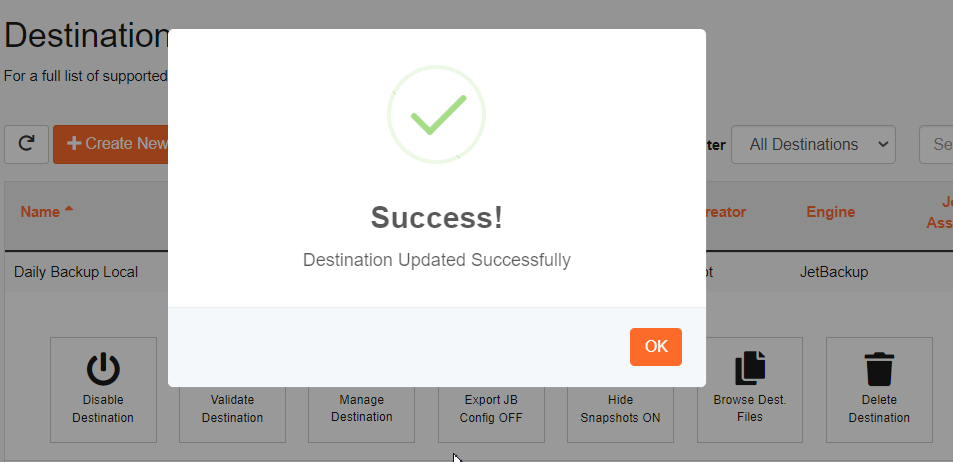
- A pop-up will appear like that:
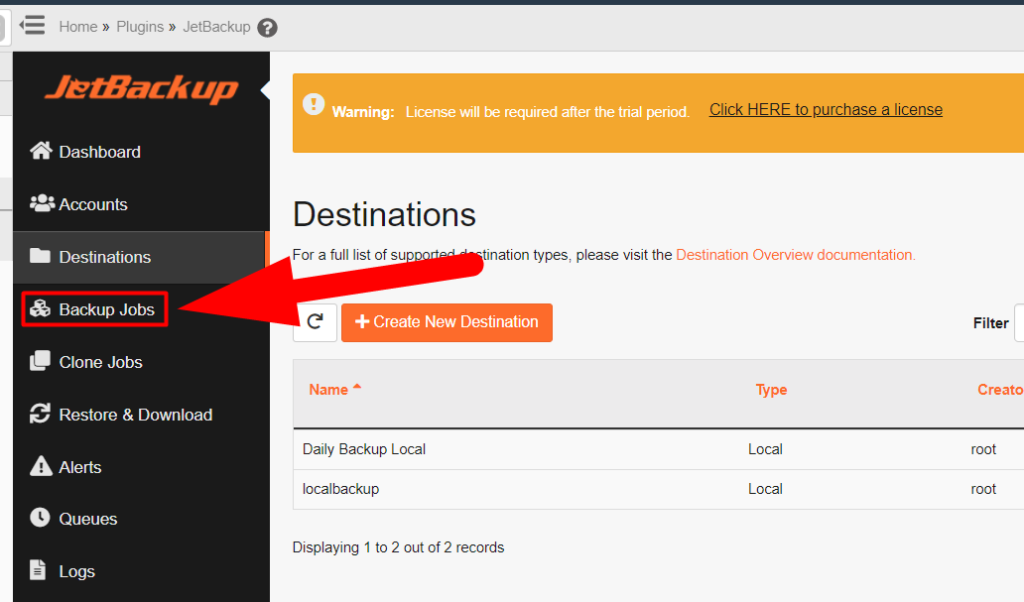
- Once you’ve successfully created the destination, navigate to the Backup Jobs tab.
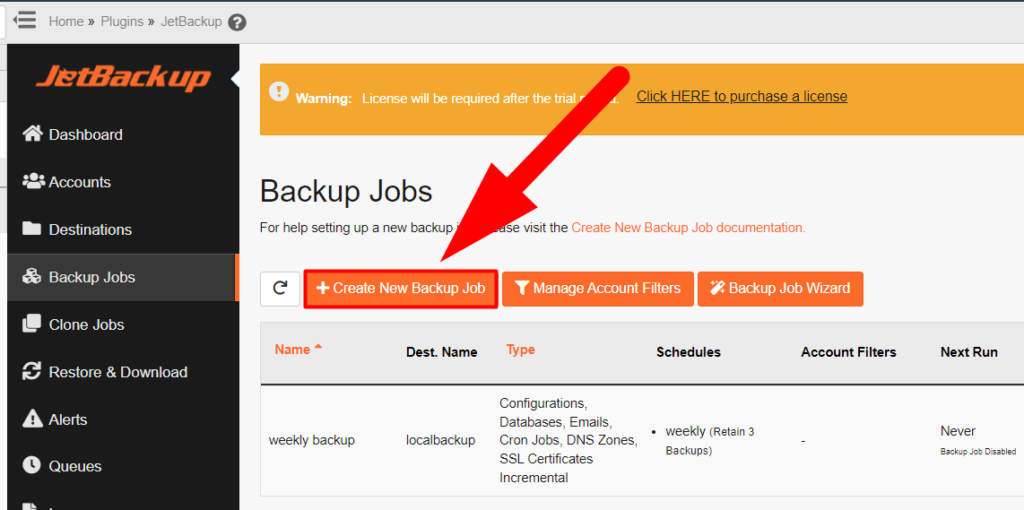
- Click on Create New Backup Job button.
- Fill in the basic details. Select your suitable Backup Type & Structure, and customize the backup contents according to your need.
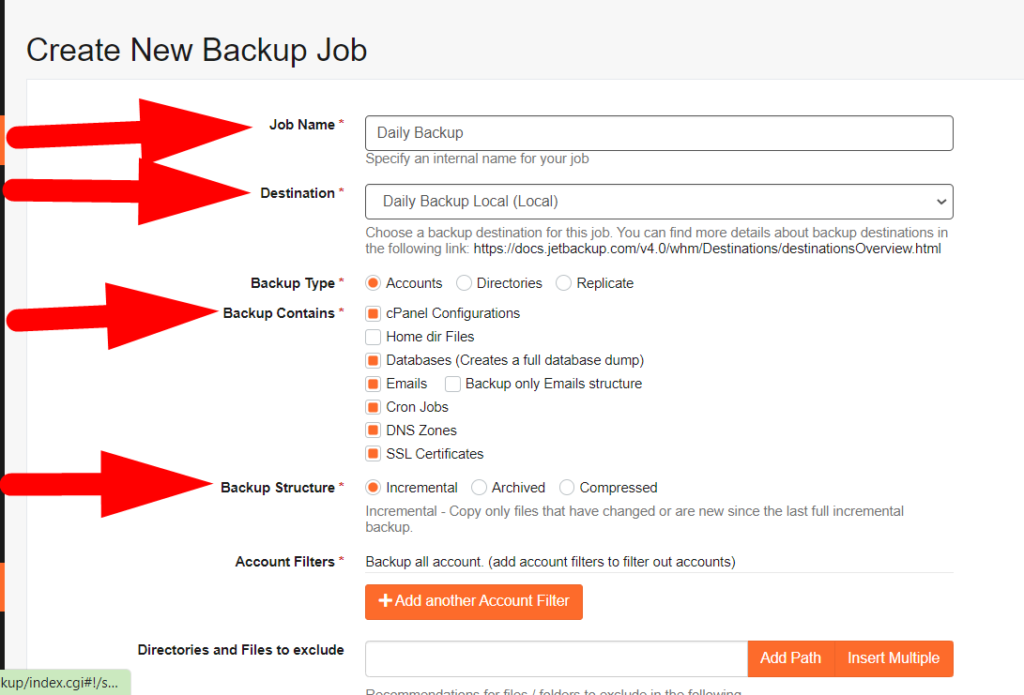
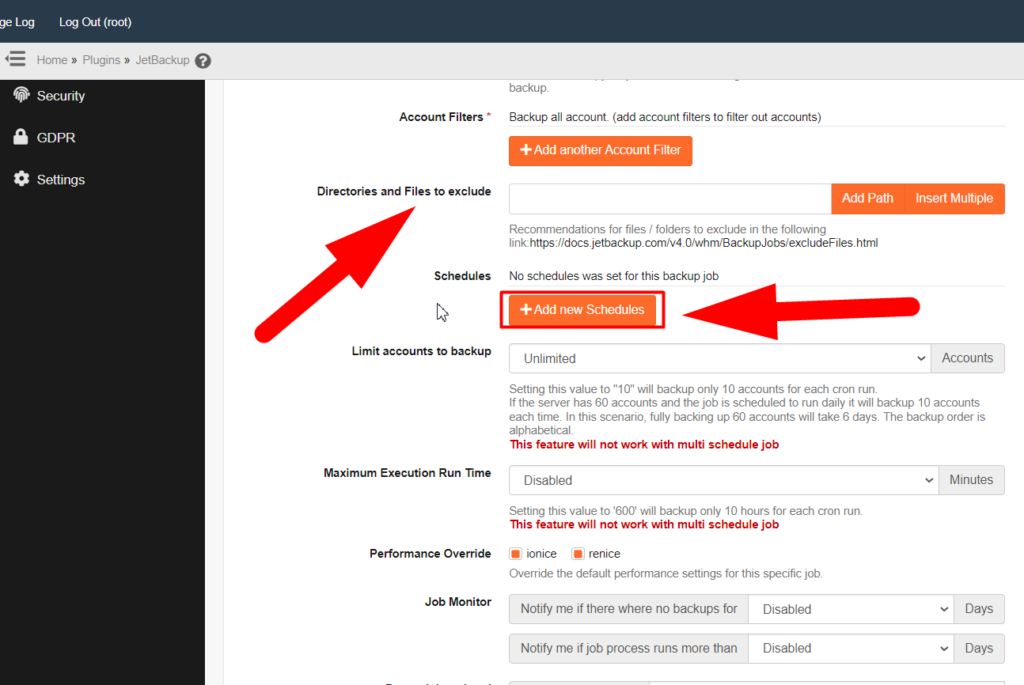
- Type the exact path of the directory or file in the exclude box that you don’t want to include in the backup.
- Hit Add New Schedule button to manage the backup timing and backup type.
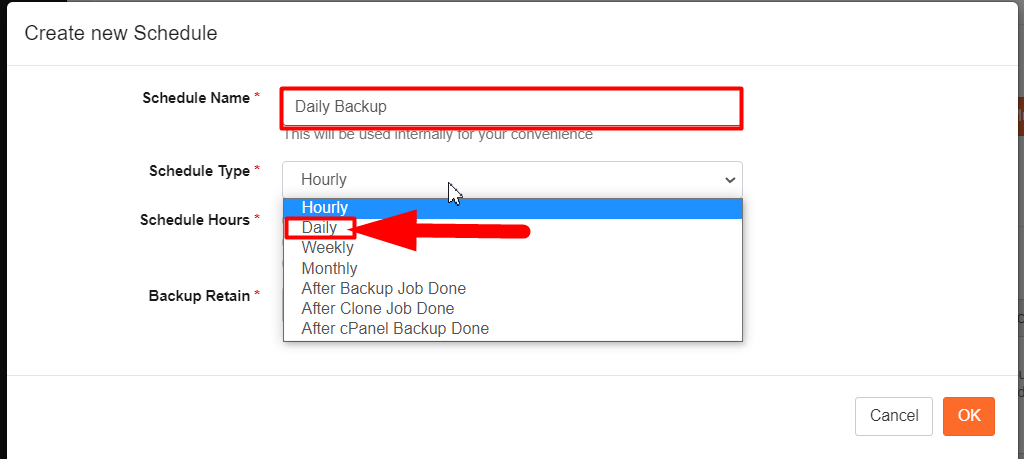
- Select the Schedule Type according to you. For me, as I want a daily backup, I’ll choose Daily in the Schedule Hours box.
- If you want the backup to run daily, select all days. The Backup Retain option is used to modify the storage of backups. For example, in my case, as I’ve selected 3 in the backup retain the option, JetBackup will store backups for 3 days and delete all those backups that exceed the 3 days limit.
Also See:
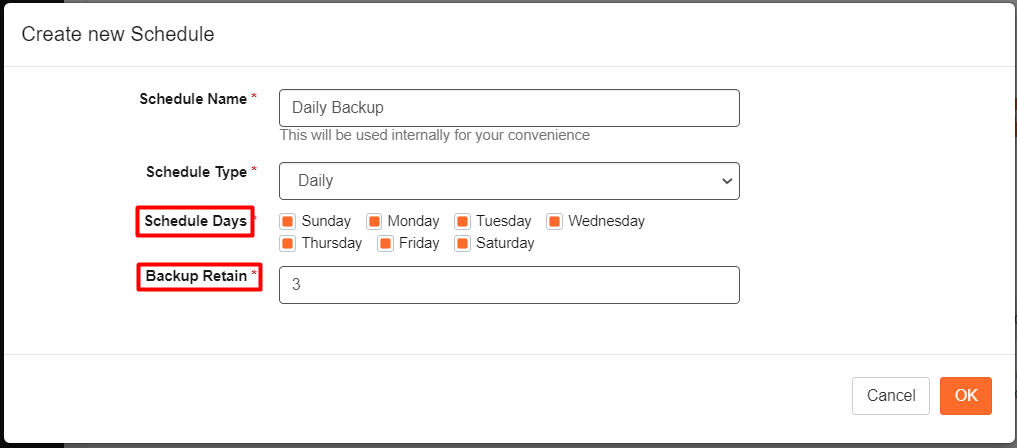
- Hit the OK button once done.
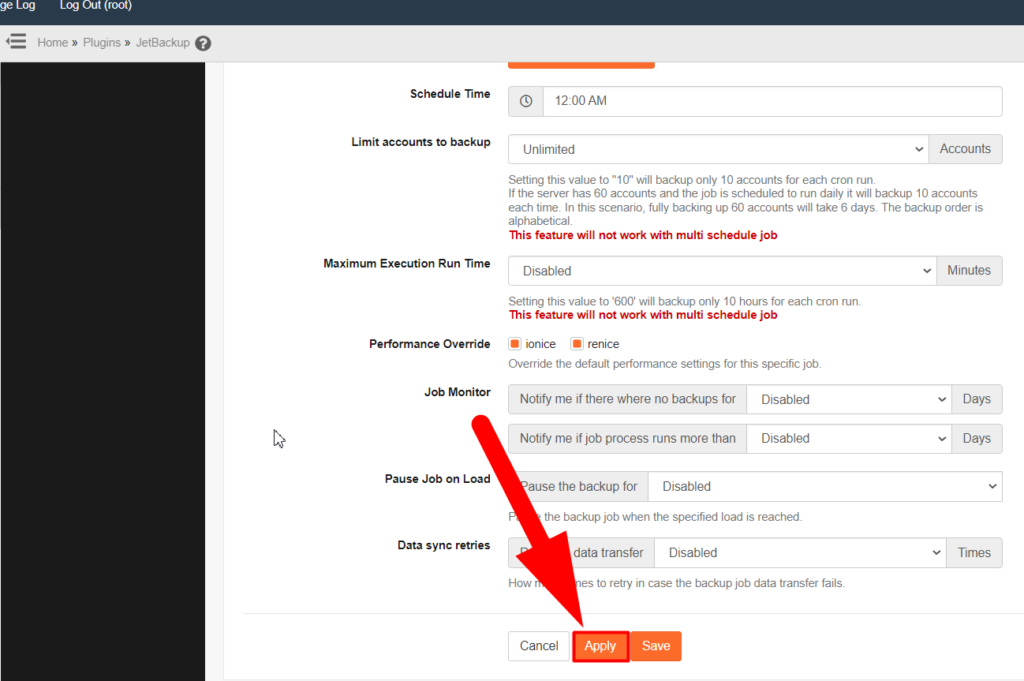
- Scroll down to the bottom and hit the Apply button to create the Backup Jobs.
- Now, move back to the Destination tab, hit the Validate Destination button, and then hit the Export JB Config ON button.

- You’ll receive the following pop-up every time.
That’s it. You’ve successfully created Backup Jobs. Additionally, you can browse other options if you want to explore the Backup Jobs option. Other than this, you can contact us on our Facebook & Twitter handles for any further inquiries.
Moreover, purchasing a WHM hosting with Root access is easy in RedserverHost if you have a keen desire to purchase the Best Reseller Plan at the Cheapest Cost across the Internet.