Complete Guide to Backup & Restore Websites

Creating a time-to-time backup, and restoring that backup when needed is the most crucial part of the web hosting industry. There are several types of backup options by which a user can easily create a backup and also restore it. Here, in this tutorial, we’re gonna walk you through a complete guide to creating a backup of your website and restoring those backups when needed.
There are several ways to create a backup mentioned below:
- cPanel Backup
- Third-Party Backup
- Root Level Backup
cPanel Backup
A user can easily create a Full/Partial Backup of his website from the cPanel itself. A full cPanel backup creates a copy of your files, emails, databases, etc, and compresses all of them into a tar.gz file that will be saved directly to your external storage. The users can also select the email addresses to receive email alerts for the backup. We’ll first show you all the methods to create or generate backups and then how to restore them. It’s going to be a long article but if you want to learn about the several ways to backup & restore your website, stay with us.
Third-Party Backup
It’s recommended to use third-party backup if your website contains any sensitive business information and crucial data because a third-party backup provider such as JetBackup will backup your website and store it in a different location. This will secure your sensitive data from any kind of tragedy or circumstances that happens on your server.
Root Level Backup
This one is suitable for root users. If you’re the root and have several users on your server, you should definitely use JetBackup to backup your user’s data. You can easily install or uninstall JetBackup in WHM root. Additionally, you can generate a backup by yourself and also restore them accordingly, easily, and effortlessly.
Other than this, it’s easier to generate and restore backups from SSH. So, you can also try the SSH method to backup and restore cPanel accounts. This method is quite useful if you want to restore bulk cPanel backups at once.
Moreover, you can also view our video tutorial to Restore Full Website Backup Via cPanel.
Generating Full cPanel Backup
You can generate the full cPanel backup of your website by following the below steps:
- Log into your cPanel account.
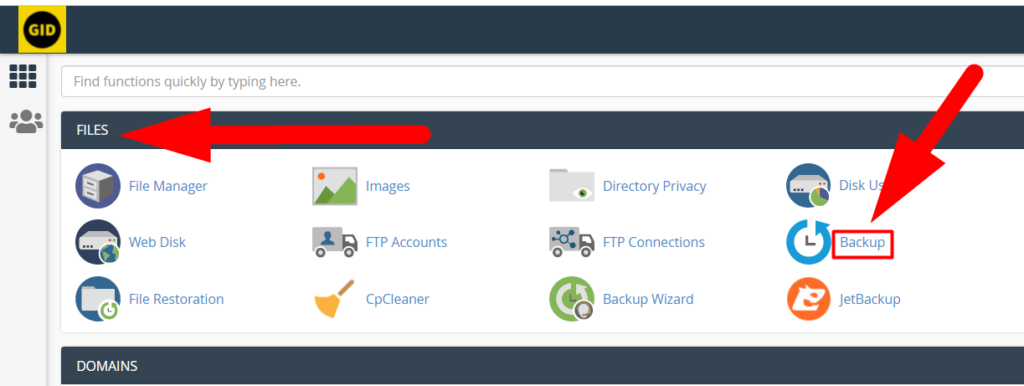
- Once logged in, navigate to the Backup section located inside the FILES tab.

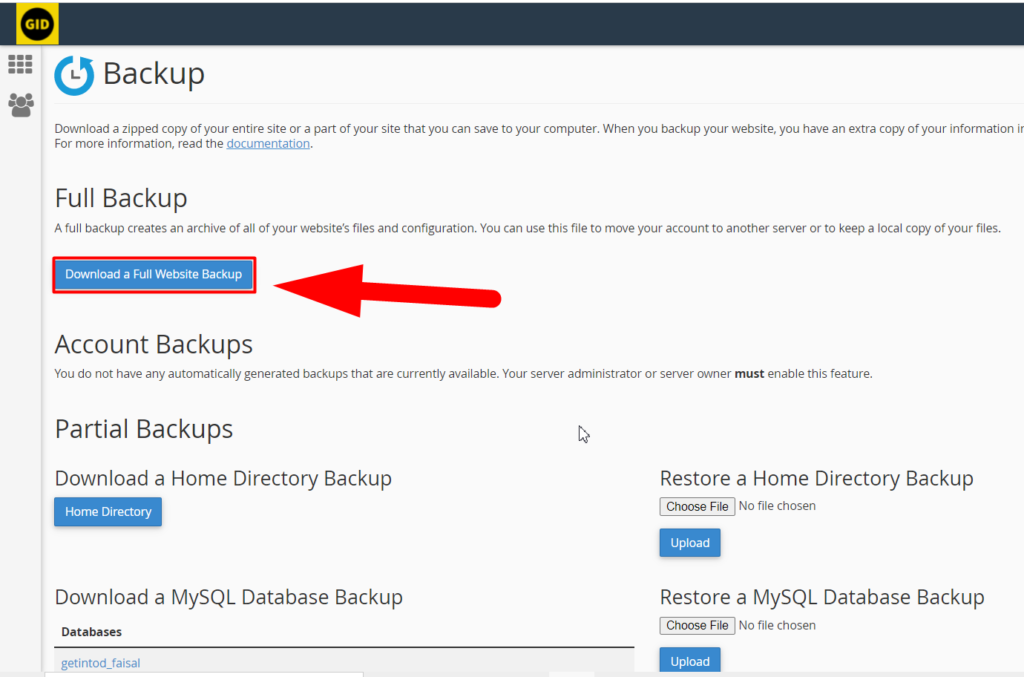
cPanel Dashboard - Hit the Download a Full Website Backup option to generate & download the full cPanel backup.

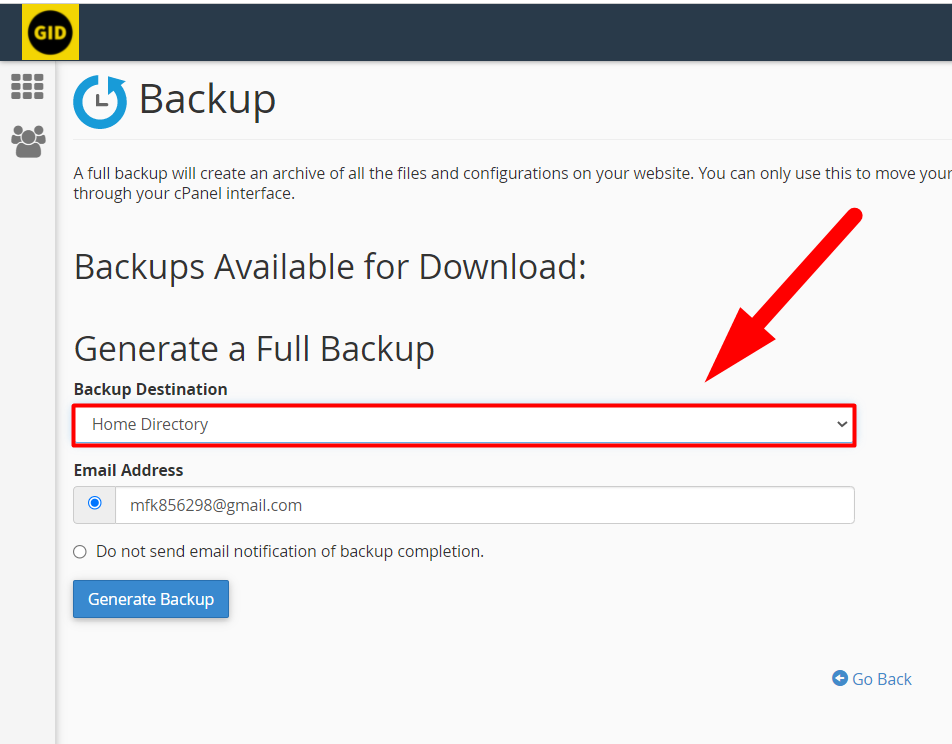
Create a Full cPanel backup - You can also select the backup destination such as Remote FTP Server, Home Directory, Secure Copy (SCP) Transfer, ETC. Other than this, you can add your email address if you want email alerts about the backup.

Generate a Full Backup - And finally, hit the Generate Backup button to generate the backup at your given location.

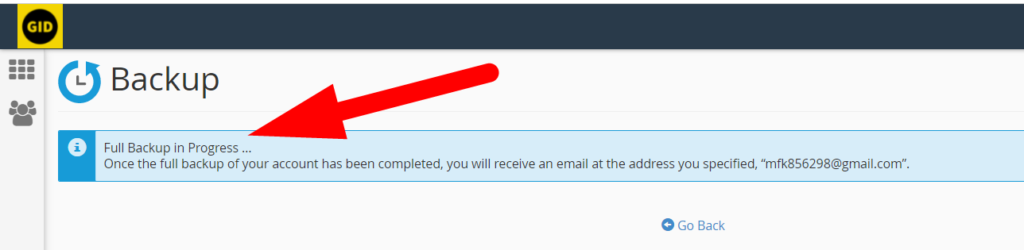
- You’ll receive the below alert that the backup of your website is in processing, and you’ll receive an email alert post completing the backup.

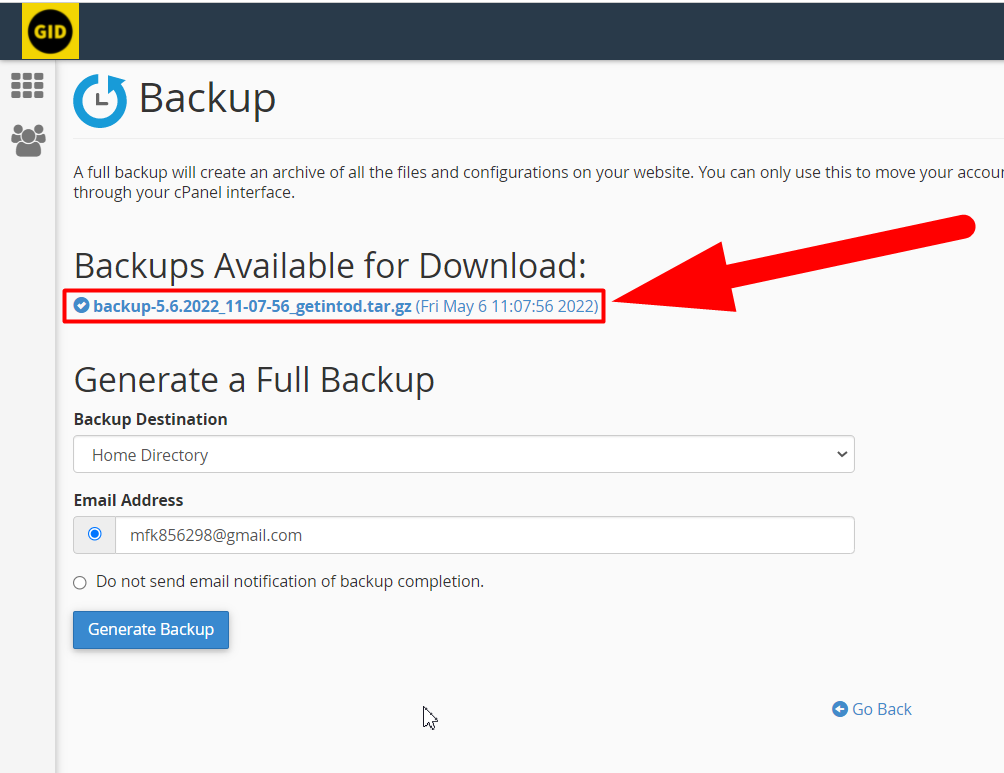
Full Backup in Progress - Hit the Go Back button to move back to the main Backup page. If your backup is completed, you’ll see it in the Backups Available for Download tab.

Backup available for download - Click over the file name, and it’ll start downloading.
That’s how you can generate and download the full cPanel backup of your website. This backup will contain everything about your websites such as database, file, image, and email. However, you can also generate a backup of a specific section. The partial backup is useful when you don’t want to generate the full backup of your website. For example, suppose you only want to create a backup of your MySQL Databases and exclude everything else on your website, in this case, you can use a partial backup to generate and download backups of the database only. Let’s do it practically.
Related Article: Enable Two-Factor Authentication in cPanelGenerate and Download Partial Backup from cPanel
Instead of creating a full backup, you can follow the below steps to generate and download a partial backup of your website from cPanel:
- First of all, log into your cPanel account.
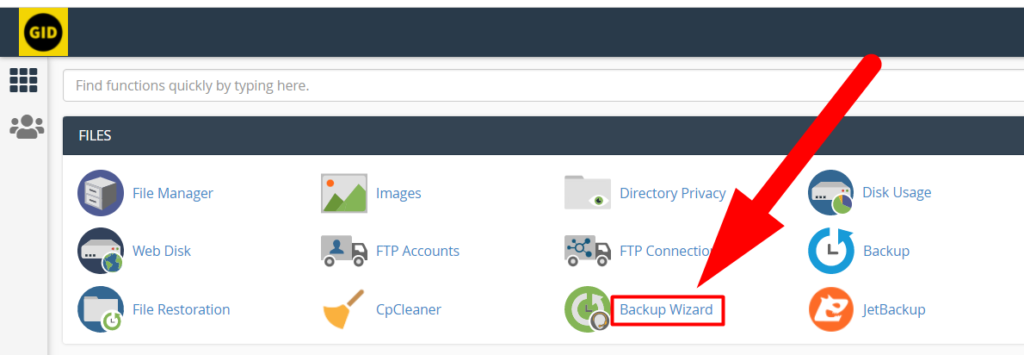
- From the FILES tab, click over the Backup Wizard option.
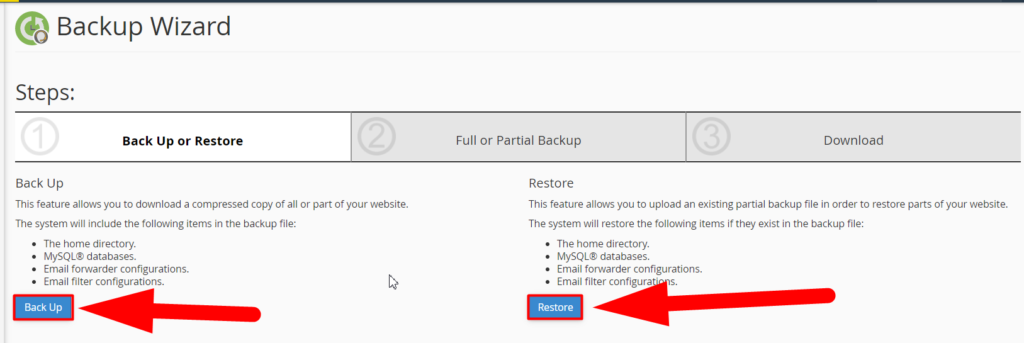
- Once entered in the backup wizard section, you’ll see two buttons that would be Back Up and Restore, and I think you already know the button you have to click for. The Back Up button.
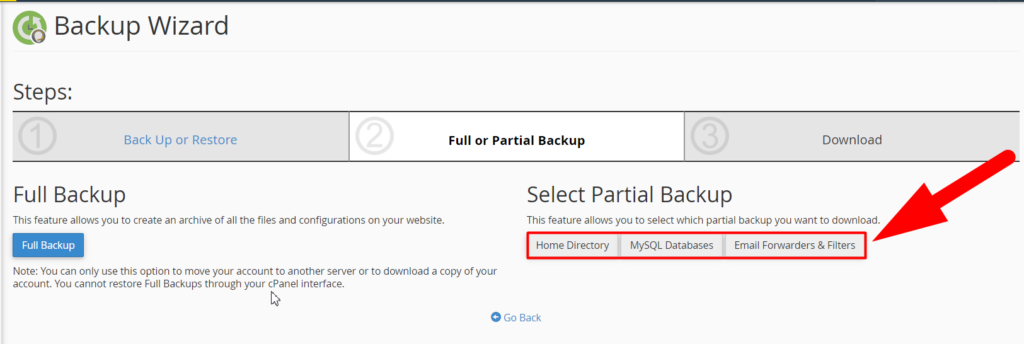
- You can generate and download different types of partial backups from Backup Wizard. Hit the Home Directory button to generate a backup of your home directory, hit the MySQL Databases button to backup the database of your website, or if you want to generate only an email backup, hit the Email Forwarders & Filters button.
That’s It.
That’s how you can generate and download partial backup from cPanel. Now, let’s move ahead to the restoration process.
Restoring full cPanel Backup
Warning: Full cPanel backup must be restored from the root level to avoid any further circumstances. If you’re a root user and want to restore the full cPanel backup by yourself, then you can follow the below steps. Moreover, if you’re a Shared Hosting user or trying to restore your full cPanel backup at the user level. You should contact your hosting provider instead. They’ll do it for you.
However, you can still restore the full cPanel backup by yourself with a user level access, but it’s not recommended if you’re a beginner as a small mistake could cause several errors to your website.
To restore a cPanel account, the backup file must use one of the below formats. Otherwise, the restoration process won’t work.
cpmove–{USER}
cpmove–{USER}.tar
cpmove–{USER}.tar. gz
{USER}.tar
{USER}.tar.gz
backup-{BACKUP-DATE_TIME}_{USER}.tar
backup-{BACKUP-DATE_TIME}_{USER}.tar.gz
backup-{MM.DD.YYYY}_{HH-MM-SS}_{USER}.tar
backup-{MM.DD.YYYY}_{HH-MM-SS}_{USER}.tar.gz
Moreover, the file must be present in one of the following locations:
/home
/user/home/
/web
/home2
/home3
/root
/usr
The file may also be selected from your local file system at the time of restoration.
Restoring cPanel backup from WHM Root
– Only for Reseller Hosting, Dedicated Hosting, and VPS Hosting users.
Follow the below steps to restore the full cPanel backup from WHM root:
Related Article: Restore Bulk cPanel Backups Via SSH- Log into your WHM as a root user.
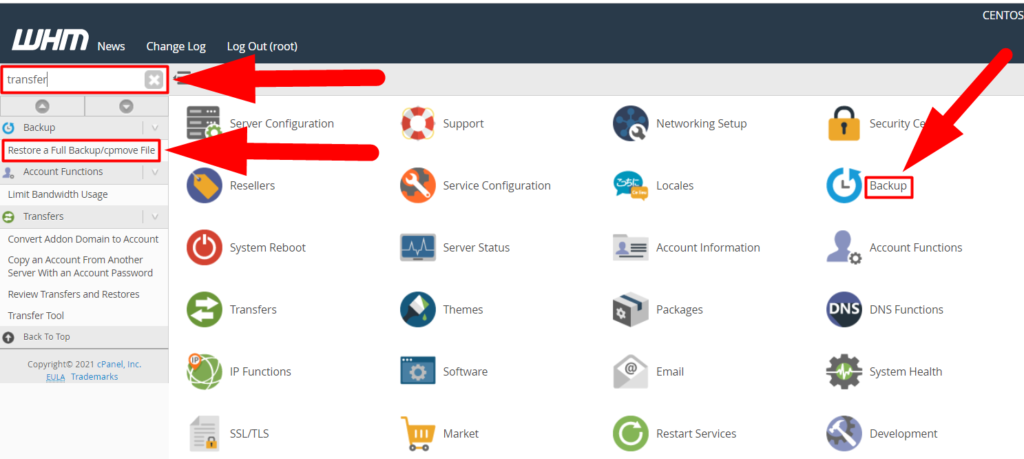
- Either navigate to the Backup > Restore a Full Backup or simply search ‘cpmove’ in the search bar and hit Restore a Full Backup/cpmove File option from the result.

Restore a Full Backup cpmove File - Once you landed on the restoration page, you’ll be able to see an option named Restricted Restore. Enable the Restricted Restore option is quite helpful to prevent your server from any hijackings and other attacks. Suppose, the cPanel account you want to restore is having reseller/root access, or maybe someone edited the tar.gz file and modified the privileges to hack into your server. Restoring the cPanel account/accounts with the Restricted Restore box checked will restrict all the cPanel accounts to have any root privileges.

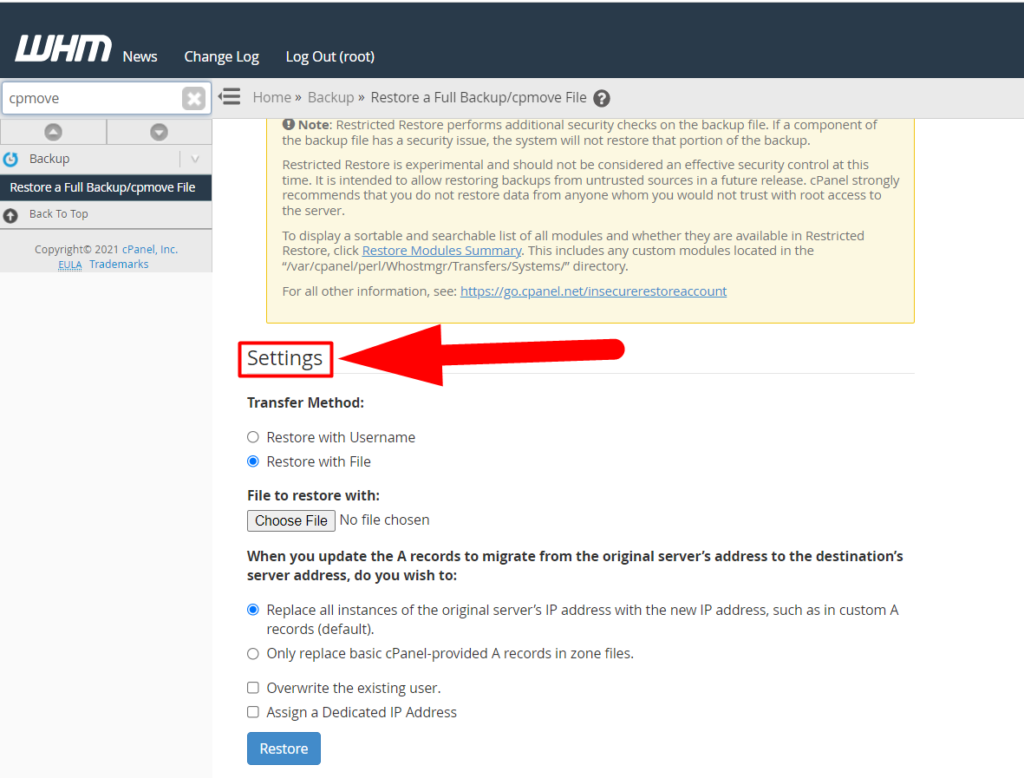
Restore full cpanel backup section - Now scroll down to the restoration Setting.

Restoration Setting - In the Settings tab, you’ll be able to see several options such as:
- Transfer Method: If you have the backup file then you can select the Restore with File option, and select the Restore with Username option if the cPanel account is already associated with your server and the user has already created and stored a full cPanel backup in his home directory.
- File to restore with: This option will visible if you select the transfer method to Restore with File. You can upload the backup file by clicking over the Choose to button.
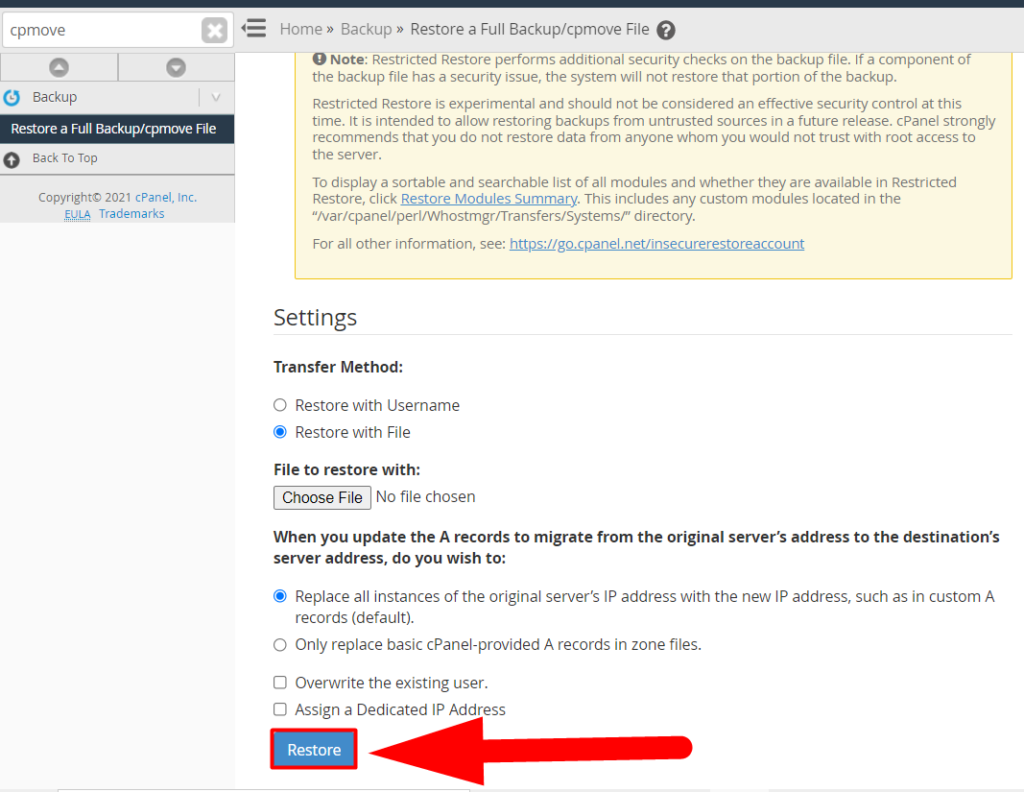
- Replace all instances will replace all the A records and other DNS entries of your website with the current server. This option could be helpful for those who are trying to restore a full cPanel backup from one server to a different server. In this way, they can simply backup their website from a different server and restore it directly from the backup section in WHM root.
- This will replace only basic A records of backup.
- This will overwrite the existing backup. This could be helpful if you’re restoring your website to the same server. To avoid any confusion, you can check the overwrite existing backup option to avoid any duplicacy.
- You can also assign a dedicated IP address to the backup you’re going to restore.
- Once everything is done, hit the Restore button to restore the full cPanel backup.

Restore Button

That’s it.
That’s how you can restore full cPanel backup from the root. However, you can also restore a full cPanel backup from the user level, but it could be risky that’s why we do not recommend it. If you still want to do this, you can browse our previous article by clicking on the link.
Restoring Partial Backup from Backup Wizard
Partial backups can easily be restored from the cPanel itself. Follow the below steps to restore a partial backup of your website from cPanel using the Backup Wizard feature.
- First of all, log into your cPanel account.
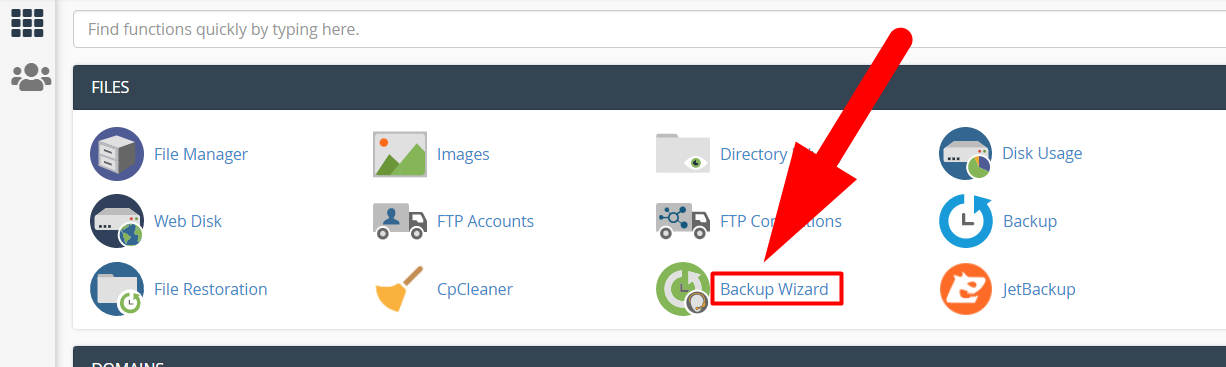
- Navigate to the Backup Wizard section located inside the FILES tab.

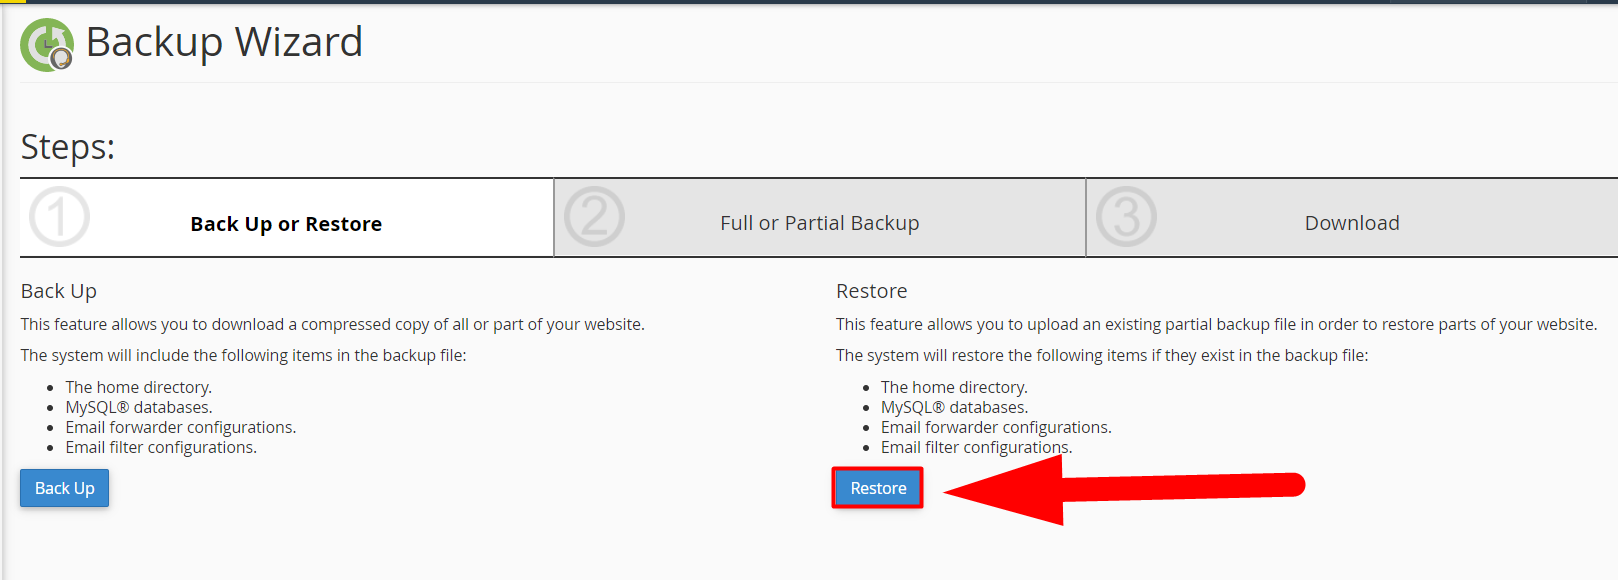
Backup Wizard - This time, hit the Restore button to land on the restoration process page.

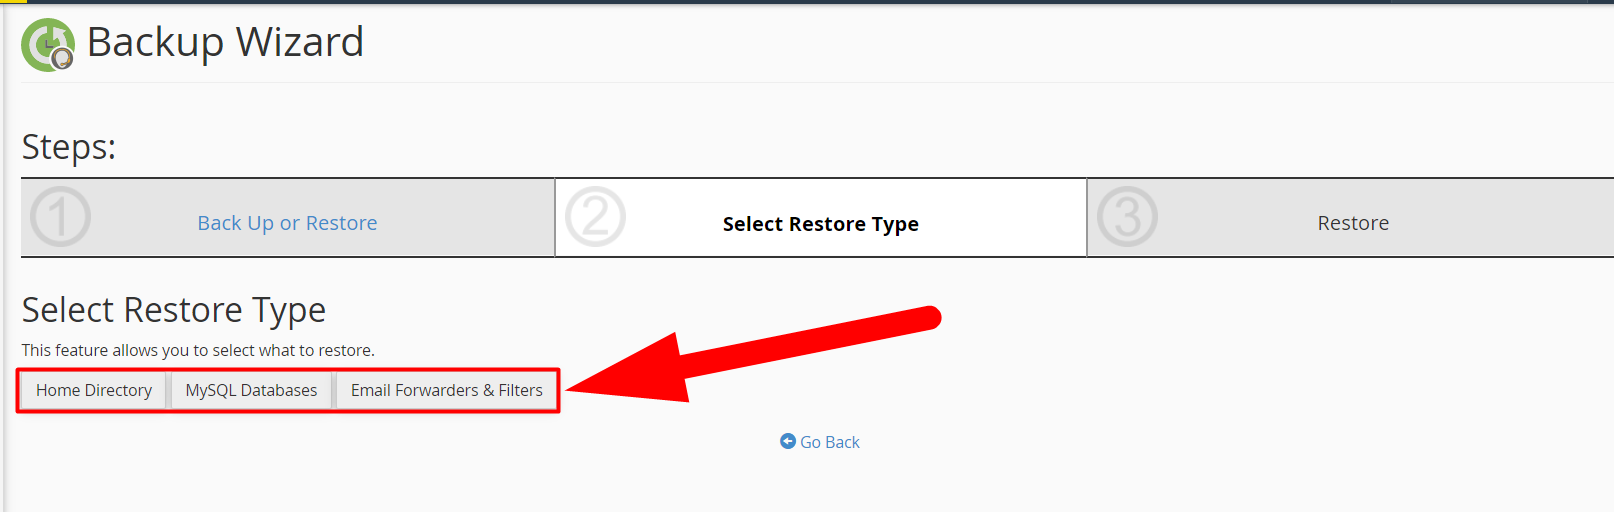
Restore Backup - Select the restoration type accordingly. For example, to restore the databases hit the MySQL Databases button, and to restore the email accounts hit the Email Forwarders & Filters button.

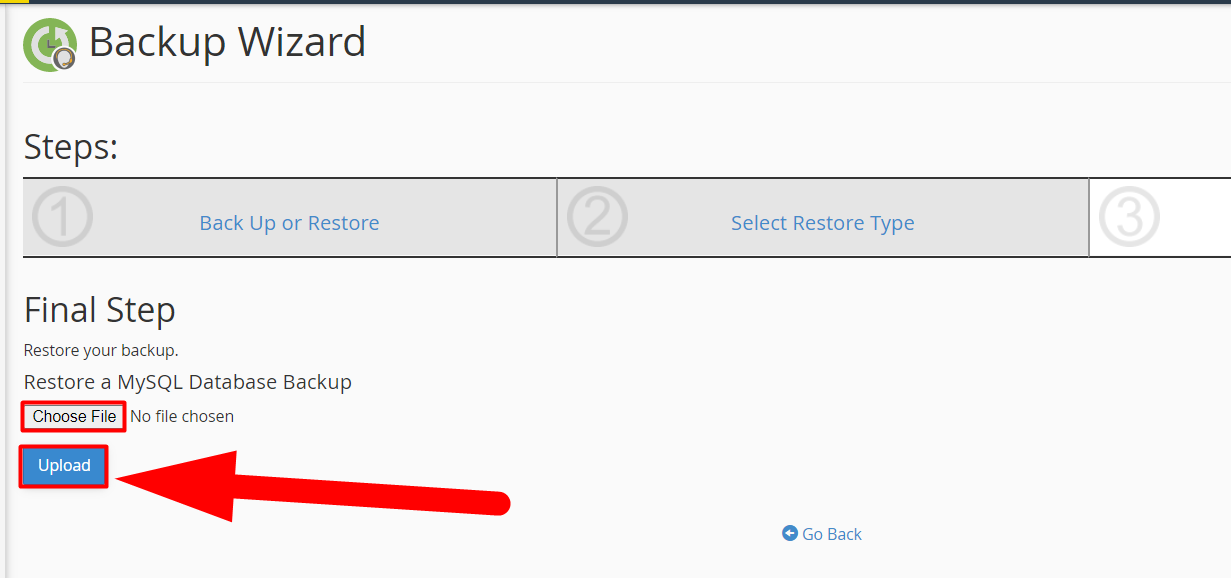
Partial Restoration Type - Hit the Choose File button to upload your backup, once uploaded, hit the Upload button to restore the backup.

Click Upload to Restore
That’s it.
Your backup will be restored successfully in a couple of minutes. I hope you liked this article. You can hit the comment for any queries related to the article. Additionally, you can visit redserverhost.com and open a Free Support Ticket. Our experienced technical support team will be happy to help you.
Other than this, you can contact us on Facebook and Twitter for any further queries or suggestions. We always appreciate suggestions.