How to setup custom static homepage in WordPress site? [STEP BY STEP]☑️
Today in this tutorial you will learn how to easily setup custom static Homepage in your WordPress site. In this article, we will show you how to setup a custom static homepage in WordPress.
Video Tutorial- How to setup custom static homepage in WordPress site
If you don’t like the video or need more instructions, then continue reading.
Follow the steps given below to setup custom static homepage for your WordPress site:
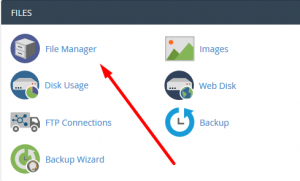
Step::1 Login to your cPanel dashboard and click on File Manager
Step::2 Then go to public_html
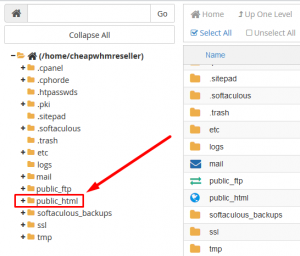
Step::3 Here are some of the files which are responsible for homepage of your WordPress site like index.php, index.html, sample.html Now you just need to prioritize them in order to set the default homepage.
Step::4 Find .htaccess file inside public_html (If you don’t find .htaccess file then click on Settings from the top right corner to access the Settings menu. Select the Document Root and make sure Show Hidden files(dotfiles) is selected. Click on Save button.)
Watch this video to learn how to find htaccess or hidden (DOT) Files in cPanel-
Step::4 Right-click the .htaccess file and Click on Edit.
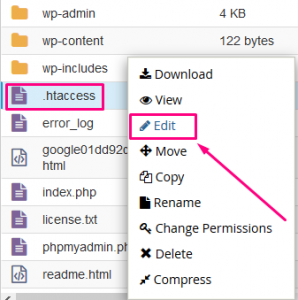
It will show up the Edit pop up. Click on Edit button.
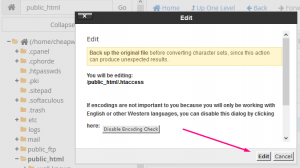
Step::5 Add the following line of code in your .htaccess file to configure your index page.
#Custom default index pages
============================================
DirectoryIndex sample.html index.php index.html
============================================
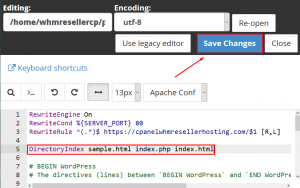
Step::6 The server will read the file from left to right. If the server doesn’t find the first one, it will look for another one in the right.
Step::7 Save the changes and close the editor.
Thanks for Reading this article !!! We hope this was helpful to you all.
For more information, kindly follow us on social media like Twitter and Facebook and for video tutorials, subscribe to our YouTube channel –https://youtube.com/redserverhost.com
Facebook Page– https://facebook.com/redserverhost
Twitter Page– https://twitter.com/redserverhost.com
If you have any suggestions or problems related to this tutorial, please let us know via the comment section below.
Tags: cheap linux hosting, buy linux hosting, cheap reseller hosting, buy reseller hosting, best reseller hosting, cheap web hosting, cheapest web hosting, cheapest reseller hosting, cheap reseller host, cheap linux host, cheapest linux hosting, best linux hosting, best web hosting
