Your PHP installation appears to be missing the MySQL extension which is required by WordPress – SOLUTION
Are you getting a PHP installation “Your PHP installation appears to be missing the MySQL extension which is required by WordPress” error while opening your wordpress website? Don’t worry, here in this article, we’ll walk you through the several diagnostics you can do to solve the PHP installation error.
Why Does Missing MySQL Extension Error Occur?
This is basically a MySQL error that can occur if:
- You’re using an outdated version of WordPress or Plugins.
- You’re using an older PHP version.
- You haven’t configured PHP extensions properly.
- The MySQL extension isn’t installed.
MySQL Extension Error Solution
The PHP installation error could occur for the above several reasons. However, it can be easily diagnosed by following the below steps:
1: Update Your WordPress & Plugins:
The first step one should take to diagnose the MySQL extension issue is to update the WordPress installation with the latest version. To check your current WordPress version & update it to the latest one, follow the below steps:
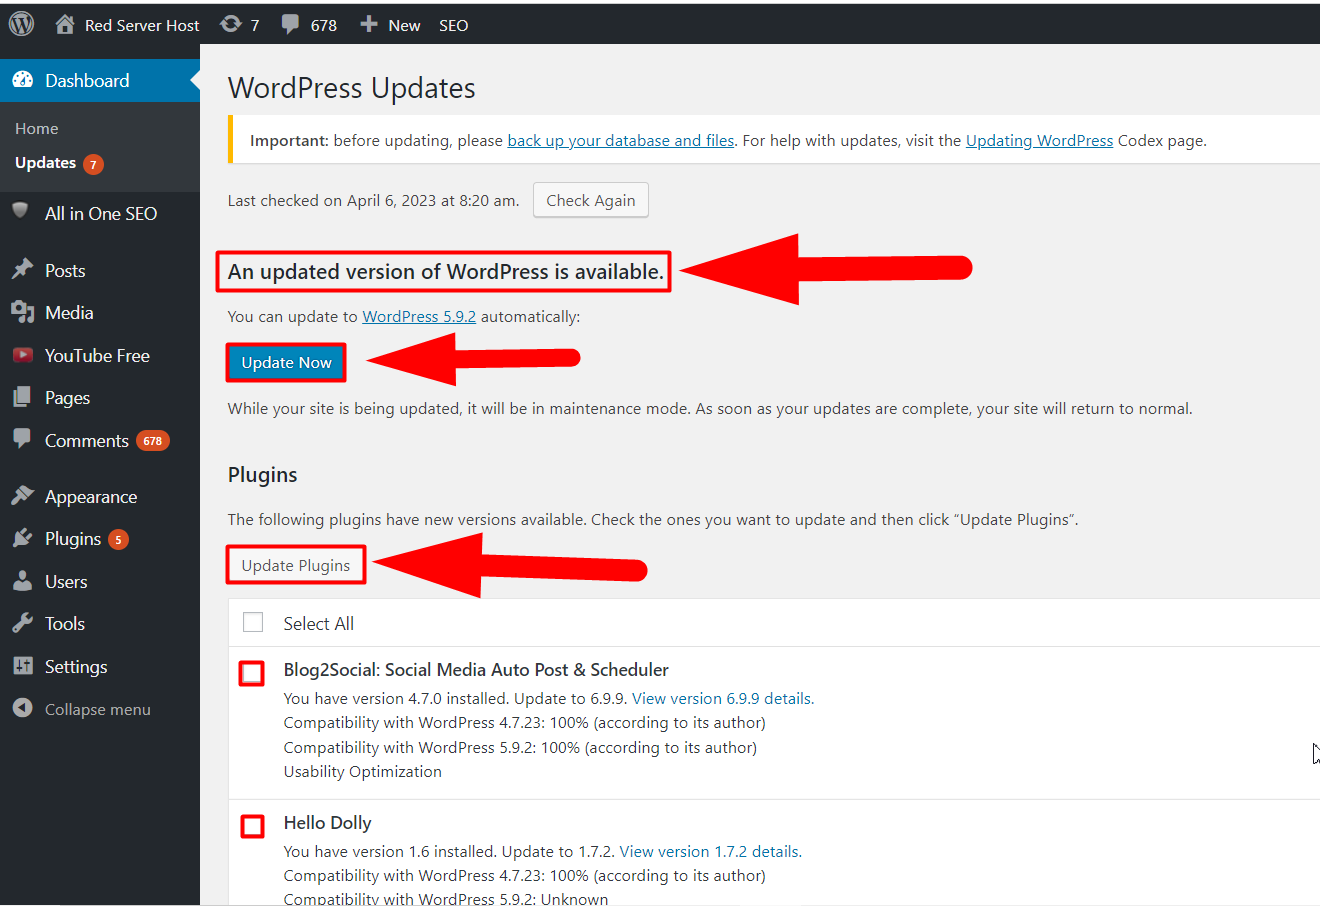
- First of all, log into your WordPress dashboard.
- Once logged in, hover your cursor towards the Dashboard tab and click over the Updates drop-down.

- Whether the WordPress update or Plugins update. Both can be viewed from the Updates section, and you can easily update your WordPress version and Plugins to the latest one.
Once you’ve updated WordPress & Plugins to the latest version, check which version of PHP your website is running. You can easily check your Current PHP version of the WordPress website by following the below steps:
2: Check Current PHP Version of Your Website:
To check what PHP version you’re using, follow the below steps:
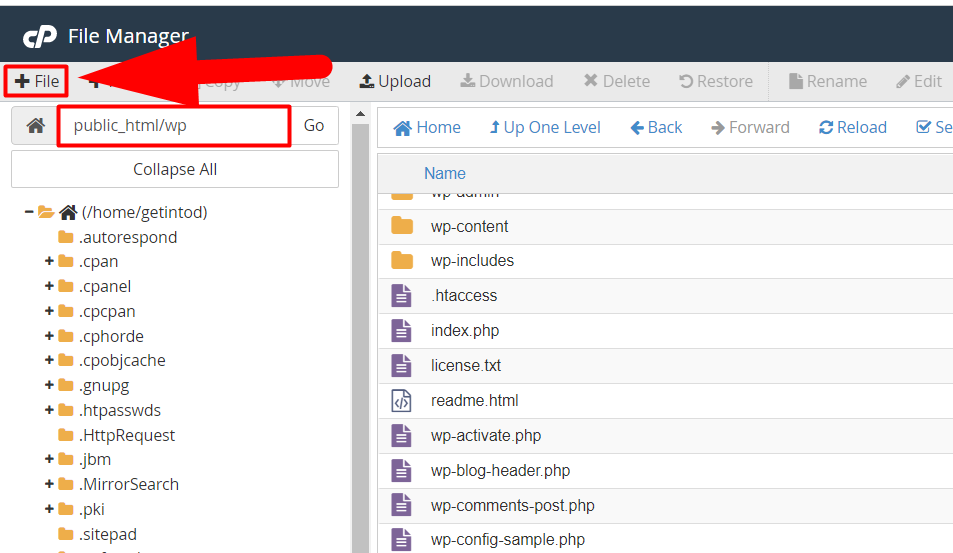
- Log into your cPanel account.
- Navigate to your root directory (File Manager >> Public_html) and create a new file

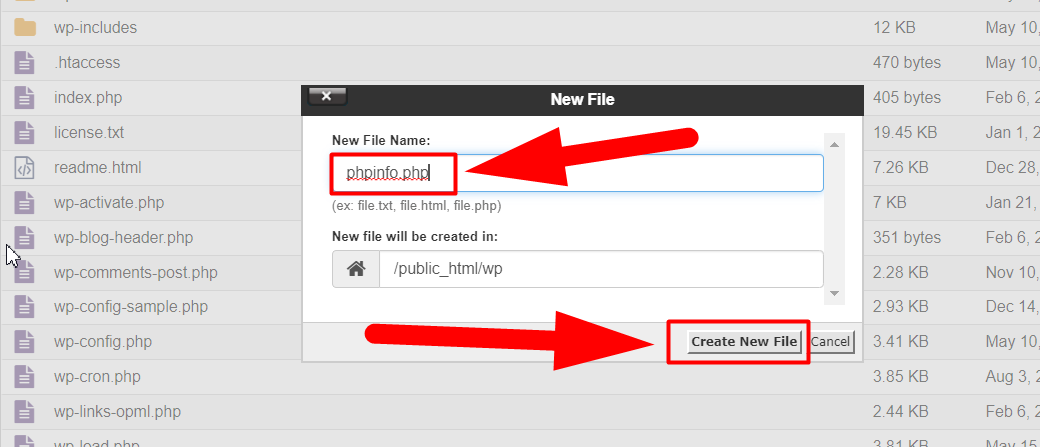
Create a new File - Name the file as phpinfo.php and hit the Create New File button.

phpinfo File Note: The phpinfo file must be present inside the root directory of your WordPress site.
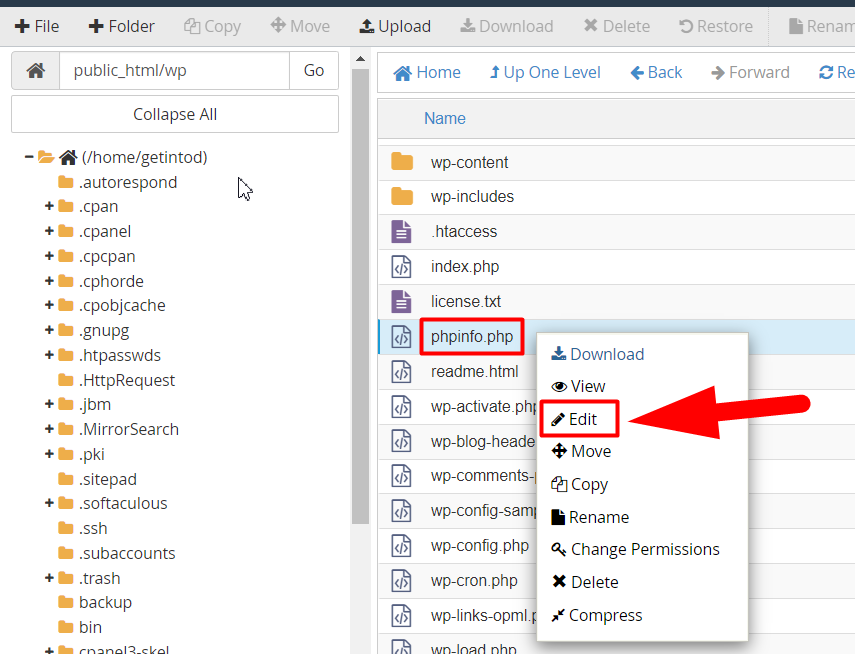
- Once created, open the file by clicking on the Edit button.

Edit the File - Add the below command inside the phpinfo file and hit the Save Changes button.
<?php
phpinfo();
?> - Once you save the file, hit the phpinfo.php file from outside to see your current PHP version. For instance, if your WordPress installation is inside www.YourDomain.com/wp then type www.YourDomain.com/wp/phpinfo.php in the search bar. Likewise, if your website is located inside the root directory, simply type www.YourWebsite.com/phpinfo.php and hit the enter button.
Note: Do not forget to replace YourWebsite.com with your own website URL.
- As soon as you hit the file from outside, you’ll be able to see almost every PHP information such as PHP Version, Build Date, Server API, Etc.

Check PHP Version
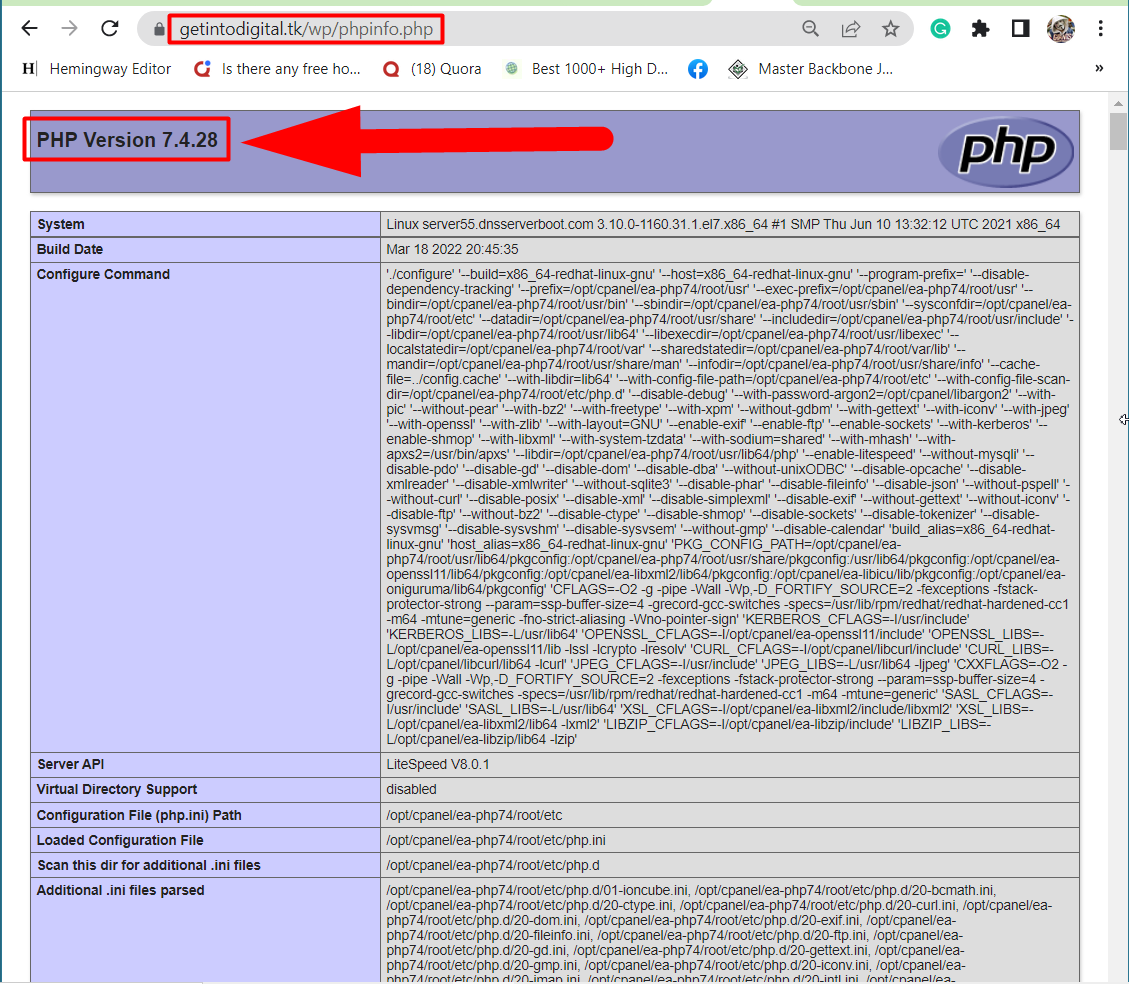
That’s how you can check your website’s current PHP version. If the PHP version is above 7, that means you have to update the software of your WordPress website. Other than this, if your website’s PHP version is 5.X, you might be missing the MySQL extension that should be fixed immediately.
3: Configure PHP Extension:
Note: This method is for localhost users. If your website isn’t hosted on localhost, this method won’t work for you. You can simply skip this method and follow the next diagnostics.
Even if you have the latest version of WordPress & PHP running on your WordPress website, you can still face the “Your PHP installation appears to be missing the MySQL extension which is required by WordPress” error if the PHP isn’t configured correctly. To verify the PHP extension running on your Website, hit the phpinfo.php file and search for the “Loaded Configuration File” section.
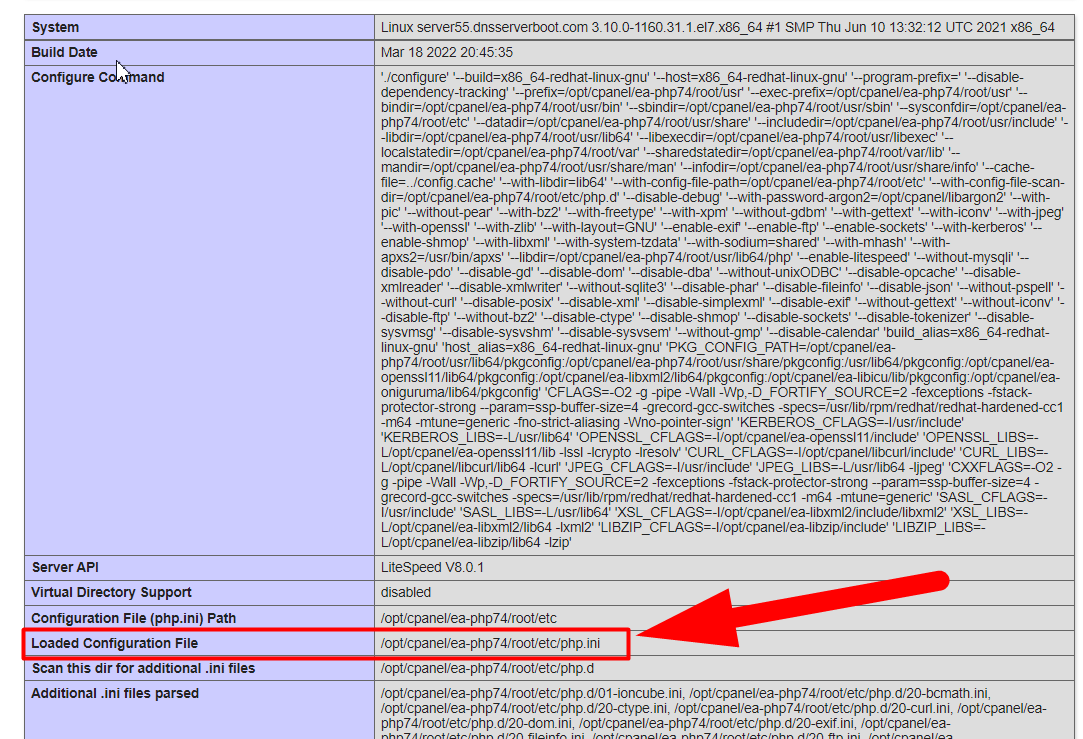
Compare the ‘Loaded Configuration File’ value with the value of “extension_dir”. If both files aren’t matching, edit your php.ini file to replace it with the file path listed for the Loaded Configuration File.
4: Check Installed MySQL extension:
Running an older version of PHP (5.6 or older) definitely means that you don’t have MySQL extension installed as MySQL extensions weren’t deprecated at that time.
To check whether your website has a MySQL extension installed or not, open that phpinfo.php page again from your browser, and find the mysql section.
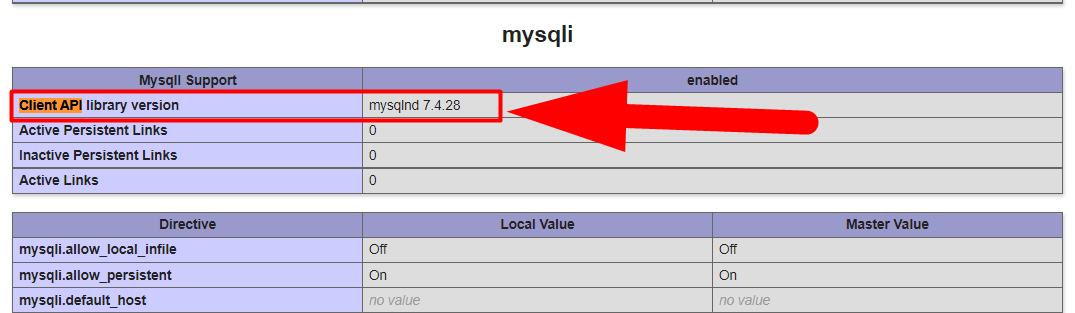
Your current MySQL extension will be displayed inside the “Client API library version”. If not, you don’t have MySQL extension installed. In this case, you should contact your hosting provider and ask them to install the MySQL extension on your website, and delete the existing phpinfo.php file as this file contain numerous information about your server that you don’t want to let others know. Other than this, you can also do it by yourself, if you’re using Reseller Hosting, Dedicated Hosting, VPS Hosting, or any other hosting with root access, by following the below steps:
Enable MySQL Extension from WHM Root
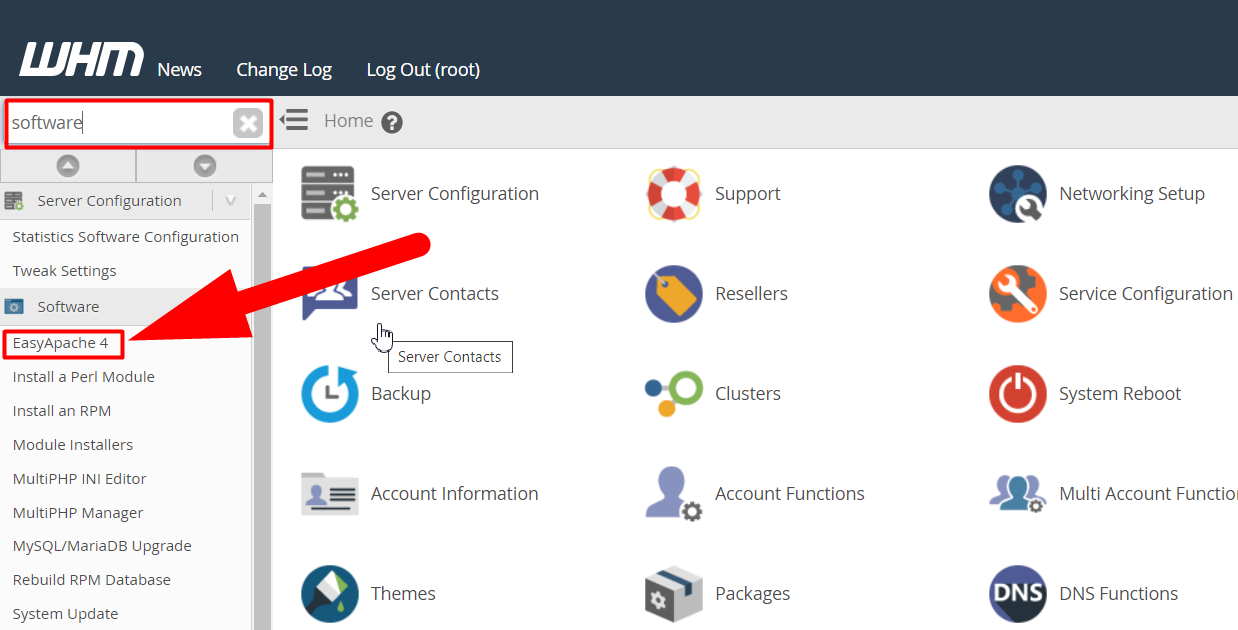
You can easily enable the MySQL extension by navigating to the EasyApache 4 section inside your WHM root. A step-by-step guide is given below.
- Log into your WHM with root access.
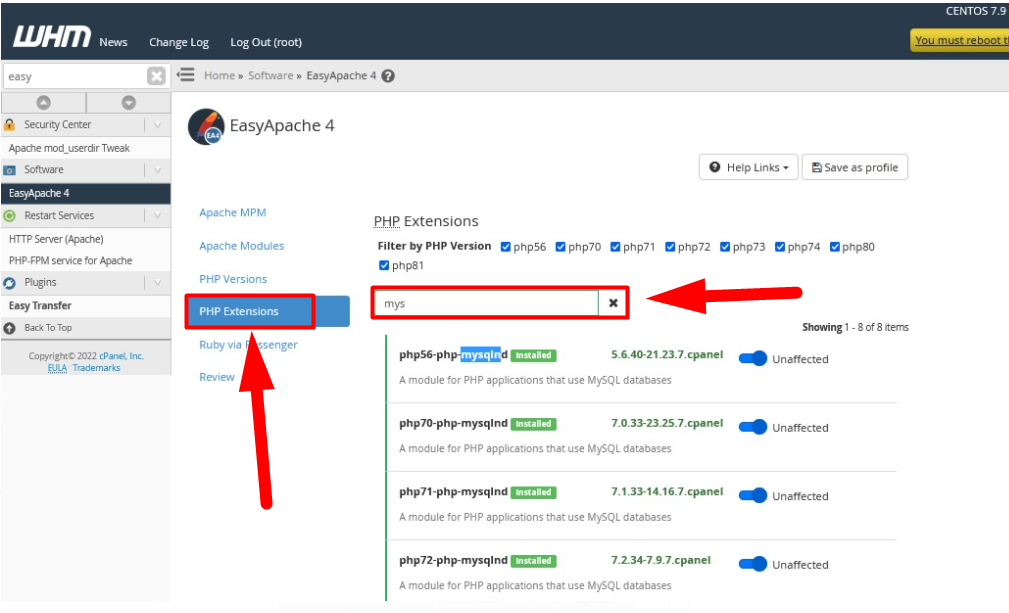
- In the search bar, type Software and then click over the EasyApache 4 option from the result.

EasyApache 4 Tab - Navigate to the PHP Extensions tab and search for MySQL.

PHP Extensions Tab EasyApache - Enable all the PHP extensions that are installed but not enabled. You can also install the PHP extensions if it’s not installed by default.

Enable PHP Extensions
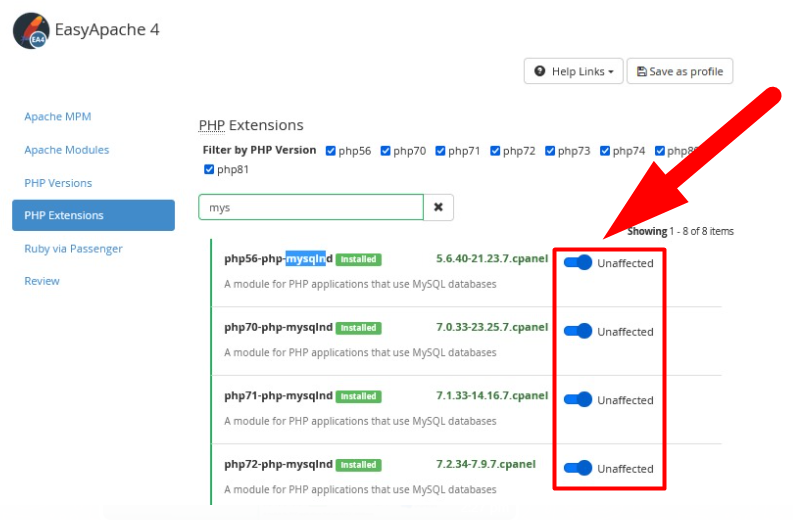
That’s it. You’ve successfully enabled the MySQL extensions. Now, all you need to do is to restart the MySQL server to execute the extensions immediately.
Restart MySQL Server
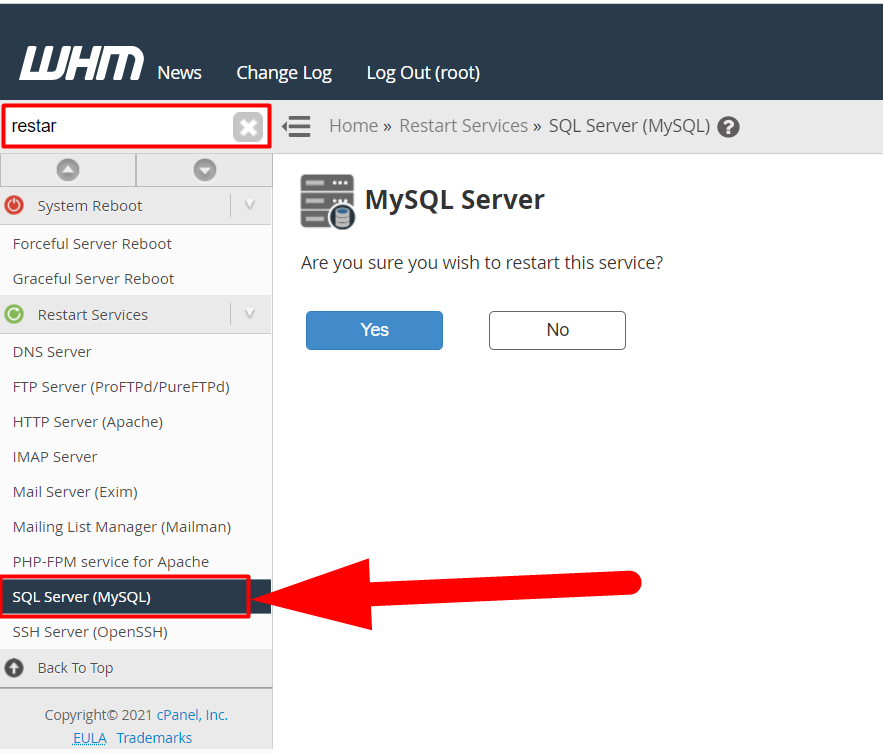
Well, you can easily restart the MySQL server from your WHM itself. Follow the below steps to do so.
- Type “Restart Services” in the search bar and hit the “SQL Server (MySQL)” button.

Restart MySQL - Click over the Yes button to restart the MySQL Services.
- Wait for the loading process to end and the MySQL services will be restarted shortly.

MySQL Restarted Successfully - That’s It.

These are the several diagnostics ways to solve the MySQL Execution error. I hope this article helps you. Moreover, you can contact us on Facebook and Twitter for any further inquiries or suggestions. Apart from that, if you’re still facing the issue, I’ll recommend you to simply visit Redserverhost.com and open a free support ticket. Our experienced Technical Support Team will be happy to assist you.