Hi,
In this tutorial, we’re gonna walk you through a complete guide to create and restore MySQL backup using Backup Wizard in cPanel. Additionally, you can view our complete guide to backup & restore websites if you’re looking for a more detailed tutorial to backup & restore websites.
Backup MySQL Database Using Backup Wizard in cPanel
You can easily backup your MySQL database from cPanel by following the below steps:
- First of all, log into your cPanel account.
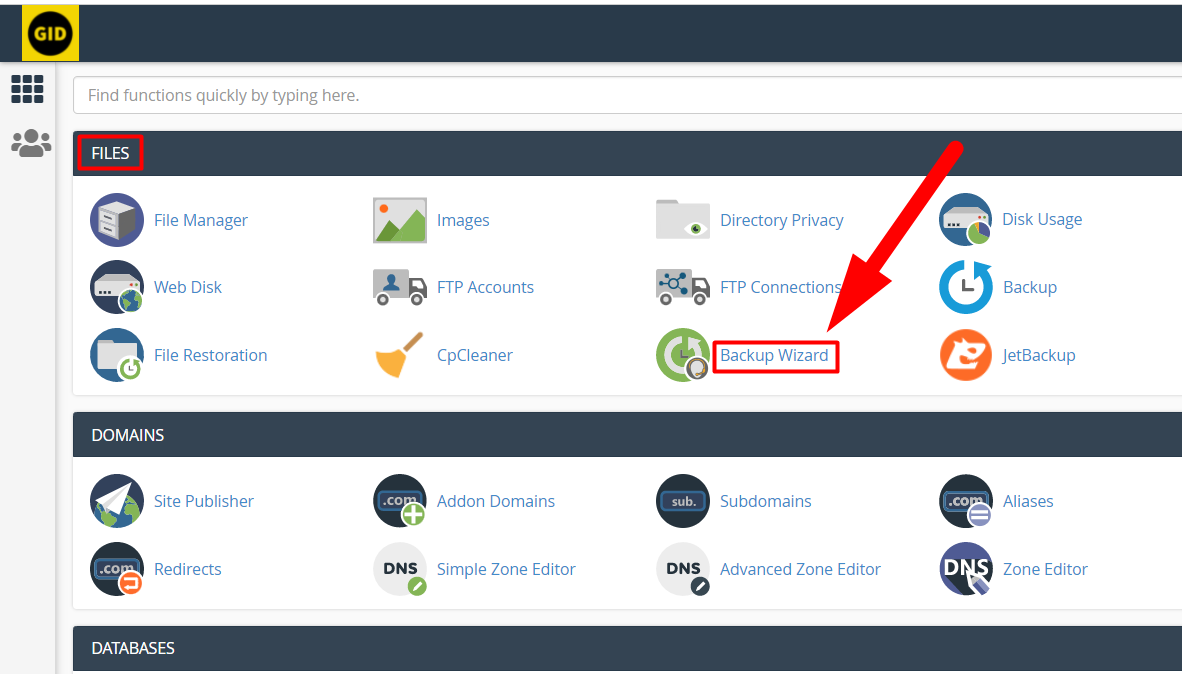
- Navigate to the FILES tab and click on Backup Wizard.

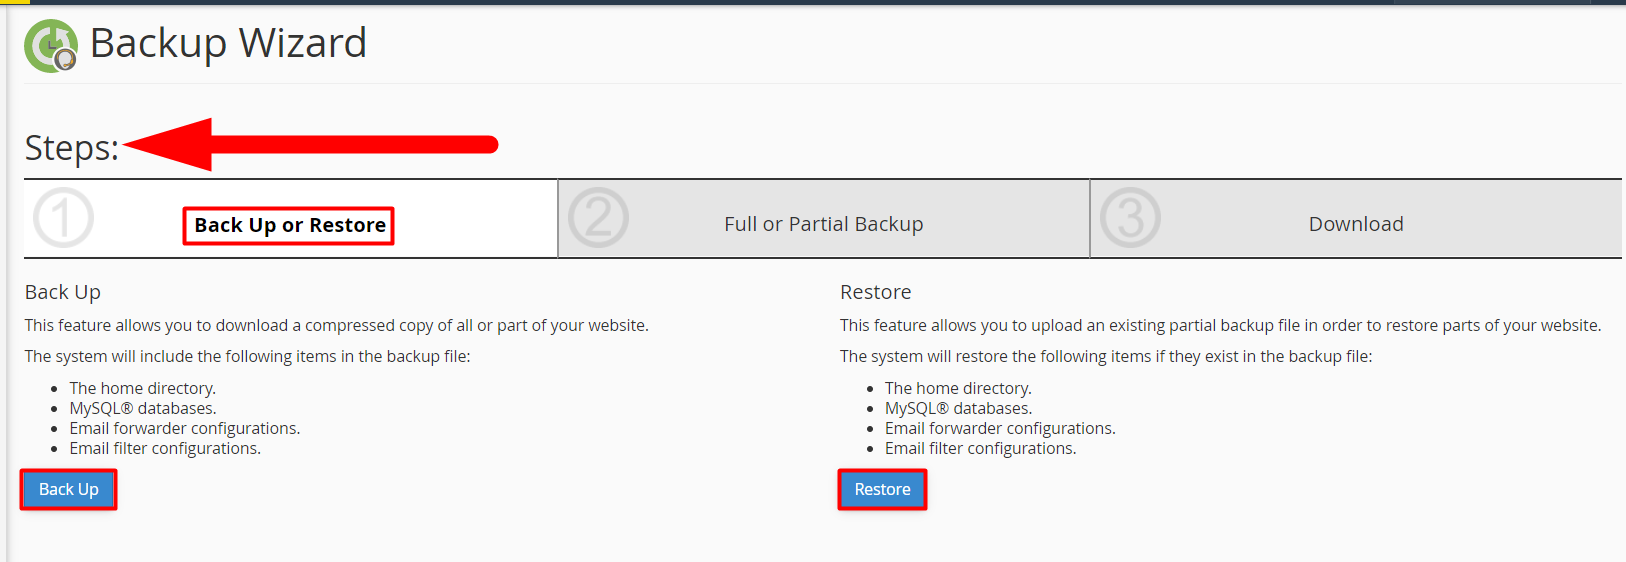
Backup Wizard - Select the Back Up option as you want to create a backup.

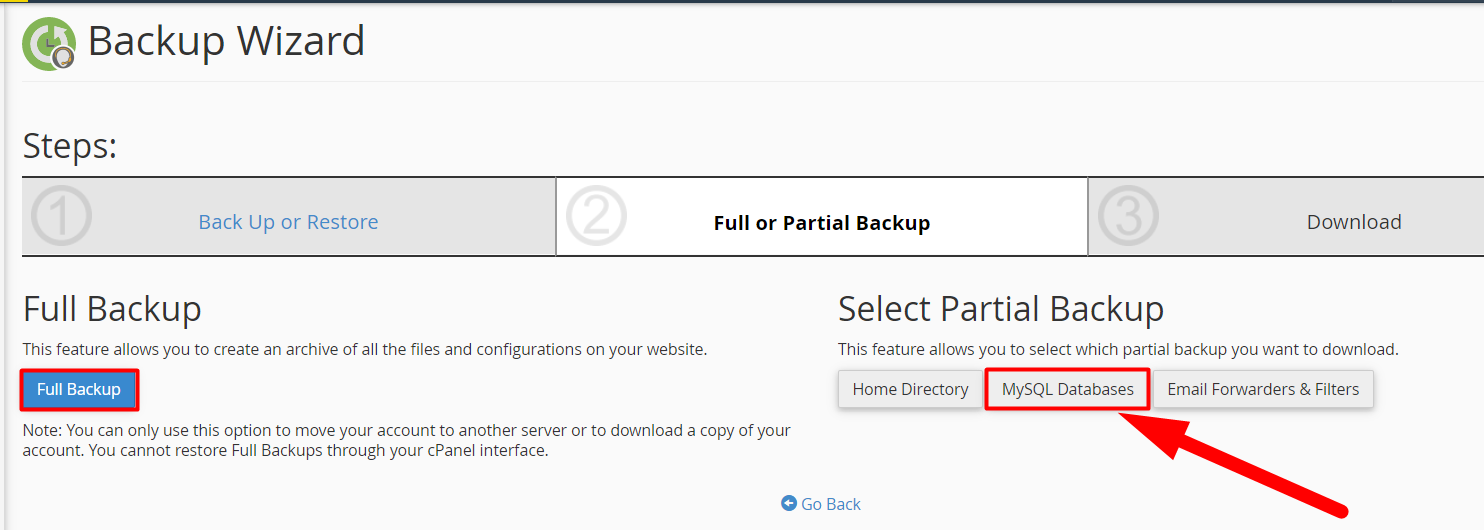
Backup Wizard Backup or Restore - In the second step, it’ll ask you to select the backup type. Click over the MySQL Databases option as you want to create a separate backup for your MySQL files.

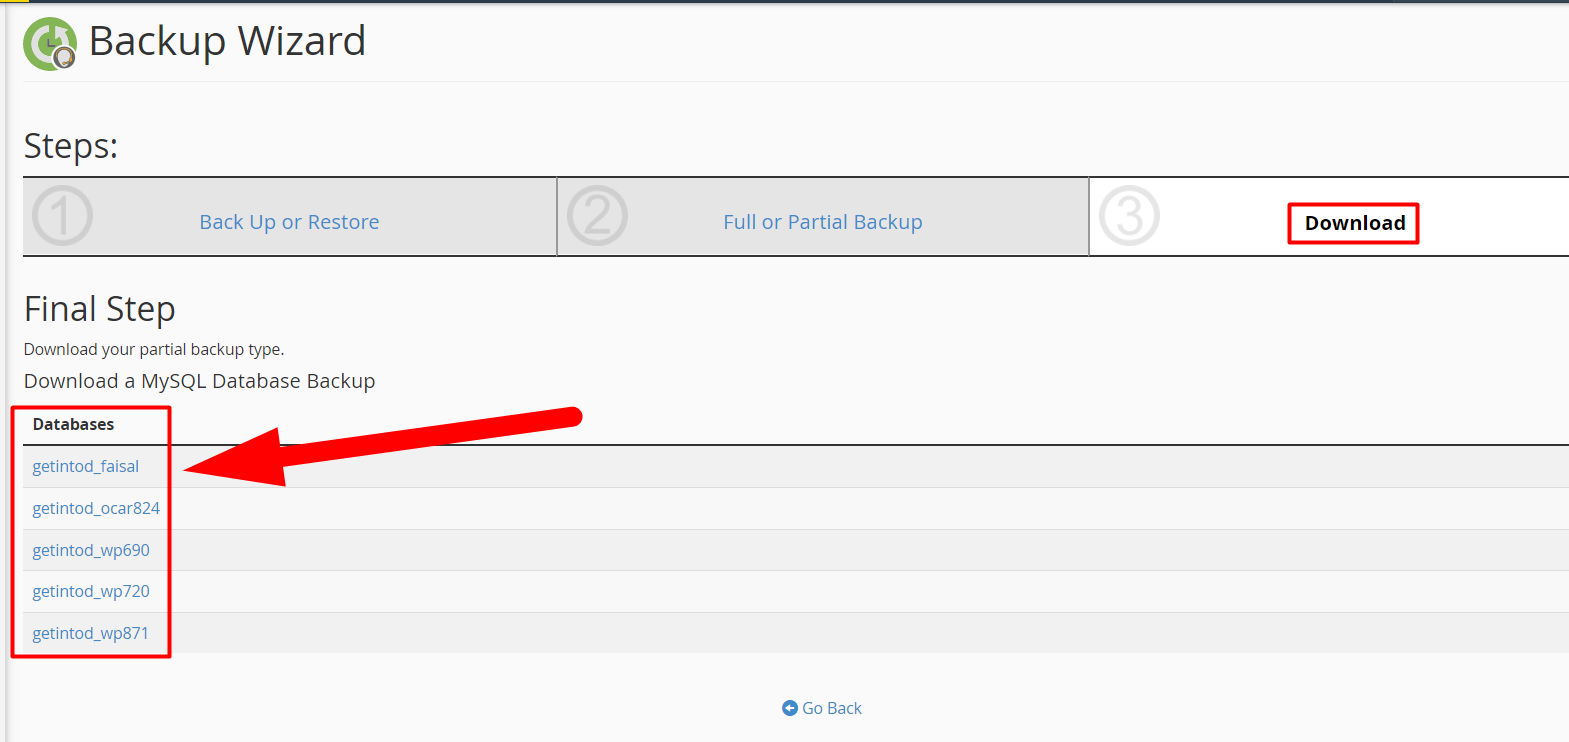
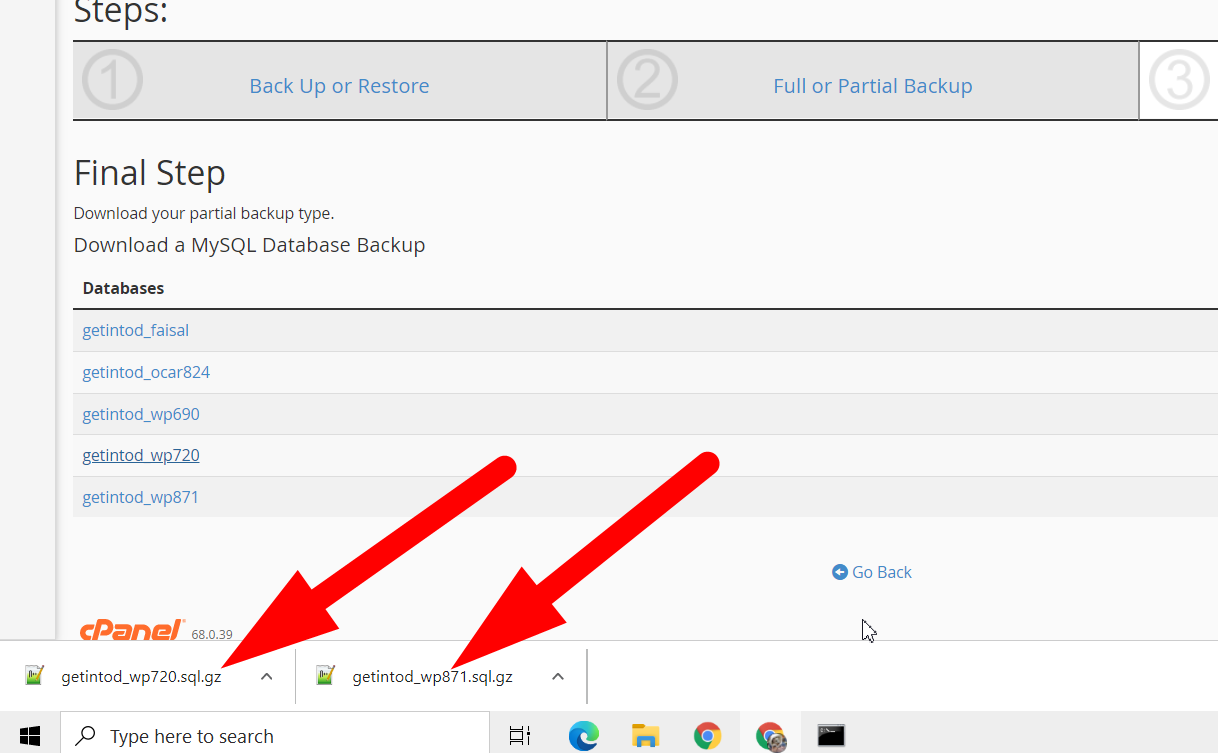
MySQL Database Backup - At the final step, you’ll see a list of MySQL Databases present inside your cPanel. Simply click over the database you want to download and it’ll start downloading automatically.

Download MySQL Database - It’ll take some time to download the database (depending upon your Internet speed & database size).
That’s It.
You’ve successfully downloaded the partial backup of your desired MySQL databases. Now, let’s move ahead to the restoration process.
Restore MySQL Databases using Backup Wizard in cPanel
It’s fairly simple to restore the MySQL backup using the Backup Wizard in cPanel. Additionally, it’ll be easier for you if you’ve created the backup from backup wizard itself. Follow the below steps to do so:
- First of all, log into your cPanel account.
- Navigate to the Backup Wizard section.
Also See: Disable Restrict Mode on Server
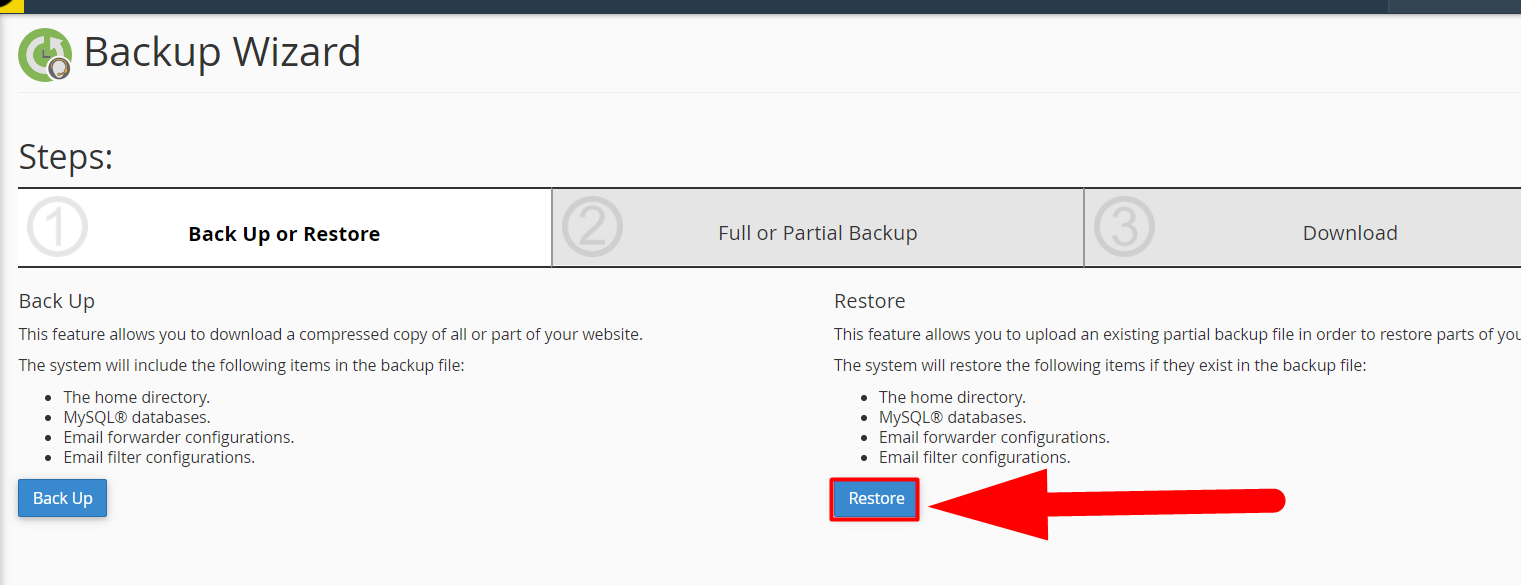
- This time, click over the Restore option instead of Back Up as you want to restore the MySQL backup.

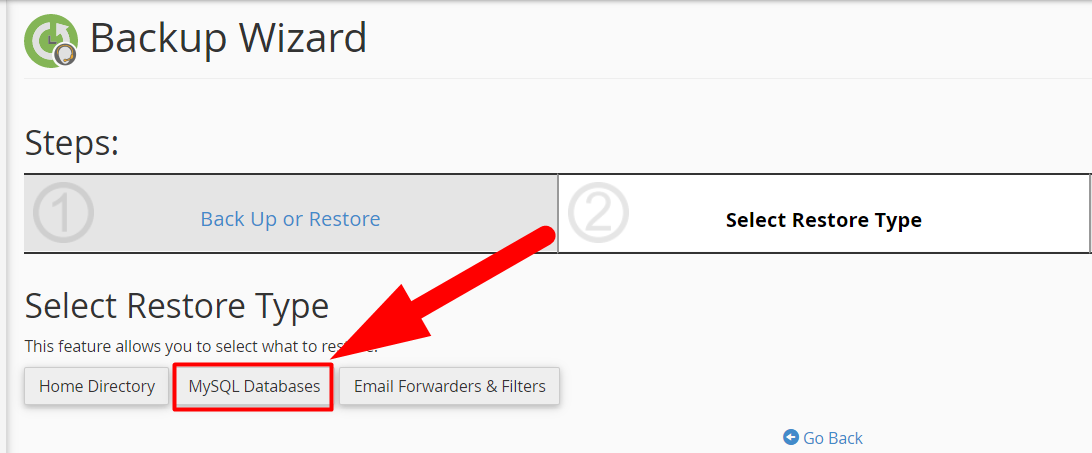
Restore MySQL Databases - It’ll ask you to select the Restore type. There are three options that are Home Directory, MySQL Databases, Emails & Filters. You can choose the option according to your restoration type. For example, hit the MySQL Databases button to restore the databases. Likewise, if you want to restore the backup of your home directory, you can select Home Directory option.

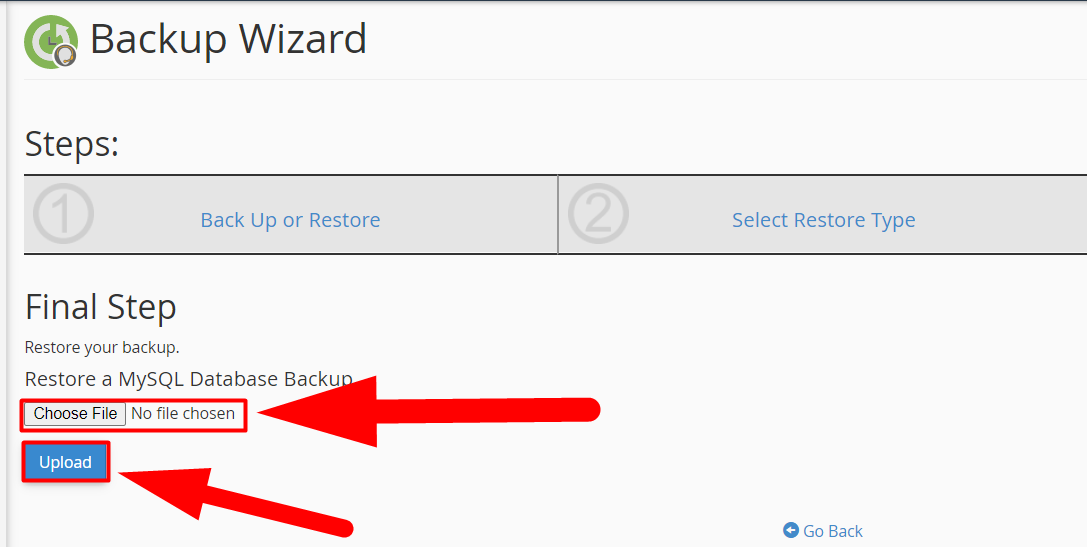
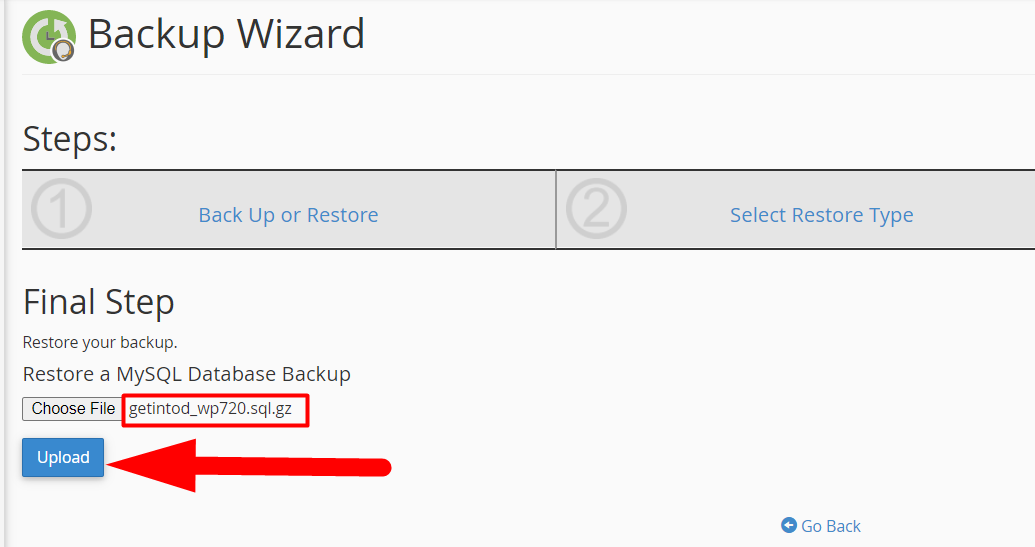
Select Restoration Type - In the final step, browse the MySQL database using Choose File button and hit the Upload button to restore it.

Restore a MySQL Database Backup - Once the database is selected, hit the Upload button.

Upload MySQL Database - Once you hit the Upload button, you’ll see the below message.
Determined database name from sql
Restoring database “getintod_wp720”
Done!
That’s It. You’ve successfully restored the MySQL database.
You’ve successfully created the MySQL backup and restored it using the Backup Wizard in cPanel. However, other than this, you’ll have to Add User to Database and assign the privileges. Otherwise, your website will through a MySQL error.
Adding User to Database in cPanel
Well, it’s not that hard to add users to the database and assign privileges to them. You can use the following steps to easily add users to cPanel database.
- Log into cPanel.
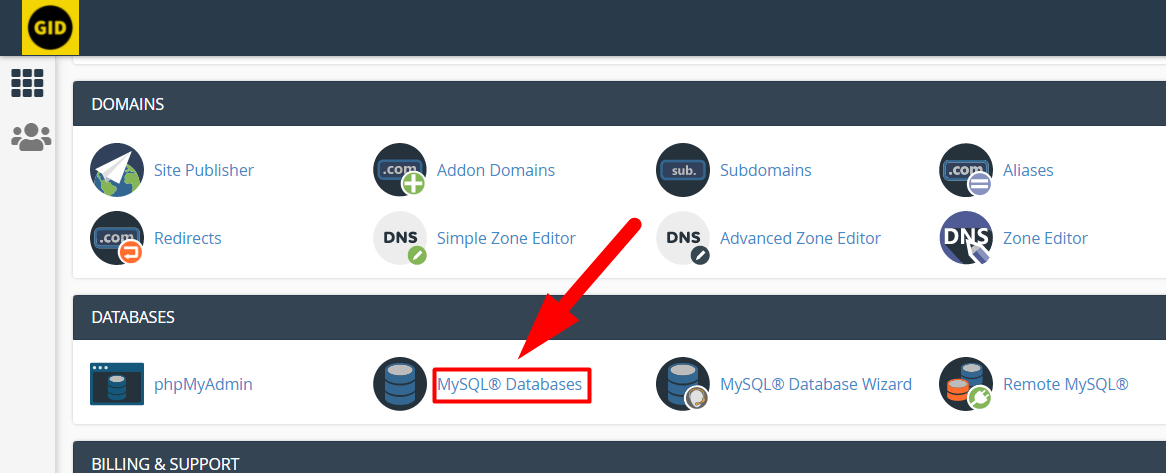
- Navigate to the MySQL Databases section located inside the DATABASES tab.

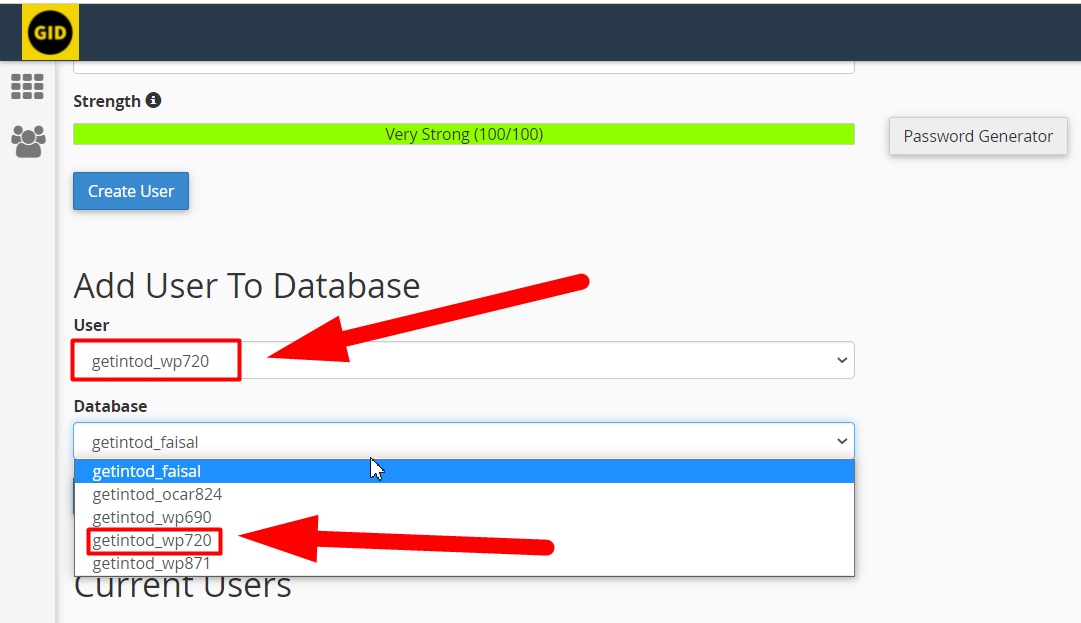
MySQL Databases Section - Scroll down to Add User to Database section and select the user & database. Hit the Add button to move to the next step.

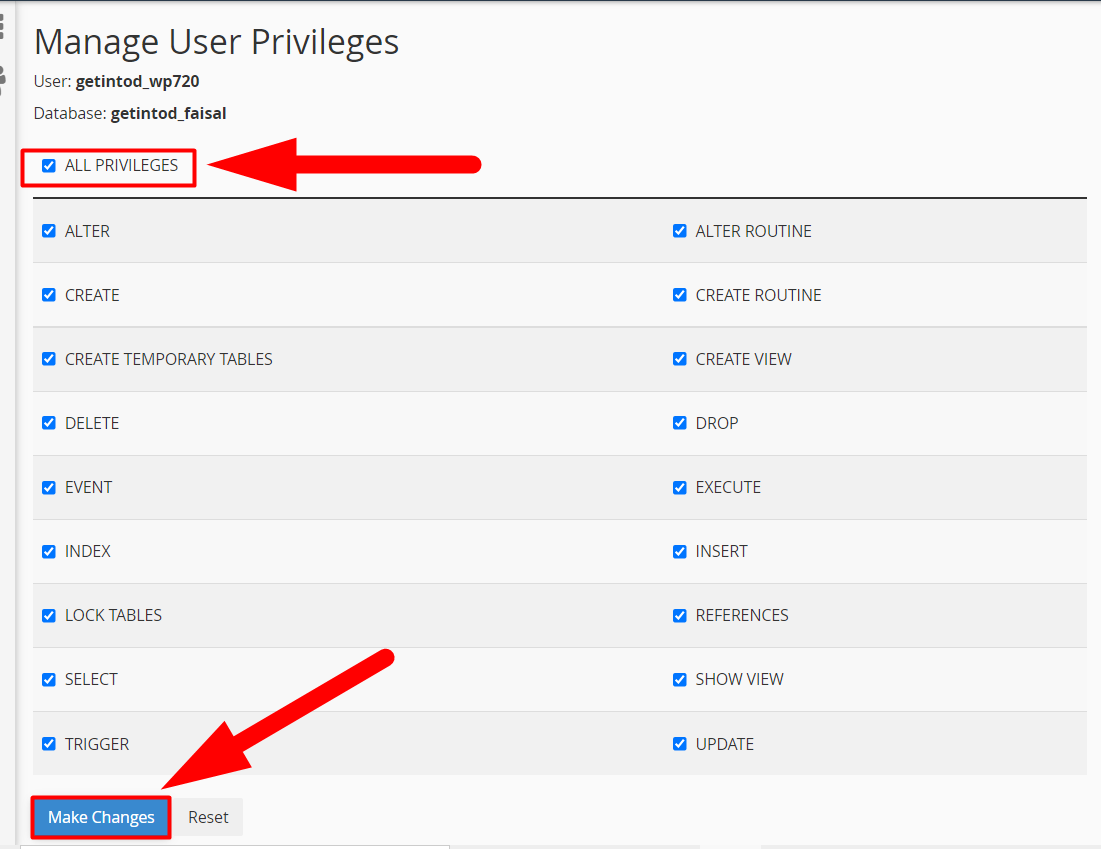
Add user to MySQL Database - Assign All Privileges to the database and hit the Make Changes button.

Assign MySQL Privileges - You’ll see a popup alert that the user is successfully added with all the privileges.

Added user to Database Successfully - That’s it.

That’s how you can easily add users to the database. Moreover, after adding a user to the database, you’ll have to configure the database. You can do this by matching the database credentials with your current database located in the wp-config.php file.
To do so, open the wp-config.php file located inside your root directory, and match the password & username of the MySQL database. If the password is wrong, Navigate to the MySQL Databases section and change the database password with the password you just saw inside the wp-config file.
This is how you can completely create and restore MySQL backup from Backup Wizard in cPanel. I hope this tutorial helps you. If not, you can simply submit your query with us on our Facebook or Twitter handle. Additionally, you can also hit the comment section for the same. We’ll be happy to assist you.