How to Set Default Timezone in WordPress? [STEP BY STEP]☑️
Today in this tutorial you will learn how to set default timezone in WordPress website. If you want to set timezone as per your country’s location then in that case you just need to follow the steps given in this article. But before getting started let us quick watch this short video tutorial embedded below:
Video Tutorial– How to Set Default Timezone in WordPress website
Follow the steps to Setup default timezone in WordPress website via cPanel:
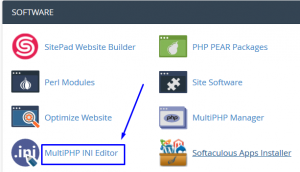
Step::1 Login to your cPanel and go to MultiPHP INI Editor.
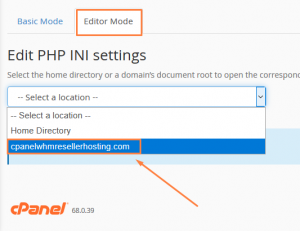
Step::2 Next select the Editor Mode tab and select your domain
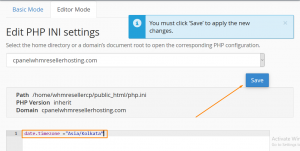
Step::3 Enter here the code given below and click on Save button.
==========================
date.timezone ="Asia/Kolkata”
==========================
Make sure you replace Asia/Kolkata with your country
Apart from this it is also very important that you have your timezone correctly set up in WordPress so that posts will publish as expected.
Follow the steps to Change Your WordPress Timezone:
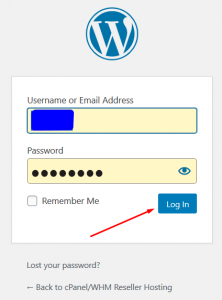
Step::1 Go to your WordPress Dashboard.
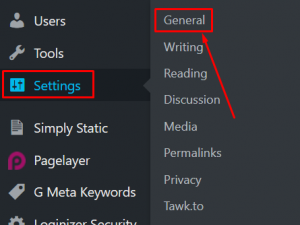
Step::2 Click on the Settings, then click General.
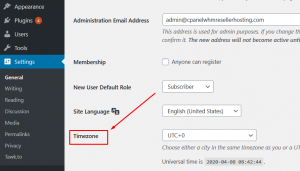
Step::3 Now find the section labeled Timezone.
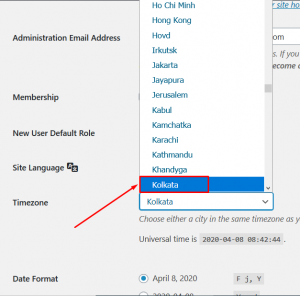
Step::4 Choose either a city in the same timezone as you or a UTC (Coordinated Universal Time) time offset.
As we are in India so we are choosing here Kolkata, you can also choose your city from the list
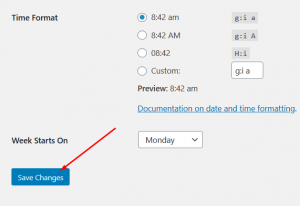
Step::5 Click on Save.
Thanks for Reading this article !!! We hope this was helpful to you all.
For more information, kindly follow us on social media like Twitter and Facebook and for video tutorials, subscribe to our YouTube channel –https://youtube.com/redserverhost.com
Facebook Page– https://facebook.com/redserverhost
Twitter Page– https://twitter.com/redserverhost.com
If you have any suggestions or problems related to this tutorial, please let us know via the comment section below.
Tags: cheap linux hosting, buy linux hosting, cheap reseller hosting, buy reseller hosting, best reseller hosting, cheap web hosting, cheapest web hosting, cheapest reseller hosting, cheap reseller host, cheap linux host, cheapest linux hosting, best linux hosting, best web hosting


