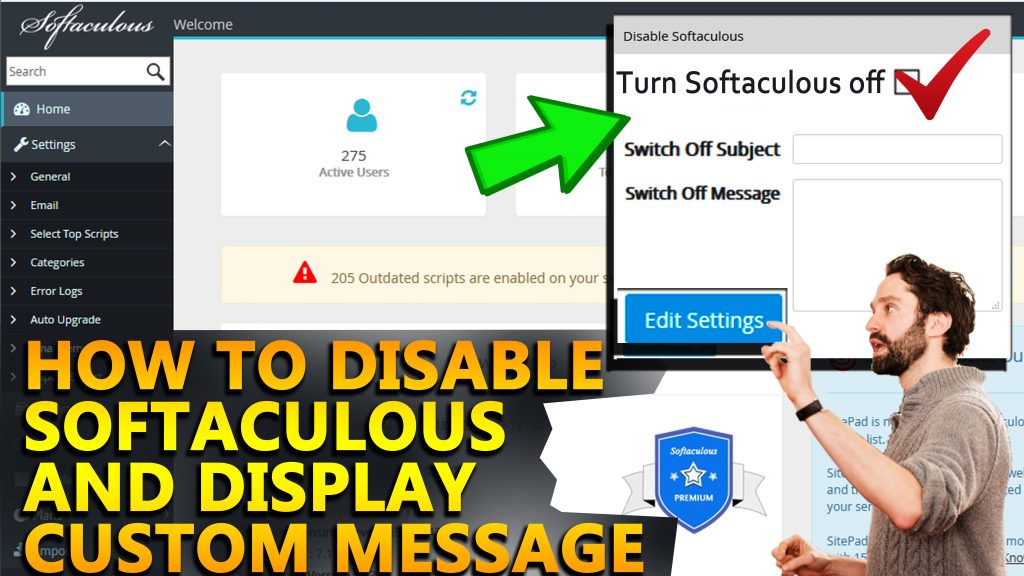
cPanel, Softaculous, WHMHow to Display brand name logo and favicon of Softaculous in all cPanel accounts?
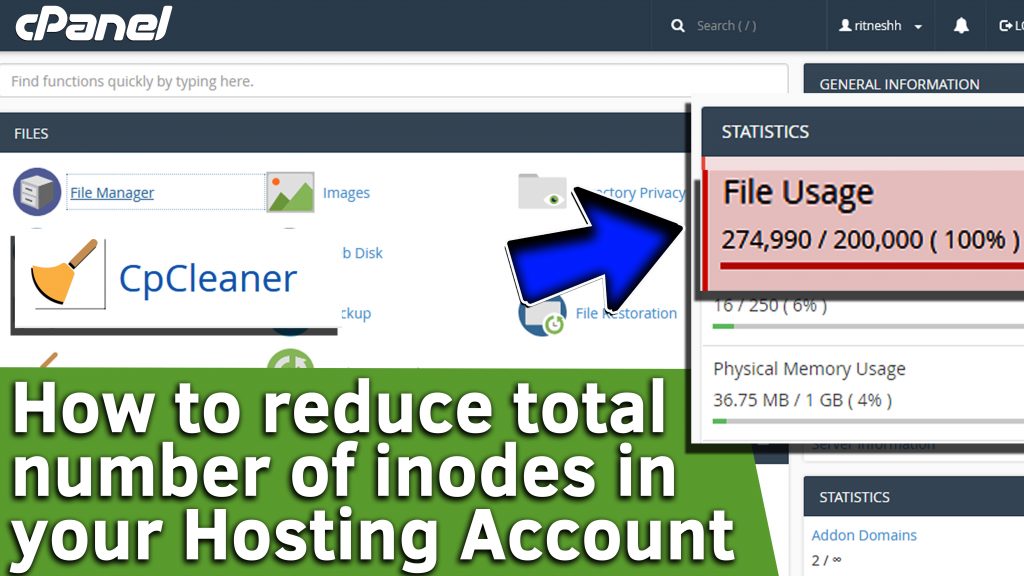
cPanel, SetUp Guide, Tutorials, WHMWhat are the ways to reduce number of inodes in your hosting account?
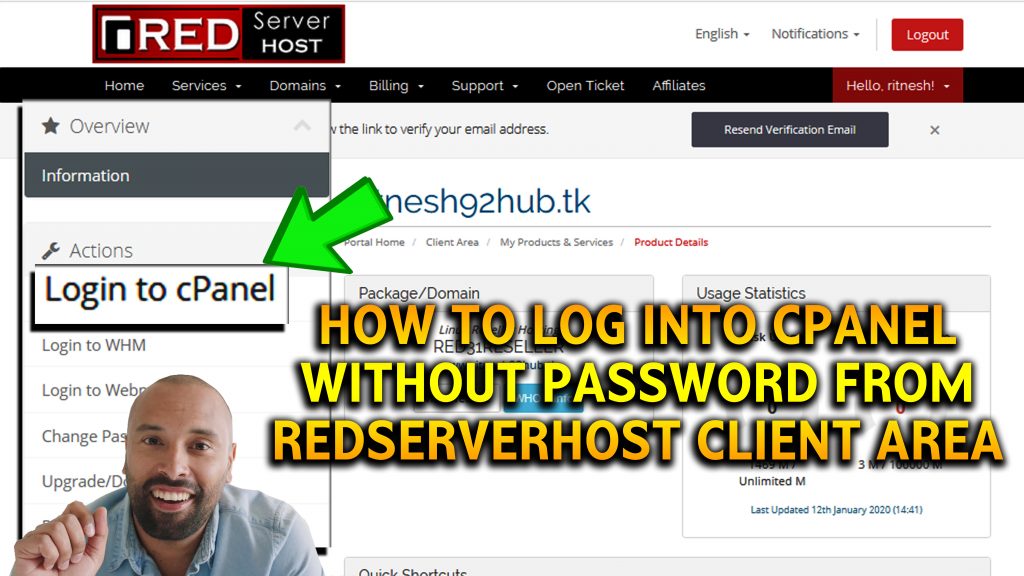
Client Area, Tutorials, Web HostingHow to log into cPanel without using password via RSH client area?
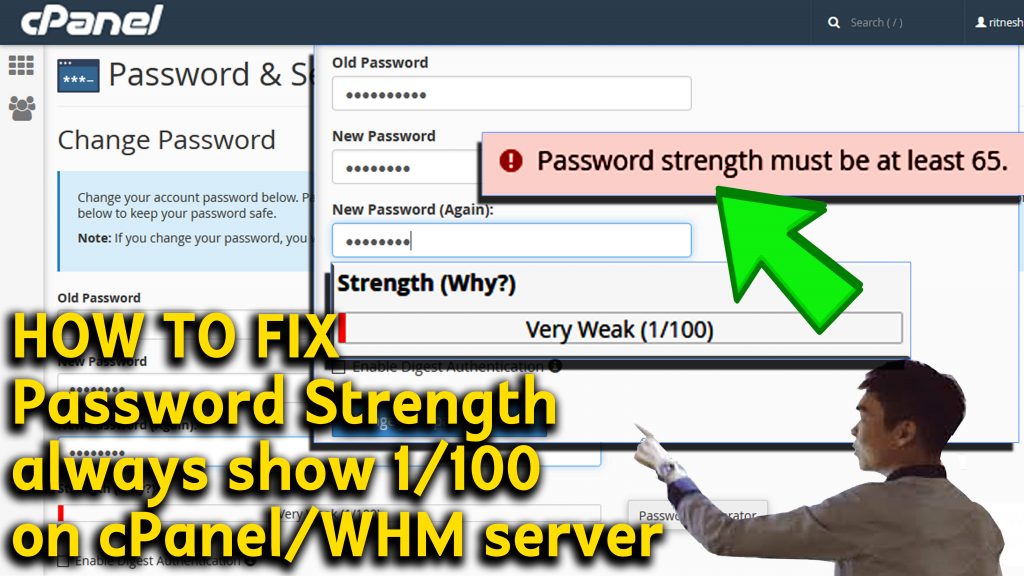
cPanel, Linux Reseller Hosting, Tutorials, WHMHow to Fix password strength always show 1/100 on cPanel/WHM server?