cPanel has various features that allow users to conveniently manage the website and its data. One of the feature IP Blocker in cPanel allows user to manage the unwanted traffic on the website and adds up a layer of security as well.
Today, in this tutorial we will learn about the detailed procedure to use IP Blocker in cPanel, i.e, how to block or Unblock IP Address in cPanel.
We will learn the procedure to:
#1. Block IP Address in cPanel
You can easily block a specific IP Address or range of IP Address from cPanel by following the below mentioned steps.
- Login to cPanel.
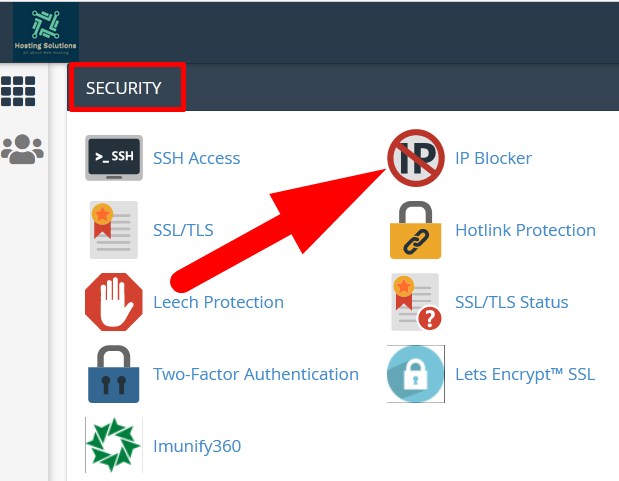
- Scroll down to Security section and select IP blocker from the feature list page.
- On the next page, you have to add IP address, domain or range of IP Address in the box which you want to disallow to access your website.
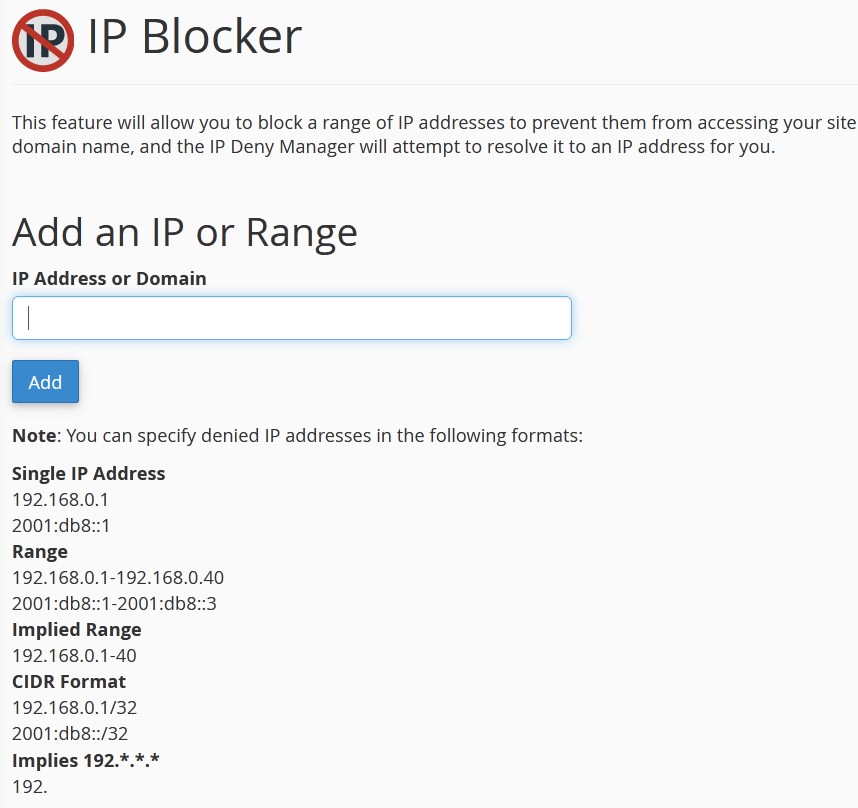
- Click over Add button. You will receive a message of confirmation.

Now, the added IP Address or the range of IP Address would not be able to access your website.
#2. Unblock IP Address in cPanel
You can easily unblock the currently blocked IP address in cPanel with below given steps.
- Login to cPanel and navigate to Security section.
- Select IP Blocker from the list.

- On the next page, scroll down to the section, Currently-Blocked IP Addresses.
- List of all blocked IP Address and range of IP Address will appear.

- Click over the Delete option next to the IP Address or Range of IP Address that you want to unblock.
- On the next page, it would ask for confirmation. Click over Remove IP and proceed.
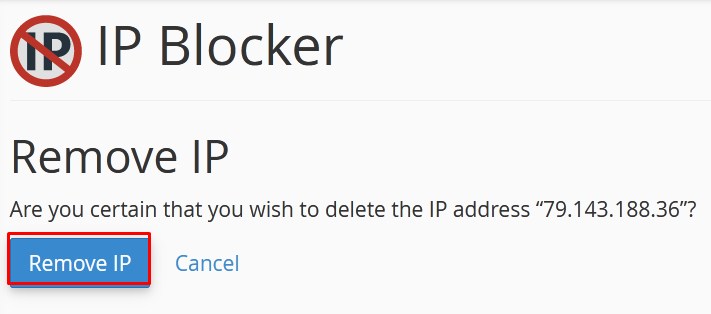
- You have successfully unblocked an IP address in cPanel. You will receive a confirmation message.

This tutorial will help you to manage the security of your website by preventing it from unwanted traffic by blocking the specific IP Address or range of IP address. If you find this tutorial helpful then do share it with your colleagues. Also, follow us on social media pages.
Facebook Page: https://facebook.com/redserverhost Twitter Page: https://twitter.com/redserverhost.com


