WordPress has multiple features that allows user to manage the manage the website content. It also provides features with which user can transfer one WordPress website to another. You can refer to the video tutorial to know the detailed procedure. This includes exporting and importing contents from one website to another. So today, in this tutorial we will learn about the detailed procedure to import content in WordPress.
In this tutorial we will learn how to access Import Tool, Installing Importer and Import Content in WordPress.
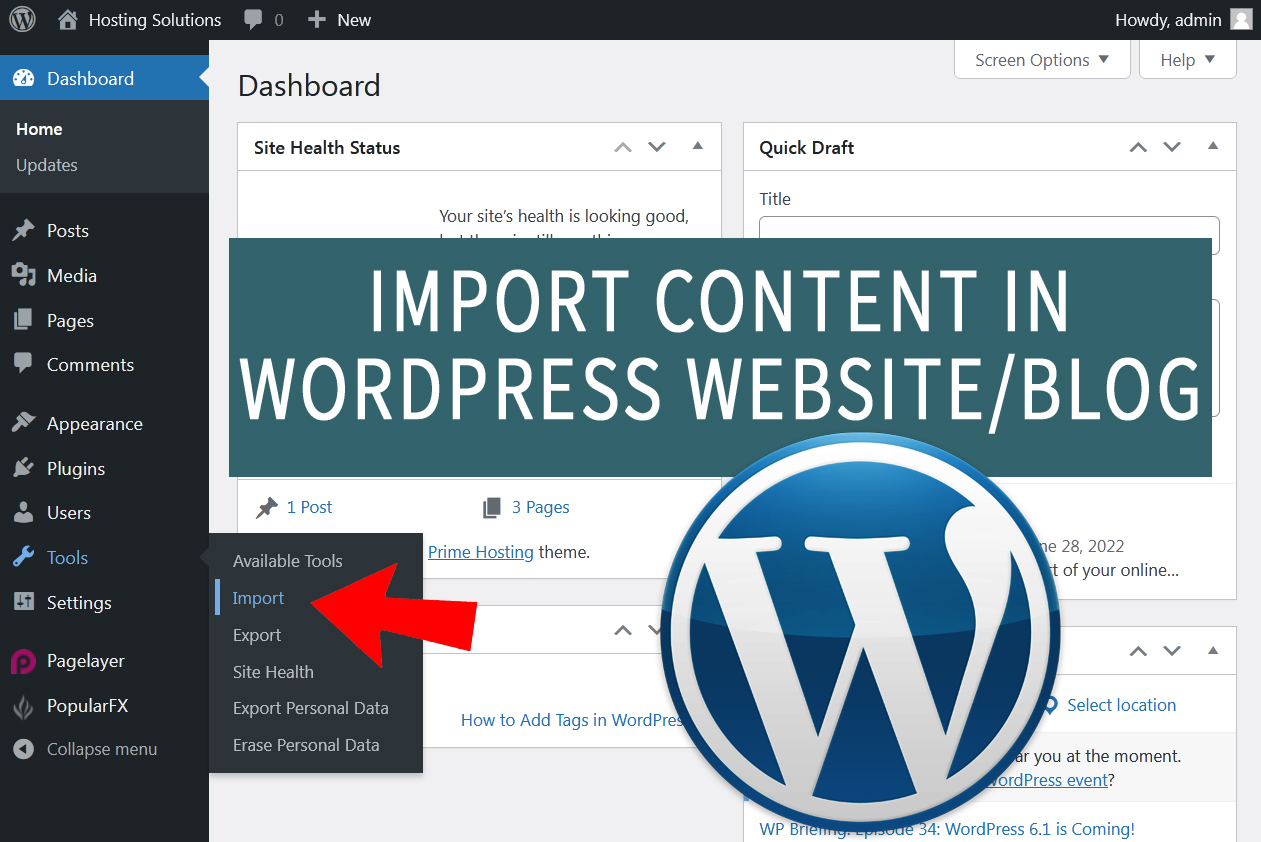
#1. Access Import Tool
You can easily access import tool from the WordPress dashboard.
- Login to WordPress website to which you want to import the content.
- Click over Tools option given in left panel list.

- Select Import from the appeared options and proceed.
On the next age you will be continue to install importer.
#2. Install Importer
As you select Import option from WordPress dashboard, you will be directed to next page. Here, you will find list of importers that can be used to import contents from multiple platforms like Blogger, WordPress etc.
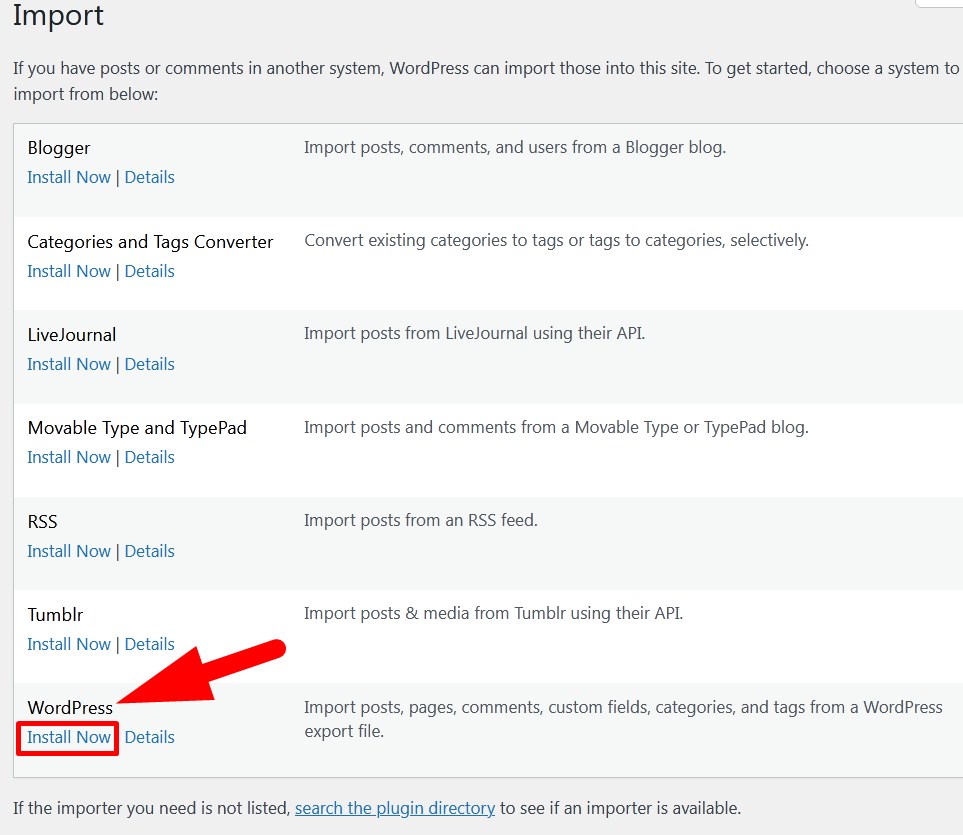
Here, we are importing WordPress contents so we will select the Install Now option given below with the WordPress to install importer for WordPress. You can install any other as per your requirement. We have shared a tutorial that explains the procedure to move your blog from Blogger to WordPress.
“If you did not find the required importer in the list then you can click over search the plugin directory and search for the required importer.”
#3. Import Content in WordPress
After successful installation of importer, the link will be converted to Run Importer, click on it.
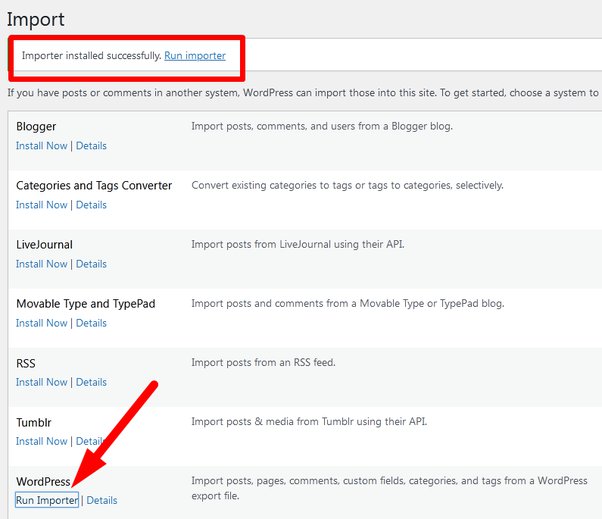
- As you click over Run Importer, you will be directed to interface from where you can browse file and upload it to import contents in WordPress.
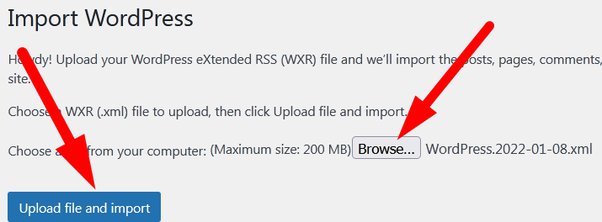
- As given in above mentioned image, after selecting the file click over Upload File and Import.
- Once the file is imported, you will be directed to another page where you have to update import settings.
- On the next page, you will get he options to do the same.
- Assign authors: In this section you will have to specify another user either by creating a new one or by selecting the existing one.
- Import Attachments: If you check the box then it will download all the media files. It is recommended to mark the box if the importing content contains images, videos etc.
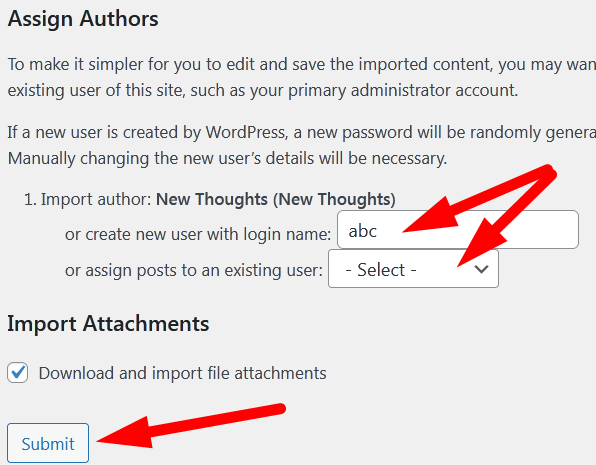
- Click over Submit to complete the procedure.
You will receive a confirmation message as All Done !
Thus, with the above given procedure you can successfully import the content in WordPress. Hope the tutorial better explained the steps to import content in WordPress.
Thanks for Reading !
If you find this tutorial working then do share with your colleagues and follow us on social media too.
Facebook Page: https://facebook.com/redserverhost Twitter Page: https://twitter.com/redserverhost.com